The Resin Tips That All Beginners Need to Know
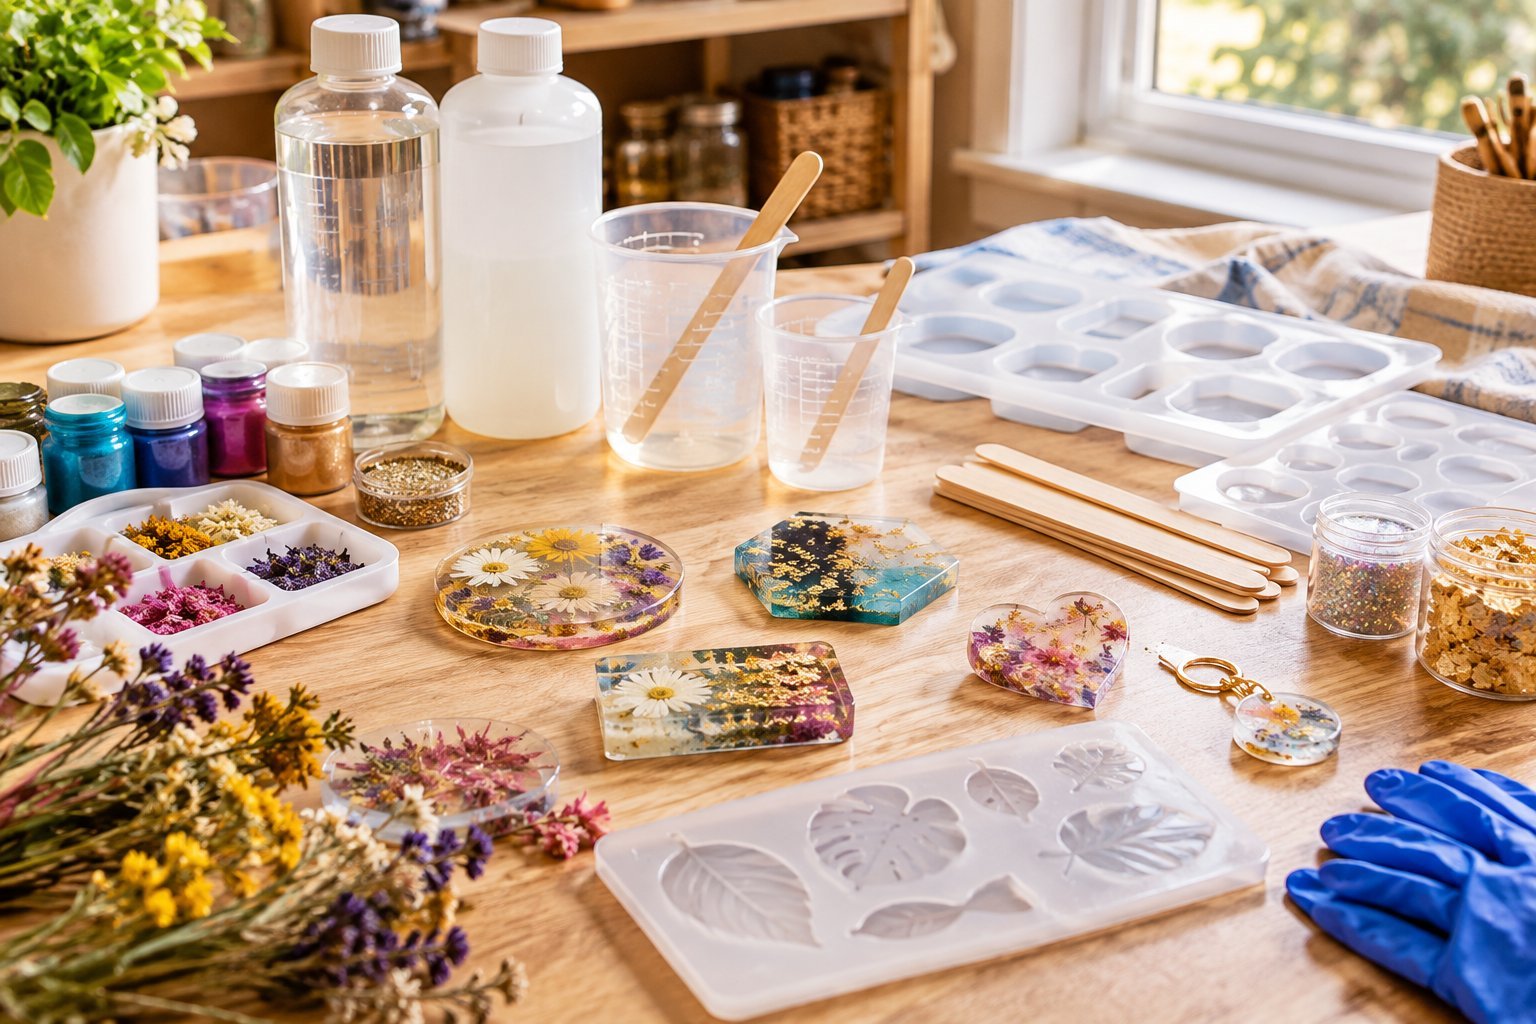
Working with resin can look incredibly simple when you watch someone pour a clear, glossy mixture into a mold and pull out a beautiful finished piece. Once you start working with it yourself, you quickly realize that the little details matter.
The amount you measure, the way you mix, the temperature of your workspace, the type of mold you use, and even how long you leave the piece alone can completely change the result.
I learned this through plenty of trial and error. Resin has a way of making small mistakes very obvious, especially when you are aiming for a smooth, crystal clear finish.
I have had pieces with bubbles I could not get rid of, uneven curing, sticky spots, and projects that looked perfect until I removed them from the mold. Those experiences taught me that good resin work is much more about preparation and patience than simply pouring and waiting.
If you are just getting started with epoxy resin, these are the resin tips I wish I had understood before wasting materials on avoidable mistakes. They will help you work more confidently, get cleaner results, and understand what is happening when a project does not turn out the way you expected.
1. Choose the Right Resin for Your Project
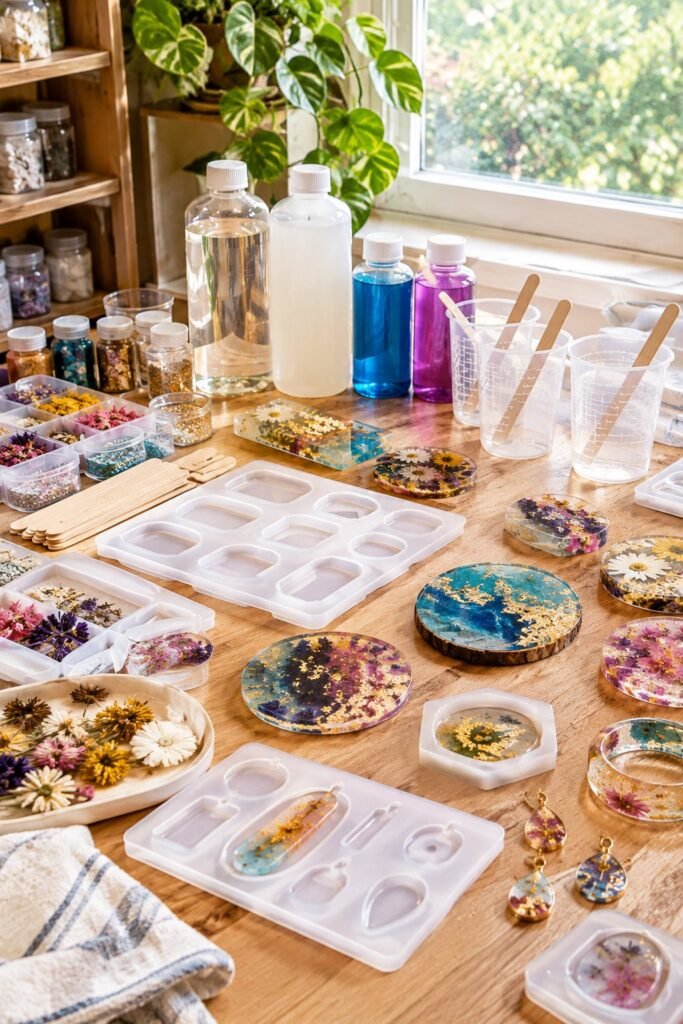
One of the easiest mistakes beginners make is assuming that all resin works the same way.
Resin products can have very different properties depending on what they are designed for. Some are intended for deep pours, some are better for thin coatings, and others are specifically formulated for crafts, jewelry, molds, tumblers, artwork, or larger projects.
I always recommend deciding what you actually want to make before buying your resin. A small coaster project does not necessarily need the same type of resin as a thick decorative casting.
Pay attention to the manufacturer’s recommended pour depth, mixing ratio, curing time, working time, and recommended applications. Those details are much more important than simply choosing the cheapest bottle.
If you are making something inside a silicone mold, for example, you want a resin that is suitable for casting. If you are coating a flat surface, a coating resin may be more appropriate.
Choosing the right resin at the beginning can prevent a lot of problems later.
2. Read the Instructions Before You Mix Anything
This sounds obvious, but it is one of the resin habits that makes the biggest difference.
Before opening the bottles, I check the instructions for the specific resin I am using. I pay particular attention to the mixing ratio and curing instructions because these can vary between products.
Do not assume that every two part epoxy resin uses the same ratio.
Some products require equal parts resin and hardener by volume, while others have completely different ratios. Measuring incorrectly can leave you with a piece that stays soft, sticky, cloudy, or never properly cures.
I also check the recommended working temperature and maximum pour depth. These details are easy to overlook when you are excited to start a project, but they can save you from ruining an entire mold.
I keep the product instructions nearby while I work instead of relying on memory. It takes a few seconds and gives me much more confidence that I am using the product correctly.
3. Measure Your Resin and Hardener Carefully
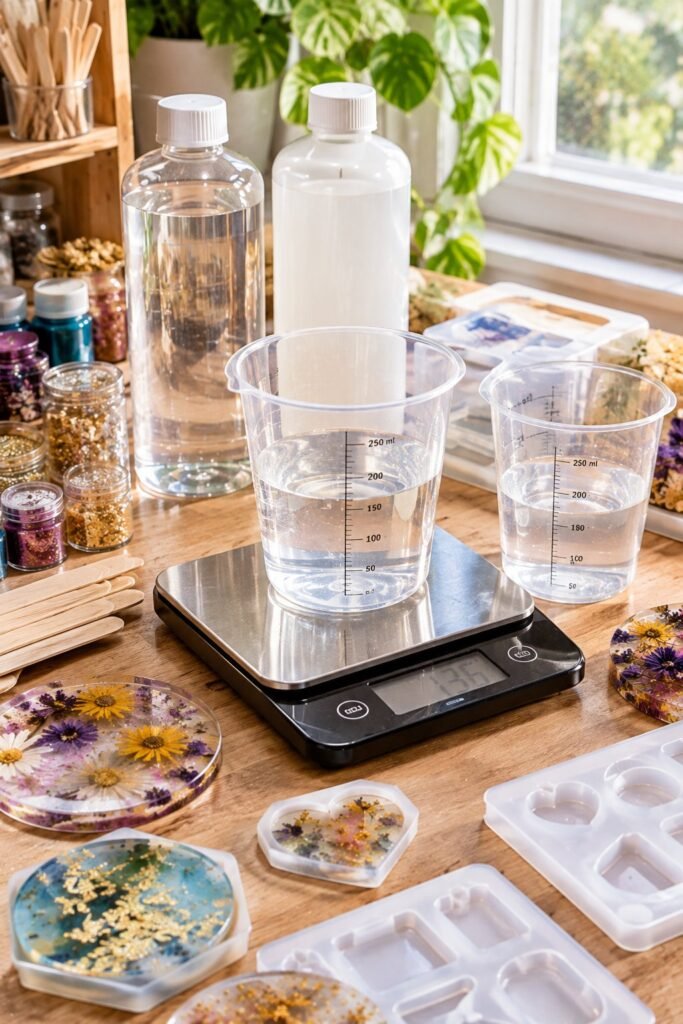
Accurate measuring is one of the most important resin tips for beginners.
When you are working with two part epoxy resin, the resin and hardener need to be combined in the correct proportion. Adding extra hardener does not make the project cure faster. In fact, using the wrong amount can interfere with the curing process.
I prefer measuring carefully rather than trying to estimate the amounts by eye.
If your resin manufacturer specifies a ratio by weight, use a digital scale. If the instructions specify volume, use suitable measuring cups and follow the manufacturer’s directions.
I also try to prepare everything before mixing. Once the resin and hardener are combined, you have a limited amount of working time, so stopping halfway through the process to search for tools or decorations can make the project unnecessarily stressful.
Have your mold, colors, glitter, dried flowers, mixing sticks, gloves, and other supplies ready before you begin.
4. Mix Slowly and Thoroughly
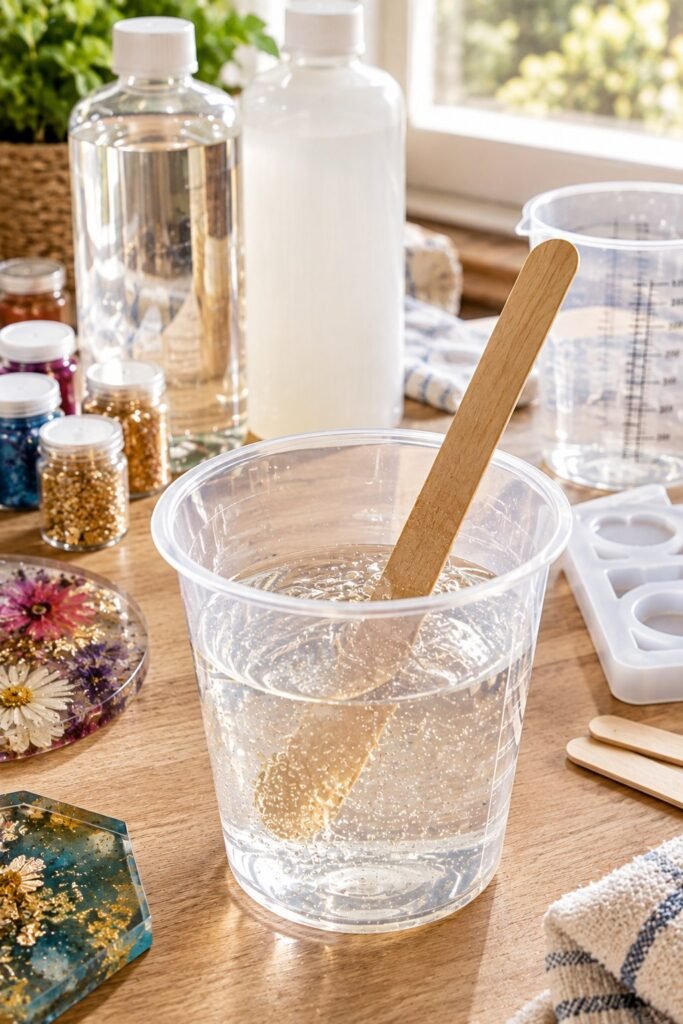
Mixing is another area where beginners can accidentally create problems.
It is tempting to stir resin quickly because you want everything combined as soon as possible. I have found that slower and more deliberate mixing gives me much better control.
I scrape the sides and bottom of the mixing cup while stirring so the resin and hardener are properly incorporated. I also avoid whipping the mixture aggressively because rapid stirring can introduce more air bubbles.
The goal is not simply to stir for a certain number of seconds. You want to follow the manufacturer’s recommended mixing time and technique while making sure the two components are thoroughly combined.
I usually take my time here because a few extra minutes of careful mixing are much better than discovering later that the finished piece has soft or uncured areas.
If your instructions recommend transferring the mixture into a clean second cup and mixing again, follow that recommendation. This technique can help ensure that material left around the sides of the first cup does not become part of your final project.
5. Keep Your Workspace Clean and Level
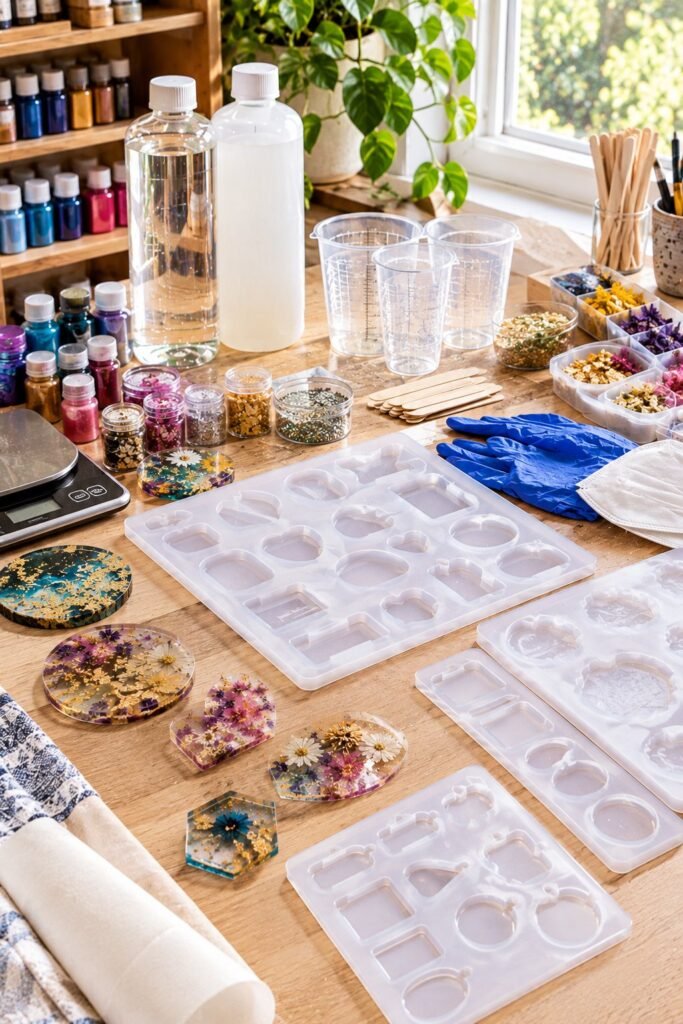
Resin shows everything.
Dust, hair, crumbs, fingerprints, uneven surfaces, and tiny particles can become permanently trapped in a finished piece.
Before I start a resin project, I clean my workspace and make sure the surface is level. A slightly uneven table can cause resin to pool more heavily on one side of a mold or coating project.
I also try to avoid unnecessary movement around the project while it cures.
A clean workspace is especially important if you are making clear resin pieces. When the resin is transparent, even a tiny piece of dust can become very noticeable.
One habit that has helped me is preparing a clean area where the finished project can remain untouched while it cures. I would rather spend a few minutes preparing that space than spend hours trying to fix contamination later.
6. Temperature Can Affect Your Results
Temperature is one of those resin details that beginners often overlook until a project behaves strangely.
Resin generally works best within the temperature range recommended by the manufacturer. If the environment is too cold, the resin can become thicker and harder to work with. It may also take longer to cure.
A warmer environment can make resin flow more easily, but excessive heat can also create problems.
I pay attention to the temperature of both my workspace and the materials I am using. I do not try to dramatically heat resin just to make it flow faster because that can create problems with curing and bubbles.
If your resin suddenly seems much thicker than usual, check the product instructions and your workspace temperature before assuming something is wrong with the resin itself.
7. Bubbles Are Normal, but You Can Reduce Them
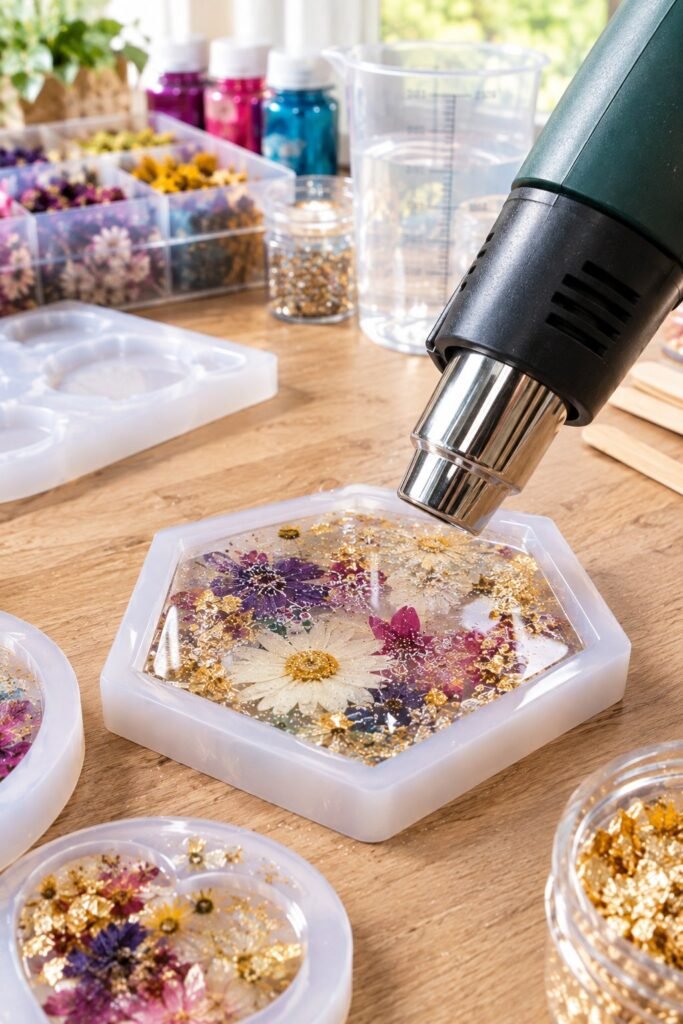
Bubbles are probably one of the most frustrating things for beginners because they can appear even when you feel like you have done everything correctly.
The good news is that bubbles are manageable once you understand where they come from.
Some are introduced while mixing. Others can come from the mold, decorations, porous materials, or trapped air inside detailed mold designs.
Mixing slowly is one of the simplest ways to reduce unnecessary bubbles. I also give the mixed resin a little time to settle when appropriate rather than immediately pouring it into the mold.
For surface bubbles, a suitable heat source can sometimes help release them, but this needs to be done carefully. Too much heat can damage the resin, deform silicone molds, overheat a project, or create other problems.
I never hold a heat source in one spot for too long. Gentle, controlled passes are much safer than trying to blast every bubble away at once.
8. Do Not Rush the Pour
Once the resin is mixed, it can be tempting to get everything into the mold as quickly as possible.
I have learned that slowing down at this stage gives me much more control.
Pour steadily and avoid creating unnecessary splashes. If you are working with a detailed silicone mold, a slower pour can help the resin reach small areas without trapping as much air.
For larger designs, I prefer building the piece gradually when the resin instructions allow it rather than assuming I should fill everything in one thick pour.
This is especially important for projects containing flowers, glitter, charms, stones, or other decorative elements. Pouring too quickly can move your decorations around or create pockets of trapped air.
A controlled pour makes the rest of the project easier to manage.
9. Do Not Overfill Your Silicone Mold
Overfilling a mold can turn a simple project into a messy cleanup job.
I always leave a little room when the project allows it instead of filling the mold right to the edge. Resin can move around while you are working, and adding decorations can also raise the level.
If you overfill the mold, resin may spill over the edges and cure onto your work surface.
Before pouring, I look at the shape of the mold and think about how much space my decorations will take up. That small bit of planning helps me avoid having resin squeeze over the sides.
If your mold has a fill line or the resin manufacturer provides specific guidance, follow those instructions rather than guessing.
10. Give Your Resin Enough Time to Cure
One of the biggest beginner mistakes is removing a project from the mold too early.
The surface may feel hard while the inside is still curing. If you pull the piece out too soon, you can bend it, leave fingerprints, damage delicate edges, or permanently distort the shape.
I know it can be difficult to leave a project alone when you are excited to see how it turned out, but curing time is part of the project.
Follow the curing time provided by your specific resin rather than relying only on how the surface feels.
I also avoid moving projects unnecessarily while they cure. A level, protected area gives the resin the best chance of curing evenly without dust or accidental contact.
Patience at this stage saves a lot of frustration.
11. Use Silicone Molds That Are in Good Condition
The mold has a bigger effect on the final result than many beginners realize.
A good quality silicone mold can give you cleaner edges and make demolding much easier. A damaged, scratched, dirty, or poorly shaped mold can transfer those problems directly to your finished piece.
Before using a mold, I inspect it for dust, debris, damage, or leftover resin from an earlier project.
I also clean molds according to the manufacturer’s recommendations rather than using products that could damage the silicone.
When a mold starts losing its shape or developing damaged edges, I do not expect a perfect result from it. Sometimes replacing a worn mold is much easier than trying to correct imperfections in every piece it produces.
12. Keep Decorations Clean and Dry
Adding dried flowers, paper, glitter, wood, fabric, or other decorative materials can make resin projects much more interesting, but these materials can introduce their own problems.
Moisture is particularly important. Anything containing moisture can react unpredictably when embedded in resin, and porous materials can release air bubbles into the mixture.
I make sure decorative materials are completely dry before adding them.
I also test unfamiliar materials in a small project before using them in something important. That gives me a chance to see whether the material changes color, releases bubbles, floats, absorbs resin, or causes another unexpected problem.
A small test piece can save an entire project.
13. Protect Yourself While Working With Resin
Getting a beautiful finished piece is important, but safe handling matters just as much.
I always follow the safety instructions supplied with the resin I am using. That includes wearing the recommended protective equipment and working in an appropriately ventilated area.
I avoid getting uncured resin on my skin and keep food, drinks, and other personal items away from my workspace.
I also keep my resin supplies organized so bottles, tools, and disposable materials are not scattered around the work area.
Do not treat cured resin and uncured resin as though they have the same handling requirements. The manufacturer’s safety information is the best guide for the specific product you are using.
Good habits from the beginning make resin crafting much more comfortable and manageable.
14. Keep a Small Test Piece Nearby
This is one of the habits I recommend most to beginners.
When I am trying a new color, pigment, decoration, mold, or technique, I prefer testing a small amount before committing a large batch of resin.
A tiny test can tell you whether a pigment behaves the way you expect, whether decorations sink or float, whether a color becomes cloudy, and whether a particular material works well with your resin.
It also gives you a chance to practice removing bubbles and handling the curing process.
Testing may feel like an extra step, but it can save resin, time, and frustration.
15. Accept That Some Projects Will Not Turn Out Perfectly
Resin is one of those crafts where mistakes can teach you more than a perfect project.
I have learned to look at failed pieces as information. A sticky surface can point toward a measuring or mixing problem. Excessive bubbles can tell me that I need to change how I mix or pour. A warped piece can make me rethink curing conditions or how I supported the mold.
Instead of immediately throwing everything away, I look at what happened and try to work out why.
That mindset has made me much more comfortable experimenting with resin. You do not need every project to be perfect to become good at the craft.
The goal is to understand what happened, make one adjustment, and try again.
16. Sticky Resin Usually Means Something Went Wrong During Curing
Finding a sticky or soft patch after waiting for the resin to cure can be frustrating, especially when the rest of the piece feels completely hard.
One of the first things I check is whether the resin and hardener were measured correctly. An incorrect ratio can prevent the mixture from curing properly.
I also think about whether the two components were mixed thoroughly. Resin left unmixed around the sides or bottom of the cup can sometimes create soft areas in the finished project.
Temperature can also affect curing, which is why I always check the manufacturer’s recommended working conditions.
If only a small area is sticky, I do not immediately assume the entire project is ruined. I look at what could have caused the problem before deciding how to handle the affected area.
For future projects, accurate measuring and thorough mixing are the two habits I focus on most.
17. Do Not Add Extra Hardener to Make Resin Cure Faster
This is a mistake I would strongly avoid.
It can seem logical to think that adding more hardener will make epoxy cure faster, but resin is designed to cure according to a specific chemical ratio.
Adding extra hardener can actually create a curing problem rather than solving one.
If I need a project to cure within a particular timeframe, I work with the curing time provided by the manufacturer rather than changing the formula.
Resin requires patience. Trying to speed up the chemistry by changing the proportions can turn a manageable project into a failed one.
18. Cloudy Resin Can Have Several Causes
Clear resin should normally give you that glossy transparent appearance, so cloudy areas can be particularly disappointing.
Sometimes cloudiness comes from tiny bubbles that are trapped throughout the piece. In other cases, the issue can be related to the resin itself, moisture, temperature, pigments, or materials placed inside the project.
I pay particular attention to anything I am embedding in clear resin. Dried flowers, paper, wood, and other porous materials can behave differently from nonporous decorations.
If I am trying something new, I test it in a small amount of resin before using it in a larger project.
That simple test helps me see whether the material remains clear and whether it introduces unexpected bubbles or moisture.
19. Learn the Difference Between Surface Bubbles and Trapped Bubbles
Not every bubble requires the same solution.
Surface bubbles are usually easier to deal with because they are sitting close to the top of the resin. Trapped bubbles can be much more difficult because they are already inside the piece.
I try to reduce both types before they become a problem.
Slow mixing helps reduce the number of bubbles introduced during preparation. Pouring slowly can also help prevent additional air from becoming trapped.
For detailed molds, I pay attention to small corners and narrow sections because those areas can trap air very easily.
If bubbles appear on the surface, I use a suitable method recommended for my resin and work carefully rather than applying excessive heat.
The goal is to release the bubbles without overheating the resin.
20. Avoid Constantly Disturbing the Resin
Once I have poured a project, I try not to keep touching it.
It can be tempting to move decorations around repeatedly, pop every tiny bubble, check the surface, or move the mold to another location. The more you disturb the resin, the more opportunities you create for dust, fingerprints, movement, and uneven surfaces.
If I need to make adjustments, I do them while the resin is still within its workable stage and then leave the project alone.
A protected curing area makes this much easier.
I now think of curing as part of the craft rather than dead time. Once the resin is poured correctly, leaving it undisturbed is often one of the best things I can do.
21. Watch What You Add to Colored Resin
Adding pigment can completely change a resin project, but too much colorant can affect how the resin behaves.
I prefer starting with a small amount of pigment and gradually increasing it until I reach the color I want.
This gives me more control and helps prevent accidentally overpowering the resin.
I also use colorants that are specifically intended for resin whenever possible. Not every paint, dye, or coloring product is designed to mix properly with epoxy resin.
A small test batch is especially useful when experimenting with a new pigment.
I would rather spend a little resin testing a color than discover that a large batch has become difficult to cure.
22. Be Careful With Glitter
Glitter looks beautiful in resin, but it can behave differently depending on its size and weight.
Some glitter stays suspended throughout the piece, while heavier pieces can sink toward the bottom. Fine glitter can also spread throughout the resin much more easily than chunky pieces.
I decide where I want the glitter to appear before adding it.
If I want a more controlled design, I may add glitter gradually rather than dumping a large amount into the mixture at once.
It also helps to remember that clear resin can make glitter look different after curing. A color that looks subtle in the mixing cup may appear much brighter once the piece has cured.
23. Decorations May Move During Curing
One of the most annoying things can be arranging everything perfectly and then discovering that your decorations have moved while the resin was curing.
This can happen with lightweight items because they may float or shift before the resin becomes firm enough to hold them in position.
I have found that working in layers can give me much more control.
Instead of placing everything into one large pour, I can add a thin layer, position certain decorations, allow the resin to reach the appropriate stage, and then continue with the next layer when the resin product allows it.
This technique is particularly useful for flowers, leaves, charms, photographs, and lightweight decorative pieces.
24. Do Not Assume Every Decoration Will Sink
Heavy decorations can sink, while lightweight decorations can float.
This is another reason I prefer testing unfamiliar materials before starting an important project.
If I want something to remain in a specific position, I think about its weight, shape, and the thickness of the resin around it.
Layering can help create a more controlled design because I am not relying on one large pool of liquid resin to hold everything exactly where I want it.
With practice, you start to understand which materials are likely to move and which will stay where you place them.
25. Use Layers When the Design Needs More Control
Layering is one of the techniques that has made resin projects much easier for me.
Instead of trying to create the entire design in one pour, I can build the project gradually.
A first layer can create a clear base. Decorations can then be positioned before another layer is added. Additional colors or details can be introduced as the project develops.
The important part is understanding the resin’s recommended working and curing stages.
You do not want to add another layer randomly without checking whether the previous layer is ready for it.
Following the manufacturer’s guidance gives you a much better chance of creating layers that bond properly.
26. Keep an Eye on the Resin Depth
Resin depth matters more than beginners often expect.
A thin coating and a deep casting do not behave in exactly the same way. Pouring a large amount of resin into a mold can generate heat during curing, and excessive depth can create problems if the resin is not designed for deep pours.
I always check the recommended maximum pour depth for the resin I am using.
If I want a thicker piece, I would rather build it in suitable layers than assume that one huge pour will work.
This is particularly important for larger molds and pieces with a lot of material inside them.
27. Watch for Heat During Curing
Epoxy resin can generate heat as it cures.
I learned to pay attention to this because a project can look completely normal during the pouring stage and become noticeably warmer while curing.
The thicker the pour, the more important it is to follow the manufacturer’s instructions about depth and curing conditions.
I do not try to cover up excessive heat or accelerate the process with additional heat.
If a project is getting hotter than expected, I stop and check the product instructions rather than experimenting with it.
Following the recommended pour depth is one of the easiest ways to avoid unnecessary curing problems.
28. Keep Dust Away From Your Finished Pieces
Dust is one of those tiny problems that can ruin an otherwise beautiful resin surface.
Because resin remains exposed while curing, dust particles can settle directly onto the surface.
I keep my curing area as clean and protected as possible.
I also avoid doing dusty activities nearby while resin projects are curing. Sanding, cutting wood, cleaning dusty surfaces, and similar activities can release particles into the air.
A simple cover can also help protect a curing project, as long as the setup still allows appropriate ventilation and follows the resin manufacturer’s instructions.
The cleaner the curing environment, the cleaner the final surface is likely to be.
29. Do Not Ignore Small Imperfections Before Demolding
I like to inspect the project before removing it from the mold.
If I can see an obvious surface issue while the piece is still in the mold, I think about whether it can be corrected safely at that stage.
Once resin has completely cured, some imperfections require sanding and polishing rather than a quick adjustment.
This is another reason I try to stay nearby during the early working stage without constantly disturbing the project.
Resin rewards attention, but it does not reward unnecessary interference.
30. Demold Slowly and Carefully
Removing a finished piece from a silicone mold can be exciting, but this is not the stage where I want to rush.
I gently loosen the edges and work around the mold rather than pulling aggressively on the finished piece.
Thin sections, narrow corners, and delicate details can be more vulnerable to damage.
If a piece does not want to come out easily, I take another look instead of forcing it.
A good silicone mold should generally make demolding easier, but the design of the mold itself can also affect how easily a finished project releases.
Slow and controlled movement gives me much more confidence when handling delicate pieces.
31. Sanding Can Improve Rough Edges
Even when the resin itself cures beautifully, the finished piece may have sharp edges, mold lines, or small imperfections.
Sanding can help smooth those areas.
I start with an appropriate grit for the problem instead of immediately using very aggressive sandpaper. For a small imperfection, I only remove as much material as necessary.
When sanding cured resin, I also follow appropriate safety precautions and avoid creating unnecessary dust.
After sanding, the surface may look dull, but that does not necessarily mean the piece is ruined. Depending on the project, additional polishing or finishing can restore a smoother appearance.
32. Do Not Judge the Finished Piece Too Early
This is something I remind myself whenever I am working on a new design.
A resin piece can look slightly cloudy, dull, or unfinished immediately after sanding or during an earlier stage of curing.
That does not always represent the final appearance.
Once the project has fully cured and the surface has been properly finished, the clarity and shine can look completely different.
I try to complete the entire process before deciding whether a piece worked.
That habit has stopped me from giving up on projects that simply needed another finishing step.
33. Keep Notes About Your Projects
This is a simple habit that has become surprisingly useful.
When I try a new resin, color combination, mold, or technique, I like to remember what I used and how the project behaved.
You do not need a complicated notebook.
You can record the resin brand, mixing ratio, amount used, pigment, decorations, temperature, curing time, and anything unusual that happened.
When a project turns out particularly well, you can look back at your notes and recreate the process.
When something goes wrong, the notes can help you identify what you might change next time.
34. Do Not Change Too Many Things at Once
If you are learning resin, experimentation is part of the fun.
However, changing five things at once makes it difficult to understand what caused a particular result.
If I am testing a new pigment, I try to keep the rest of the process familiar.
If I am testing a new mold, I may use a resin and colorant I already know.
This gives me a better reference point.
When the project works or fails, I have a clearer idea of which new variable affected the result.
That makes learning much faster than changing everything at once.
35. Give Yourself Room to Experiment
Once you understand the basics, resin becomes much more creative.
You can experiment with colors, textures, layers, flowers, glitter, charms, inclusions, molds, and different finishing techniques.
I still prefer to experiment on smaller pieces when I am testing an idea.
A small project uses less material and gives me a low pressure way to see how the design behaves.
Some of my favorite ideas have come from experimenting rather than trying to make every project perfect.
The important thing is to build your skills gradually and understand your materials before moving into more complicated techniques.
The Biggest Resin Lessons I Have Learned
The biggest improvement in my resin projects has not come from buying more supplies. It has come from becoming more careful with the supplies I already have.
I measure accurately, mix thoroughly, control bubbles, prepare my workspace, protect curing projects from dust, and give the resin enough time to do its job.
I also test new materials instead of assuming they will behave exactly the way I expect.
Those habits make the process much less stressful.
When something goes wrong now, I am also more likely to look at the process instead of immediately blaming the resin. That has helped me understand my materials much better and avoid repeating the same mistakes.
36. Inspect Your Piece Carefully After Demolding
Once I remove a piece from the mold, I do not immediately consider it finished.
I turn it over, check the edges, look for bubbles, inspect the surface, and make sure the shape came out properly.
Small imperfections are much easier to understand when you inspect the entire piece.
I look for things such as rough edges, tiny holes, scratches, cloudy areas, pieces of dust, or decorations that did not end up exactly where I wanted them.
This inspection also helps me decide what kind of finishing the piece needs.
Some projects need nothing more than a quick cleanup, while others benefit from sanding or polishing.
37. Smooth Sharp Edges Before Using the Piece
Cured resin can have surprisingly sharp edges, especially around the bottom or along the edges of a mold.
I always check these areas before considering a project finished.
If an edge feels sharp, I carefully sand it until it feels smooth.
I do not try to remove large amounts of material unnecessarily. The goal is simply to make the edge comfortable and appropriate for the finished item.
This is particularly important for pieces that will be handled frequently.
A beautiful resin piece should also feel finished when you hold it.
38. Sanding Requires Patience
Sanding resin is not something I try to rush.
If I have a rough edge or noticeable imperfection, I start with the least aggressive approach that will solve the problem.
Using very coarse sandpaper immediately can leave deeper scratches than necessary.
I also pay attention to how much material I am removing, particularly around small details and thin edges.
For projects that require multiple stages of sanding, I gradually move through appropriate grits rather than trying to achieve a perfect finish in one step.
The surface may look worse before it looks better, especially when sanding clear resin. That is normal.
The important part is continuing through the finishing process instead of judging the piece halfway through.
39. Take Dust Seriously When Sanding
Sanding cured resin creates dust, so I treat sanding as a separate step that requires appropriate precautions.
I use suitable protective equipment and work in a way that limits my exposure to dust.
I also keep sanding away from my clean resin workspace.
Once sanding is finished, I clean the area rather than allowing dust to settle around molds, mixing supplies, or curing projects.
Keeping sanding and resin pouring areas organized separately can make the entire workspace easier to manage.
40. Learn When a Surface Needs Polishing
A sanded resin surface can look dull even when the piece is structurally fine.
That does not necessarily mean the resin has been damaged.
If I want a glossy appearance, the piece may need additional finishing after sanding.
The exact process depends on the type of project and the finish I want. Some pieces may benefit from polishing, while others may need an additional suitable resin coating or finishing product.
I always consider the original surface before deciding what to use.
The goal is to restore the appearance without creating another problem.
41. Do Not Pour a New Coat Over an Unprepared Surface
Adding another layer can sometimes improve the appearance of a resin project, but preparation matters.
I make sure the existing surface is properly cured, clean, and prepared according to the instructions for the product I am using.
Simply pouring fresh resin over a dirty or damaged surface does not automatically hide the problem.
Dust, oils, scratches, and other imperfections can remain visible underneath the new layer.
A little preparation can make the difference between a smooth new coating and a project that still looks unfinished.
42. Clean Your Silicone Molds Carefully
Your molds are tools, and taking care of them can help extend their useful life.
After removing a finished piece, I inspect the mold for leftover resin, glitter, dust, or small particles.
I clean it using a method that is appropriate for silicone and avoid anything that could unnecessarily damage the surface.
I also allow molds to dry properly before storing them.
If you keep using a dirty mold, tiny particles can become trapped in future projects and create imperfections.
A clean mold is one of the simplest ways to improve consistency.
43. Store Silicone Molds Properly
How you store your molds matters too.
I avoid throwing silicone molds into a crowded container where they can become folded, crushed, or distorted.
When possible, I store them flat or in a way that helps them maintain their shape.
I also keep them away from sharp objects that could puncture or scratch the silicone.
A good mold can be used for many projects, so protecting it is worth the extra effort.
44. Keep Resin Bottles Closed
Resin and hardener should not be left sitting open unnecessarily.
After measuring what I need, I close the containers properly before continuing with the project.
This helps keep dust and other contaminants away from the materials.
I also store resin according to the manufacturer’s recommendations rather than leaving bottles exposed to unsuitable temperatures or direct sunlight.
Good storage habits can help preserve your supplies and prevent avoidable problems.
45. Keep Pigments and Add Ins Organized
Once you start collecting resin supplies, it is surprisingly easy to accumulate a large collection of pigments, glitter, molds, charms, dried flowers, and other decorations.
I find it much easier to work when everything has a designated place.
I keep similar materials together so I can quickly find what I need.
Small containers are particularly useful for organizing glitter, charms, beads, and other tiny decorations.
Organization is not just about making the workspace look nice. It also prevents me from forgetting what I already own and buying supplies unnecessarily.
46. Prepare Everything Before Mixing Resin
One of the most useful habits I developed is preparing my entire workspace before opening the resin.
I have my mold ready.
I have my measuring supplies ready.
I have my mixing cups and tools nearby.
I have my decorations prepared.
I have my pigments available.
I also make sure I have enough workspace to actually complete the project.
Once resin and hardener are mixed, I do not want to waste working time searching for something.
Preparing everything beforehand makes the process calmer and gives me much more control.
47. Use Separate Tools for Different Materials When Appropriate
Resin tools can quickly become covered with cured material, pigments, glitter, and other residue.
I try to keep my supplies organized so I know which tools are being used for particular purposes.
Disposable mixing tools can make cleanup easier, while reusable tools should be cleaned according to the manufacturer’s recommendations.
I also avoid casually mixing different materials on the same tools when that could contaminate a project.
Keeping your tools clean and organized becomes increasingly important as you start working on more complicated designs.
48. Do Not Waste Resin When You Are Practicing
Resin can become expensive when you are learning, so I try not to use large amounts while experimenting.
Small molds are excellent for practicing colors, mixing techniques, glitter combinations, and new decorative ideas.
A small project can teach you nearly as much as a large project without requiring as much material.
Once I know that a combination works, I feel much more comfortable using it for a larger project.
This is particularly useful when experimenting with unfamiliar pigments or decorative materials.
49. Understand That Different Resin Brands Behave Differently
Once you become comfortable with one resin, it can be tempting to assume that every other resin will behave exactly the same way.
I would not rely on that assumption.
Different products can have different working times, viscosities, mixing ratios, curing times, recommended pour depths, and finishing characteristics.
Whenever I switch products, I go back to the manufacturer’s instructions rather than relying entirely on what worked with another resin.
That small habit has helped me avoid treating different products as though they are interchangeable.
50. Do Not Mix Resin When You Are Rushed
This is one of the simplest lessons I have learned.
When I am rushing, I am more likely to make small mistakes.
I may measure too quickly, forget to prepare a decoration, mix too aggressively, or overlook a bubble.
Resin is much easier to work with when I have enough time to complete the project properly.
If I know I only have a few minutes available, I would rather prepare the workspace and start the actual project later.
A calm working environment gives me much more control.
51. Keep a Dedicated Resin Workspace if Possible
You do not need a huge craft room to work with resin.
Even a small dedicated area can make a big difference.
Having one place for your molds, tools, pigments, protective equipment, and resin supplies means you spend less time setting everything up and putting it away.
I also like having a clear separation between my resin workspace and areas used for food or everyday household activities.
The easier it is to access your supplies safely, the more likely you are to keep your workspace organized.
52. Learn From Every Failed Piece
Not every resin project will work.
Even after becoming more comfortable with resin, unexpected things can happen.
Instead of automatically throwing away a failed piece, I look at it carefully.
Was the resin measured incorrectly?
Were the components mixed properly?
Was the workspace too cold or too warm?
Were there too many bubbles?
Did the decoration contain moisture?
Was the pour too deep?
Did I remove the piece from the mold too early?
Asking these questions gives me useful information for the next project.
The failed piece becomes part of the learning process.
53. Take Photos of Projects You Really Like
Taking photos is another simple way to track your progress.
When I make a project that turns out particularly well, I like to photograph it from different angles.
This helps me remember what the finished piece looked like and gives me ideas for future projects.
If I have kept notes about the materials and process, I can also compare the finished photo with what I used.
Over time, these photos can become a useful visual record of how your resin skills are developing.
54. Do Not Buy Every Resin Tool at Once
There are so many resin tools available that it can be tempting to buy everything immediately.
I prefer building my supplies gradually.
Start with the basic equipment needed for the projects you actually want to make. As you become more experienced, you will naturally discover which tools would make your process easier.
This also prevents your workspace from becoming crowded with tools you rarely use.
Good resin work comes from understanding your materials and techniques, not from owning the largest collection of equipment.
55. Keep Your Designs Simple While You Learn
Resin gives you endless opportunities to experiment, but complicated designs can make it harder to understand what went wrong.
When I am testing a new technique, I prefer keeping the rest of the design fairly simple.
For example, if I am learning how to create a layered effect, I do not also introduce several new pigments, a complicated mold, multiple types of decorations, and an unfamiliar resin.
Keeping things simple makes the results easier to understand.
Once you are comfortable with the technique, you can start combining it with other ideas.
56. Give Your Projects Enough Curing Time Before Finishing
Finishing a resin piece before it has fully cured can create additional problems.
I make sure the piece has reached the appropriate cure according to the resin manufacturer’s instructions before sanding, polishing, drilling, or performing other finishing work.
A piece can feel hard on the outside while still needing more time internally.
Waiting until it is properly cured gives you a much more stable surface to work with.
57. Be Patient With the Learning Curve
Resin crafting has a learning curve.
You may understand the instructions and still have a project that does not look exactly like the example you had in mind.
That does not mean you cannot learn the technique.
I have found that the biggest improvement comes from making small adjustments from one project to the next.
Measure a little more carefully.
Mix a little more deliberately.
Prepare the workspace better.
Use fewer decorations.
Give the project more curing time.
Test a new material before using it in a large piece.
Those small changes add up.
58. Focus on Consistency Before Complexity
Once you can consistently create clean, properly cured resin pieces, more complicated techniques become much easier.
I would focus on getting the basics right before worrying about advanced designs.
Being able to measure accurately, mix thoroughly, control bubbles, pour carefully, cure properly, and finish the piece gives you a strong foundation.
From there, you can experiment with more detailed techniques without feeling like every new project is a complete mystery.
59. Keep Your Best Results as References
When you create a project you really like, keep track of how you made it.
Write down the resin you used, the colors, the approximate amounts, the decorations, and anything else that made the project different.
I find this particularly helpful when I want to recreate a color combination or design.
Instead of trying to remember exactly what I did months later, I have something to refer back to.
60. Enjoy the Creative Side of Resin
Once the measuring, mixing, curing, and finishing become familiar, resin becomes much more enjoyable.
You can start developing your own style instead of simply following someone else’s project.
You can experiment with color combinations, transparent layers, natural decorations, glitter, textures, molds, and different finishes.
The important thing is to understand your materials and give yourself enough room to experiment.
You do not have to create complicated pieces to make something beautiful.
Sometimes a simple design with a clean finish looks better than a project overloaded with decorations.
Final Thoughts
The biggest resin lesson I have learned is that good results usually come from small habits rather than one special trick.
Measure carefully.
Mix thoroughly.
Work in a suitable environment.
Keep your workspace clean.
Reduce bubbles instead of trying to fix everything afterward.
Use appropriate molds and decorations.
Follow the manufacturer’s curing instructions.
Give your projects enough time.
Finish the piece carefully.
Most importantly, pay attention to what each project teaches you.
When something goes wrong, try to understand why before moving on to the next project. That is how I have become more comfortable working with resin, and it is one of the best ways for a beginner to improve without constantly wasting materials.
You do not need to master everything immediately. Start with simple projects, keep your process organized, and make small improvements as you gain experience. The more familiar you become with how resin behaves, the easier it becomes to create clean, glossy pieces that look intentional and polished.
Resin can be incredibly rewarding once you stop treating every mistake as a failure and start using each project as a way to learn.