
A ball of brown yarn does not look like much on its own. Give it a little trimming, a small piece of felt, and a pair of tiny eyes, and it turns into something completely different: a soft, round little otter that looks like it belongs on a shelf, in a gift box, or tucked into a kid’s backpack.
That is the magic of this craft. It uses simple supplies, it does not require any special skill, and the finished result is genuinely cute rather than just “cute for a homemade project.”
This tutorial walks through the entire process from start to finish. You will learn how to make the pom pom itself, how to trim it into an otter shaped body, how to build the face, ears, paws, and tail, and how to troubleshoot the small mistakes that trip up most beginners.
By the end, you will have a finished pom pom otter and a good understanding of how to make more in different sizes and styles.
There is something satisfying about a craft that starts as a chaotic tangle of yarn and slowly turns, cut by cut, into a recognizable little creature. Unlike crafts that require precise measurements or expensive tools, pom pom animals are forgiving.
A slightly lopsided ear or an off center tail does not ruin the project. If anything, those small imperfections are part of what gives a handmade otter its charm. This is a craft where the process itself, sitting down with a pair of scissors and slowly shaping something with your hands, is just as enjoyable as the finished result.
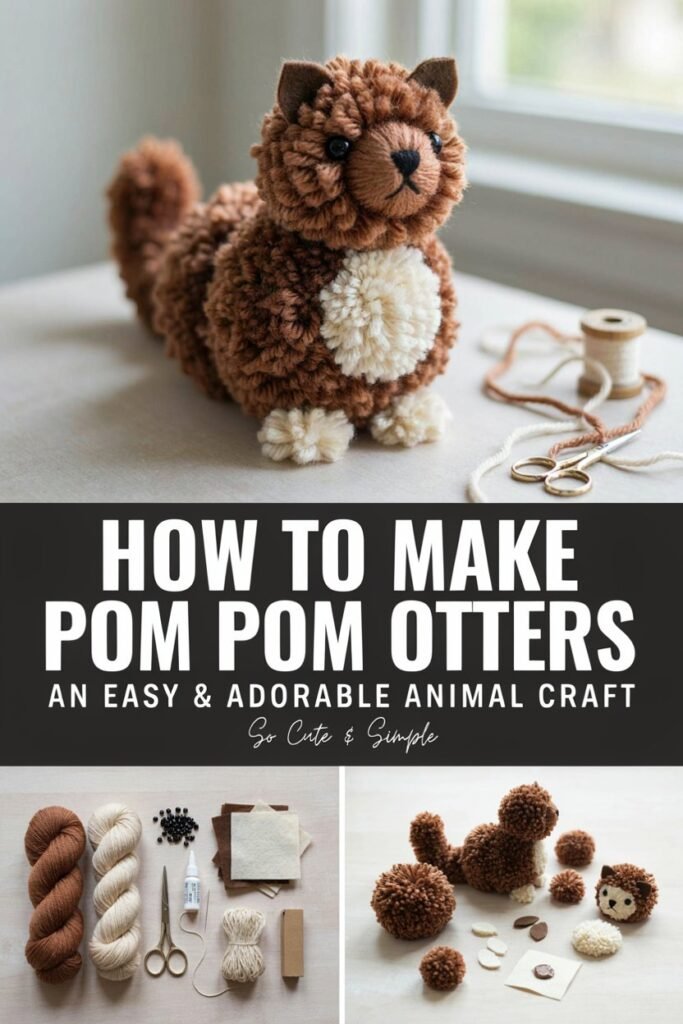
Otters in particular make a great subject for a beginner pom pom project. Their bodies are naturally round and compact, which lines up well with the shape a pom pom already wants to take.
Their features are simple: a light muzzle, small ears, a long tail, and paws that are often shown held together in front of their chest. None of that requires advanced sewing or sculpting skills.
You are mostly just cutting basic shapes from felt and gluing them in the right spots, which makes this an ideal project for someone who has never attempted an animal craft before.
This project works well for:
- Beginners who have never made a pom pom before
- Parents and teachers looking for a rainy day activity
- Anyone who wants an inexpensive handmade gift
- Classrooms doing an animal or ocean themed unit
- Crafters who want a quick, satisfying weekend project
If you enjoy this kind of hands on project, you may also like this guide to mini watercolor painting tutorials for beginners, or these air dry clay tips if you want to try a different beginner friendly material.
Why You Will Love This Pom Pom Otter Craft
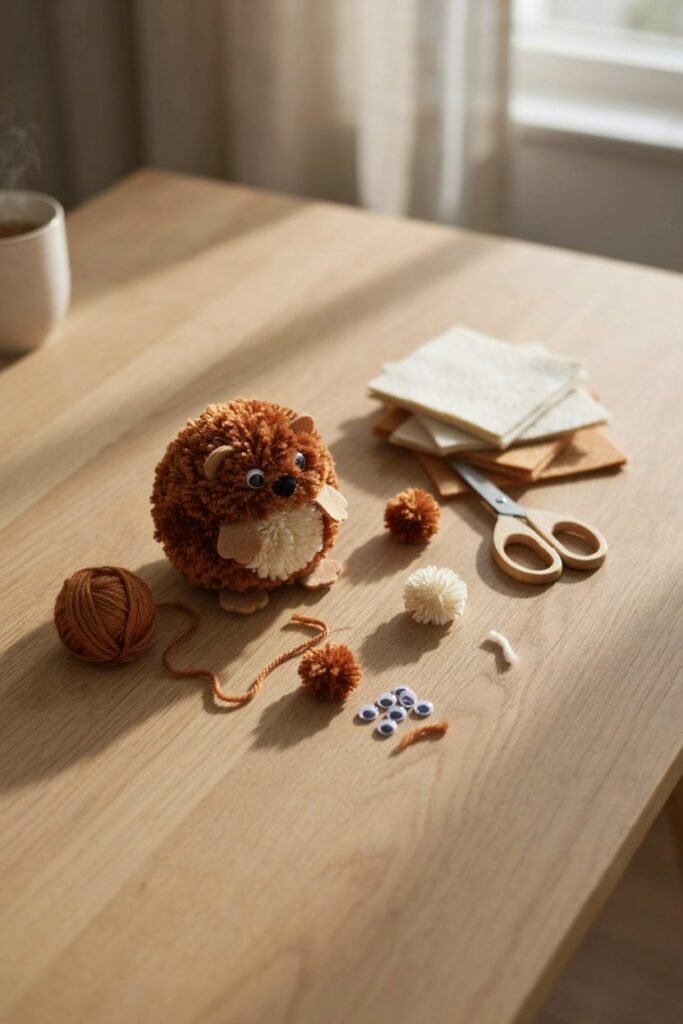
A few reasons this project is worth your time.
- It is inexpensive. You only need a handful of basic craft supplies, most of which you may already have in a craft drawer.
- It is beginner friendly. The main body is just a pom pom, which is one of the easiest crafting techniques to learn.
- It is customizable. You can change the color, size, facial expression, and accessories to make each otter unique.
- It is great for animal lovers. Once you know the basic method, you can turn one otter into an entire otter family.
- It is a good rainy day activity. It gives parents and teachers a simple, low mess project that keeps kids occupied for a solid afternoon.
- It teaches a transferable skill. Once you know how to make and trim a basic pom pom, you can apply the same technique to dozens of other animals, from bunnies to owls to penguins.
- It travels well. A finished otter is small, light, and sturdy enough to toss in a bag, mail in a small box, or tuck into a lunchbox as a surprise.
- It is a satisfying group activity. A batch of pom pom otters made together, whether at a birthday party, a scout meeting, or a family craft night, gives everyone a matching set of keepsakes to take home.
What You Need to Make Pom Pom Otters
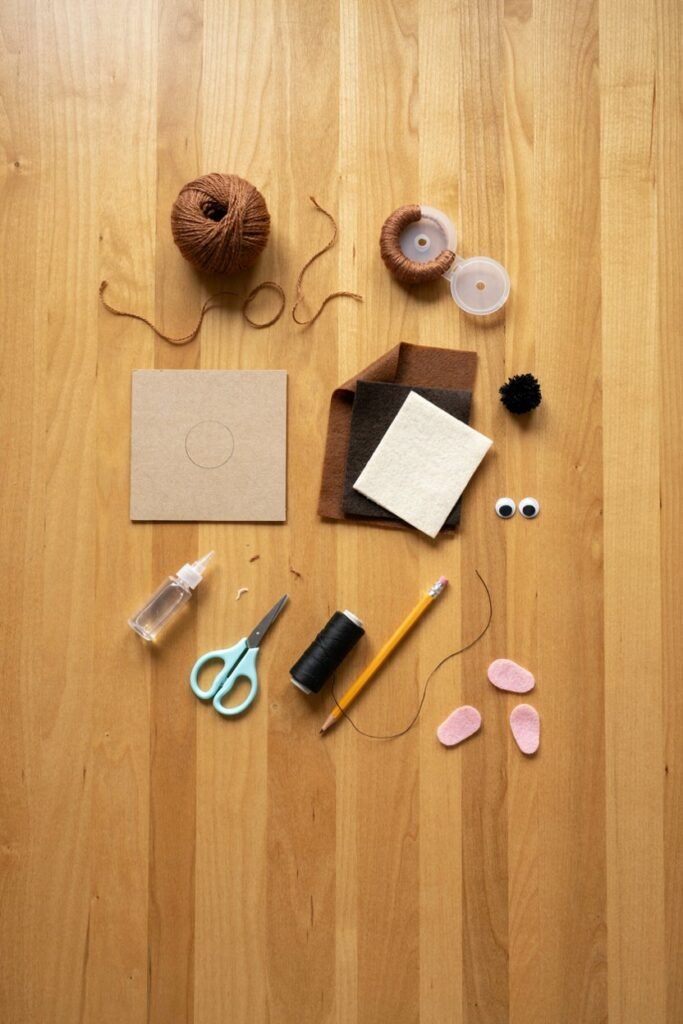
Before you start, gather your materials so you are not searching for scissors halfway through trimming a pom pom.
Materials
- Brown yarn
- Pom pom maker or a piece of cardboard
- Brown or dark brown felt
- Cream or tan felt
- Small black pom pom or a scrap of black felt
- Small googly eyes
- Craft glue
- Scissors
- Black embroidery thread
- Pencil
- Optional pink felt, for cheeks or a tongue
- Optional small piece of cardboard, for tiny accessories like a fish or a heart
Here is what the key materials actually do. Brown yarn forms the fluffy body of the otter, while cream or tan felt creates the lighter colored muzzle that gives the finished craft its otter like appearance. The contrast between the darker body and the lighter face is one of the small details that makes this craft read as an otter rather than a generic brown animal.
Craft at a Glance
- Skill level: Beginner
- Prep time: About 10 minutes
- Crafting time: About 20 to 30 minutes
- Total time: About 30 to 40 minutes
- Main materials: Yarn, felt, glue, and googly eyes
- Best for: Kids, families, classrooms, and animal lovers
These times will vary depending on how many otters you make and how much you are trimming and adjusting the shape, so treat them as a starting point rather than a strict rule.
A Note on Choosing Your Supplies
You do not need premium materials for this craft, but a few small choices will make the process noticeably easier.
- Yarn thickness. A worsted weight or medium weight yarn is the easiest to work with for a first attempt. Very thin yarn requires far more wraps to build up a full pom pom, while very thick yarn can be harder to trim into a clean shape.
- Felt quality. Stiffer craft felt holds its shape better for small pieces like ears and paws than very soft, thin felt, which can curl or fold over once glued.
- Glue choice. A thick craft glue or a hot glue gun both work well. Hot glue sets faster, which is convenient, but requires more caution around young children. Craft glue takes longer to dry but is easier for kids to use safely under supervision.
- Scissors. Sharp, small scissors give you far more control when trimming a pom pom than large fabric shears. Precision matters more than blade size here.
How to Make Pom Pom Otters, Step by Step
This is the main tutorial. Take your time with each step, especially the trimming, since that is where the otter shape really comes together.
Step 1: Make the Pom Pom
Wrap your brown yarn around a pom pom maker, or around a piece of cardboard if you are using the homemade method. The number of wraps matters more than most people expect. A pom pom with too few wraps will look thin and patchy once it is trimmed, while a pom pom with plenty of wraps will hold its shape and give your otter a soft, round body.
Keep wrapping until the sections of your pom pom maker look full and evenly covered on all sides. A fuller pom pom gives your otter a softer, rounder silhouette, which is exactly what you want for this project.
Step 2: Secure and Cut the Pom Pom
Before you cut the loops of yarn, tie a separate piece of yarn tightly around the center. This step is easy to rush, but it matters a lot. If the center is not tied securely, the whole pom pom can fall apart the moment you start trimming it.
Hold the center firmly with one hand while you cut through the loops with the other. Once everything is cut, fluff the yarn out with your fingers so it forms a rough ball shape.
Step 3: Trim the Pom Pom Into Shape
This step is where a messy ball of yarn becomes a recognizable animal shape. Do not try to get the final shape in one pass.
- Trim a little at a time
- Rotate the pom pom in your hand as you go
- Check the shape from several angles, not just the top
An otter’s body does not need to be a perfect sphere. In fact, a slightly elongated shape often looks more natural and more otter like than a perfectly round pom pom.
As you trim, hold the pom pom up and imagine where the face, ears, and tail will eventually sit. Trimming slightly flatter on what will become the front of the body, where the muzzle will attach, gives the felt pieces a more even surface to glue onto later. You do not need to trim it perfectly flat, just enough that the felt pieces will not have to fight against a lot of curved, fluffy yarn.
If your pom pom looks a little too round and ball like once you are finished trimming, do not worry. The felt pieces you add in the next few steps, especially the tail and the muzzle, will do a lot of the work in making the shape read as an otter rather than a plain pom pom.
Making the Otter’s Face
The face is where your craft really comes to life, so take a little extra care here.
Cut a small piece of cream or tan felt for the muzzle. Then gather your other face pieces:
- Two small googly eyes
- A tiny black nose, either a small black pom pom or a piece of black felt
- The cream or tan muzzle piece
Keep the face relatively small compared to the body. Position the eyes fairly close together rather than spread wide apart, since this small placement detail has a big effect on how recognizable the finished otter looks.
Lay the muzzle piece against the pom pom before gluing anything down. Otters have a fairly wide, rounded muzzle rather than a narrow, pointed one, so cut your cream or tan felt piece with soft, rounded edges rather than sharp corners. Once the muzzle shape looks right, place the eyes just above it and slightly toward the center, then set the nose right at the top edge of the muzzle. Step back and look at the whole face before committing to glue. This is the single step most likely to make or break how recognizable your finished otter looks, so it is worth the extra minute of adjusting.
Making the Otter’s Ears
Cut two small, rounded ear shapes from brown felt. Position them toward the top of the pom pom, slightly toward the front rather than dead center.
Keep the ears on the smaller side. Oversized ears can accidentally make your otter look more like a different woodland creature, such as a mouse or a bear cub, so err on the side of small and rounded.
Adding the Otter’s Paws
Cut four small paw shapes from brown felt, or use tiny rounded pieces if you prefer a simpler look. Attach the front two paws toward the front of the body, close together.
If you want your otter to look like it is holding something, an otter’s signature pose, leave a small gap between the front paws. That gap is exactly where you will glue a tiny felt fish in one of the variation ideas below.
Adding the Tail
Cut a long, slightly tapered tail shape from brown felt. Attach it toward the back of the pom pom body.
For extra personality, curve the tail slightly before you glue it down rather than leaving it perfectly straight. A gentle curve makes the otter look more playful and in motion, even though it is sitting still.
Adding the Whiskers
Cut a few short pieces of black embroidery thread and glue them carefully around the muzzle, a few on each side.
Use restraint here. A handful of thin whiskers is enough to suggest an otter’s face without overwhelming such a small craft. Too many whiskers can make the face look cluttered rather than detailed.
If you find embroidery thread difficult to glue in place because it keeps slipping, try dabbing a very small amount of glue directly onto the felt muzzle first, letting it get slightly tacky, and then pressing the thread into place. This gives the thread something to grip immediately rather than sliding around on wet glue.
Assembling Everything Together
Once all of the individual pieces, the muzzle, ears, paws, tail, and whiskers, are ready, it helps to do a full dry run before gluing anything permanently. Lay every piece on the pom pom body in its intended spot and look at the otter as a whole. Check that the ears are level with each other, that the paws are evenly spaced, and that the tail is centered on the back of the body. It is much easier to shift a piece half an inch now than to try to pry off dried glue later.
Once you are happy with the layout, glue the pieces down one at a time, starting with the larger pieces like the muzzle and tail, then finishing with the smaller details like the eyes, nose, and whiskers. Let the glue set fully before picking up or moving the otter, since handling it too soon is one of the most common reasons pieces shift out of place.
Give Your Pom Pom Otter Some Personality
Once you have made one otter and feel comfortable with the process, try a few variations.
- Baby otter. Use a smaller pom pom and scale down the facial features to match.
- Otter family. Make several otters in different sizes to create a parent and baby set.
- Otter holding a fish. Cut a tiny fish shape from felt and glue it between the front paws.
- Swimming otter. Create a slightly longer body and attach the tail in a curved, active position.
- Valentine otter. Give your otter a small felt heart to hold instead of a fish.
- Classroom otter. Have each child decorate their own otter, then group them together to build a full otter habitat display.
- Sleepy otter. Glue the eyes at a slight downward angle and add tiny closed eyelid shapes cut from felt for a napping expression.
- Otter with a bow or scarf. A thin strip of felt or ribbon tied around the neck adds a quick seasonal or personalized touch, useful for gift giving.
- Glow in the dark otter belly. Use a small piece of glow in the dark felt or fabric paint for the muzzle if you want a fun nighttime surprise for kids.
- Otter keychain or ornament. Glue a small metal loop or a loop of ribbon into the top of the pom pom before attaching the ears, then hang it from a keychain ring or an ornament hook.
Mixing and matching a few of these ideas is part of the fun. A baby otter holding a tiny felt fish, or a swimming otter wearing a small bow, takes only a few extra minutes but makes each finished piece feel more personal.
How to Make Pom Pom Otters With Kids
This craft works well for children, but it helps to know which parts are appropriate for which ages.
For younger children, an adult can:
- Prepare the pom poms ahead of time
- Cut the small felt pieces for ears, paws, and the tail
- Handle scissors and hot glue when needed
Children can:
- Choose the yarn and felt colors
- Arrange the facial pieces before anything is glued down
- Decorate their otter with extra details
- Help create accessories like tiny fish or hearts
- Take part in building a group otter habitat display
A quick safety note is worth including here. Small pieces such as googly eyes, embroidery thread, and tiny felt cutouts are a choking hazard for very young children, so keep close supervision around anyone who might still put small objects in their mouth.
If you are running this as a group activity, whether for a birthday party, a homeschool group, or a classroom, a little bit of prep work goes a long way.
Pre cutting the felt pieces into ears, paws, tails, and muzzles ahead of time means kids can jump straight into the fun part, arranging and gluing, without everyone waiting on scissors.
Laying out small trays or cups with each type of piece sorted separately also keeps things organized and cuts down on lost pieces and mixed up materials.
For older kids who are ready for a bit more independence, consider letting them cut their own felt shapes from a printed template. It adds a small amount of extra time but gives them more ownership over the finished otter, and no two will look exactly alike.
Tips for Making Better Pom Pom Otters
A few small habits will noticeably improve your results.
- Do not overtrim the pom pom. You can always cut more yarn away, but you cannot glue it back on, so trim conservatively and check often.
- Test the face before gluing. Lay the eyes, nose, and muzzle on the pom pom without any glue first. Move the pieces around until you are happy with the expression, then glue.
- Use contrasting felt. A lighter colored muzzle stands out nicely against darker brown yarn and reads clearly as an otter’s face.
- Make several sizes. A mix of pom pom sizes instantly creates the look of an otter family without any extra techniques.
- Keep the details proportional. Small ears and small facial features generally look better on a tiny craft than oversized ones.
Common Problems and How to Fix Them
Even a simple craft has a few predictable trouble spots. Here is how to solve the most common ones.
Why does my pom pom fall apart? The center was not tied tightly enough before cutting. Use a strong piece of yarn and pull the knot as tight as you can before you start cutting the loops.
Why does my pom pom look uneven? Trim gradually while rotating the pom pom in your hand, checking the shape from multiple sides rather than cutting heavily from just one angle.
Why doesn’t mine look like an otter? Check the proportions of the muzzle, ears, tail, and face. Small adjustments to size and placement make a bigger difference than most people expect.
Why won’t my felt pieces stay attached? Make sure you are using an adhesive suited to yarn and felt, and give it enough time to fully set before handling the otter.
My eyes aren’t straight. Position everything on the pom pom first without glue, step back and check the placement, and only glue once you are satisfied with how it looks.
My otter’s body looks lumpy instead of smooth. This usually means the pom pom was not wrapped with enough yarn, so certain spots have thinner coverage than others. Fluff the pom pom thoroughly with your fingers before trimming, and trim gradually rather than making one large cut, so you can even out any lumpy areas as you go.
The felt pieces keep curling up at the edges. This is more common with thin, soft felt. Press each piece flat under a book for a few minutes before gluing, or switch to a slightly stiffer craft felt if this keeps happening.
My otter looks more like a mouse or a bear than an otter. This almost always comes down to ear size and placement. Otter ears are small, rounded, and set fairly low and to the sides of the head rather than large and centered on top. Trimming your existing ears down slightly or repositioning them lower usually solves this.
How to Use Your Finished Pom Pom Otters
Once your otters are finished, there is a lot you can do with them beyond simply setting them on a shelf.
- Kids’ room decorations
- Classroom displays
- Animal themed parties
- Storytelling props
- Pretend play
- Handmade gifts
- Nature study activities
- Ocean animal projects
- DIY ornaments
- Otter habitat displays
For a simple habitat display, use blue paper as water, cardboard or paper rocks, and a bit of greenery cut from paper or felt. Group a few otters together on the display for a finished, cohesive look.
If you like the idea of small handmade pieces as gifts, this list of homemade cookie jar gift ideas pairs nicely with a handmade craft like this one, and these Easter home decor and gift ideas are worth a look if you are planning a springtime otter themed gift.
Displaying and Photographing Your Finished Otters
If you plan to share your finished pom pom otters online, whether on a blog, social media, or just in a family group chat, a little bit of styling goes a long way. Natural light is the easiest way to make a small handmade craft look polished.
Set your otter near a window rather than under an overhead light, and photograph it against a simple, uncluttered background so the texture of the yarn and felt stands out.
Grouping a few otters together, especially in different sizes, tends to photograph better than a single otter alone. A parent and baby pair, or a small otter family arranged in a row, gives the eye more to look at and makes the craft feel more like a finished project than a single test piece.
If you are building a themed display, such as the otter habitat mentioned earlier, take your photos at otter eye level rather than from directly above.
A slightly lower angle makes the scene feel more immersive and makes the otters look like they are genuinely part of the little world you built for them rather than just objects sitting on a table.
Frequently Asked Questions
Can I make pom poms without a pom pom maker? Yes. Wrap the yarn around a rectangle of cardboard instead. Tie the center tightly, slide the yarn off the cardboard, then cut through the loops on both ends just as you would with a pom pom maker.
What kind of yarn is best for pom pom otters? A medium weight, slightly fluffy yarn tends to produce a fuller, softer pom pom than a thin or very smooth yarn. Acrylic yarn is an easy, affordable option for this project.
Can younger children make this craft? Yes, with adult assistance for the parts that involve scissors, hot glue, or cutting small felt pieces. Younger kids can still choose colors, arrange the face, and add finishing touches.
What can I use instead of googly eyes? Small circles of black felt work well, or you can embroider tiny eyes with black thread if you want a slightly more polished look.
Can I make a different colored otter? Yes. While brown is the most realistic choice, this craft is meant to be creative rather than scientifically accurate, so grey, tan, or even a fun nontraditional color all work fine.
How do I make a smaller pom pom otter? Use a smaller pom pom maker or a smaller piece of cardboard, and scale down all the felt pieces, including the ears, paws, tail, and muzzle, to match.
How long does this craft take? For one otter, expect around 30 to 40 minutes total, including prep and assembly. Making several at once goes faster per otter since your supplies are already out and you are repeating the same steps.
Do I need a sewing machine or any sewing skills for this craft? No. Every part of this project, from the pom pom body to the felt details, is assembled with glue rather than stitching, which is part of what makes it so approachable for beginners.
How do I store finished pom pom otters? Keep them somewhere dry and out of direct sunlight, since prolonged sun exposure can fade both the yarn and the felt over time. A shelf, a decorative bowl, or a display box all work well.
Can I use fabric glue instead of craft glue? Yes, fabric glue works well for attaching felt pieces to yarn and tends to create a slightly more flexible bond than standard craft glue, which can be useful if the otter will be handled often, such as by young children.
What is the best way to attach the tail so it does not fall off? Apply glue to a slightly wider area at the base of the tail rather than just the very tip, and press it firmly against the pom pom for about thirty seconds. A wider glue contact area holds up much better over time than a small dab.
Final Thoughts
The fun of this project is not really about making a perfectly identical otter every time. It is about giving each little pom pom its own personality, whether that means a slightly crooked tail, an extra curious expression, or a tiny felt fish tucked between its paws.
Once you understand the basic method, experiment freely with different sizes, colors, expressions, and accessories. A whole otter family, each one a little different from the last, is often more charming than a single perfect copy.
If you are in the mood for more beginner friendly crafting after this one, take a look at these DIY clay diffuser stones or this guide to DIY macrame boho decor for another simple, satisfying project.
And if you are looking to set up a dedicated space for projects like this one, this guide to creating a hobby room as a personal sanctuary is a great place to start.