
If you have ever wanted to try making your own stuffed animal but felt intimidated by complicated patterns, a beanbag frog is exactly where you should start. These little frogs are soft, endlessly customizable, and forgiving enough for a total beginner to finish in an afternoon.
Their simple rounded shapes mean you do not need advanced sewing skills, and because they use such a small amount of fabric, they are also a wonderful way to use up scraps left over from other projects.
What makes a beanbag frog especially satisfying is the way it sits. Unlike a typical stuffed animal that flops over or needs to be propped against something, a beanbag frog has weight built into its base so it can perch on a shelf, a windowsill, or a stack of books and actually stay put. That small detail is what turns a plain stuffed toy into something people want to display.
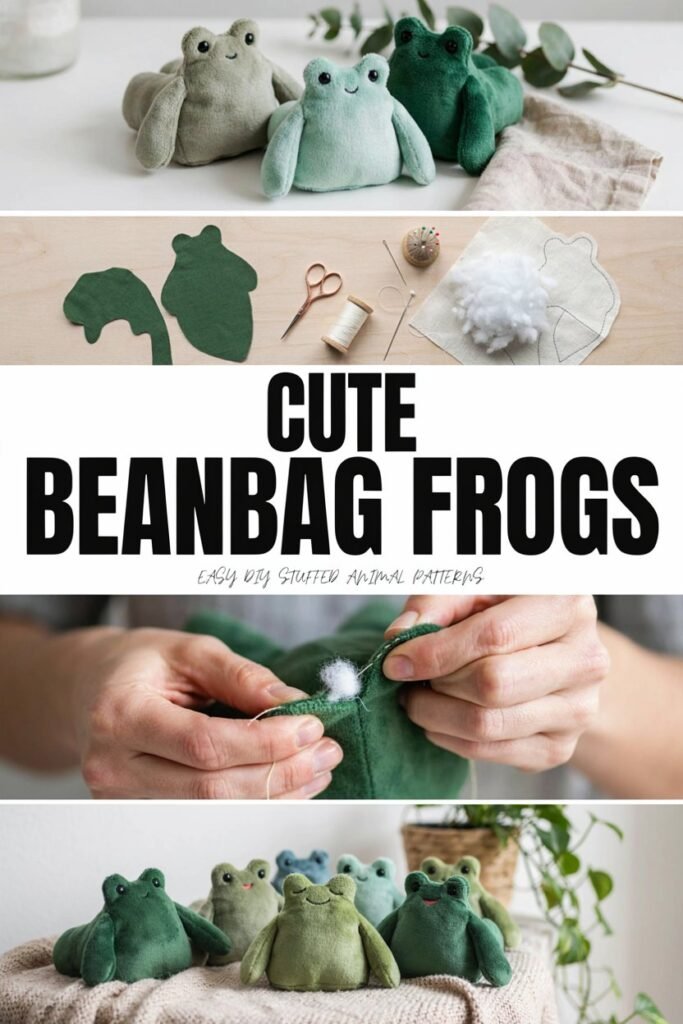
In this guide, you will learn exactly what a beanbag frog is, what materials work best, how to build a simple pattern from scratch, and how to sew, stuff, and weight the frog so it sits properly every time.
Along the way, we will cover customization ideas, common mistakes, safety considerations for children, and answers to the questions beginners ask most often. By the end, you will have everything you need to make your own frog with confidence, whether you use a sewing machine or sew entirely by hand.
What Makes a Beanbag Frog Different?
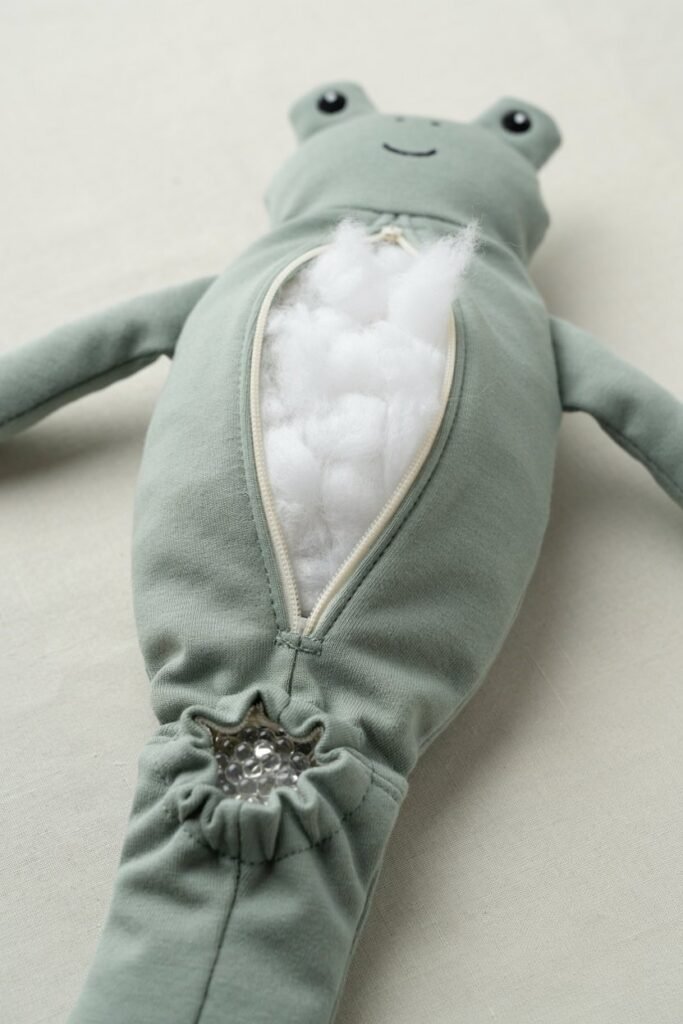
A beanbag frog is not quite the same as an ordinary plush toy. The difference comes down to how the weight and stuffing are distributed inside the body.
- The upper body and head are usually filled with a light to moderate amount of polyester fiberfill, giving the frog a soft, huggable feel.
- The lower portion of the body holds a weighted filling, such as poly pellets, which gives the frog stability.
- That concentrated weight near the base is what allows the frog to sit upright instead of tipping over.
- A wider, flatter bottom improves balance even further, since a broad base naturally resists tipping.
- You can adjust the overall shape depending on whether you want the frog to sit up tall, lean back slightly, or lie flat like a paperweight.
You do not need to buy a commercial beanbag insert to achieve this effect. A simple fabric pouch filled with pellets and sewn or tucked into the base of the frog works just as well, and it gives you full control over how much weight goes where.
Materials You Will Need
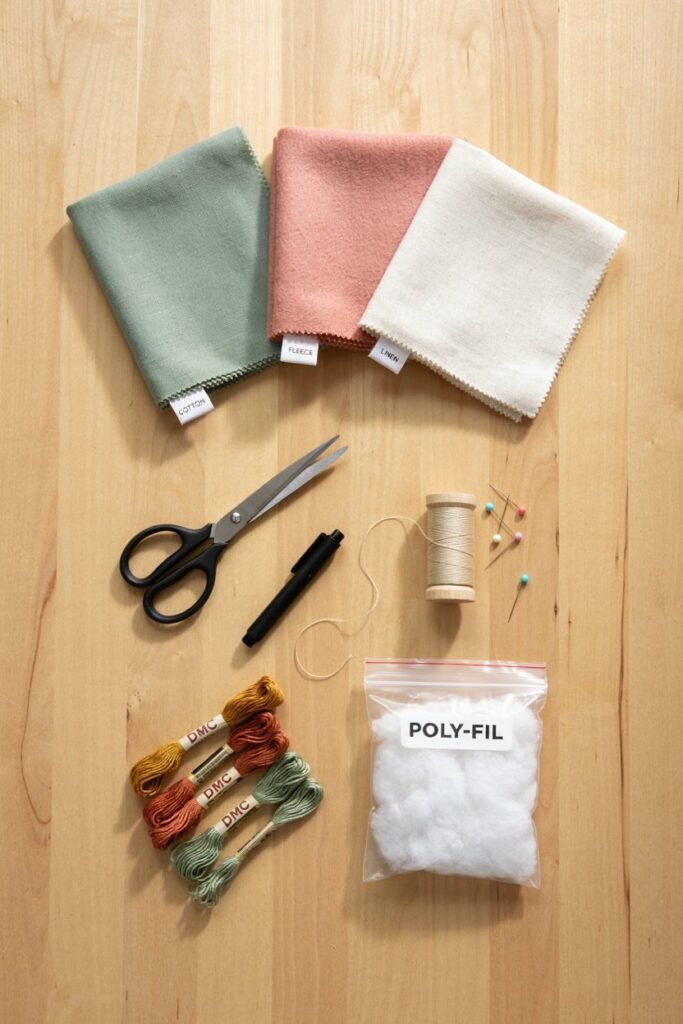
Before you start cutting fabric, gather your supplies so you are not stopping mid project to search for something.
Basic supplies
- Fleece, cotton, felt, minky, or another suitable fabric
- Coordinating thread
- A sewing machine or a hand sewing needle
- Polyester fiberfill
- A weighted filling such as poly pellets
- Fabric scissors
- Pins or sewing clips
- A fabric marking pen or tailor’s chalk
- Embroidery floss for facial details
- A small amount of felt for eyes, cheeks, or accents
- Paper for drafting your pattern
- Optional safety eyes (skip these for toys intended for young children)
Why each material matters
Choosing the right fabric makes a bigger difference than most beginners expect.
Cotton is an excellent starting point because it is stable, easy to cut accurately, and forgiving when you are learning to sew curves. It holds its shape without stretching out of position, which matters a lot when you are working with small pattern pieces.
Fleece is soft, warm, and does not fray, which means you can skip finishing raw edges on the inside seams. It is also very beginner friendly because it does not shift around under the presser foot the way slippery fabrics do.
Minky produces an incredibly cuddly, plush finished frog, but it is genuinely more difficult to sew. It stretches, slides, and can bunch up under a needle, so it is better suited to someone who already has a little sewing experience.
Felt is another great beginner option, particularly for smaller frogs or for cutting facial details like eyes and cheeks, since it does not fray and holds crisp edges.
Choosing the Right Fabric for Your Frog
If you are torn between options, this comparison should help.
| Fabric | Beginner Friendly | Softness | Difficulty |
|---|---|---|---|
| Cotton | Excellent | Medium | Easy |
| Fleece | Excellent | Soft | Easy |
| Felt | Very good | Medium | Easy |
| Minky | Moderate | Very soft | More challenging |
| Velour | Moderate | Very soft | Moderate |
For a first attempt, cotton or fleece is the safest choice. Once you feel confident with the basic construction, minky is a wonderful upgrade for a second or third frog, since the extra softness makes a noticeably more huggable finished toy.
How to Make a Simple Beanbag Frog Pattern
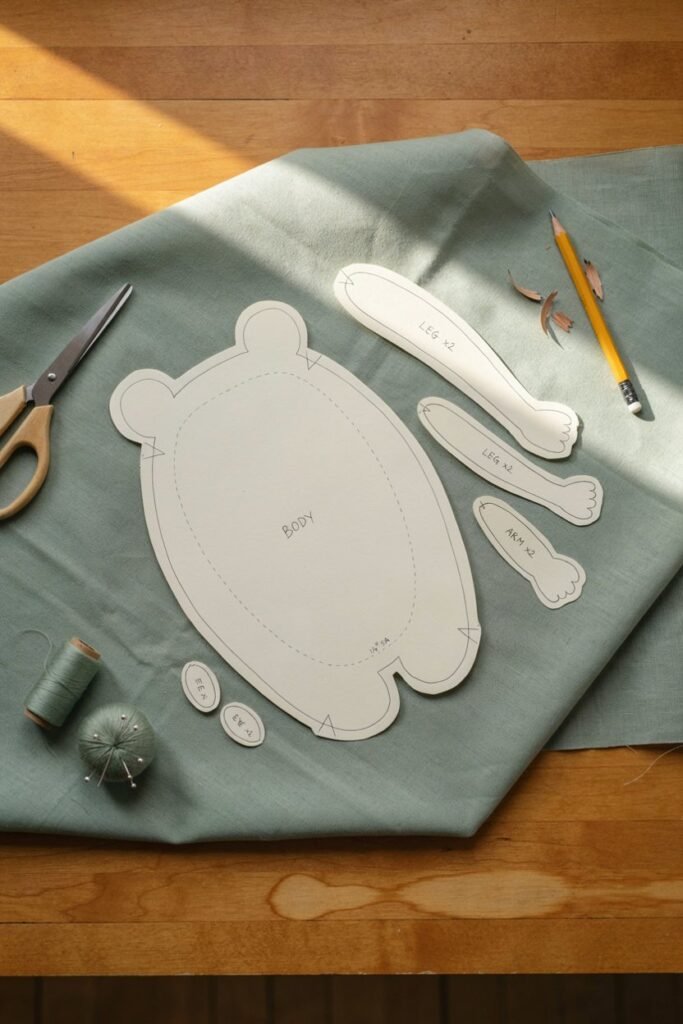
Rather than just downloading someone else’s pattern and hoping for the best, it helps to understand how the pieces actually work together. Building your own pattern also means you can resize it easily for future projects.
Draw the body
Sketch a rounded frog body that is noticeably wider at the bottom than at the top. This wider base is what will eventually hold the weighted filling and help the frog balance.
Add the legs
Frog legs are typically made from four fabric pieces, two per leg, sewn together and then attached to the body. Making the rear legs slightly larger than the front ones gives the frog that classic squat, grounded posture people associate with cartoon frogs.
Create the eyes
You have two options here. You can either cut separate rounded eye pieces and attach them after the body is assembled, or you can build small bumps directly into the head pattern so the eyes are part of the main silhouette. Separate eye pieces are easier for beginners because they are more forgiving to adjust.
Add seam allowance
Whatever shape you draw represents the finished size of the frog, so you will need to add extra fabric around the outer edge for the seam. A seam allowance of about a quarter inch is standard for a small stuffed animal.
Transfer the pattern to fabric
Pin your paper pattern to folded fabric so you cut two matching pieces at once, trace around the edges with a fabric marker, and cut carefully along your lines.
For a first project, these approximate measurements work well as a starting point.
- Finished frog size: about 6 to 8 inches tall
- Body: two matching pieces
- Legs: four pieces total
- Eyes: four pieces total
- Seam allowance: approximately a quarter inch
Feel free to scale these numbers up or down once you understand how the pieces relate to each other.
Step by Step: Sewing the Beanbag Frog
This is the heart of the tutorial, so take your time here rather than rushing through it.
Step 1: Cut your fabric. Keep paired pieces stacked together as you cut so they stay identical, and mark any important reference points, like where the legs will attach, before you separate them.
Step 2: Sew the body pieces. Stitch the two body pieces together with right sides facing in, leaving a gap along one edge for turning and stuffing later.
Step 3: Sew the legs. Stitch each leg pair together, leaving the top open. Turn them right side out carefully, since small pieces can be tricky, and avoid overstuffing them so they stay flexible enough to position naturally.
Step 4: Attach the legs. Before sewing them permanently in place, pin the legs where you want them and check that the frog looks balanced from multiple angles.
Step 5: Add the eyes. Depending on your design, eyes are usually easiest to attach before the body is fully closed, since it is much harder to sew accurately once the toy is stuffed and turned right side out.
Step 6: Turn the frog right side out. Gently push out the curves of the body using a blunt tool, such as a chopstick or a turning tool, so you do not stress the seams.
Step 7: Add the weighted filling. This step deserves its own attention, so see the section below for details.
Step 8: Add fiberfill. Stuff the upper body and head gradually, working in small amounts and checking the shape as you go so you do not overstuff any one area.
Step 9: Close the opening. Use a ladder stitch, sometimes called an invisible stitch, to hand sew the turning gap closed so the seam disappears into the fabric.
Step 10: Shape the frog. Gently massage the stuffing into the corners and adjust the weighted filling until the frog balances and sits the way you want.
How to Make Your Frog Sit Properly
This is one of the most common frustrations beginners run into, so it is worth addressing directly.
If your frog keeps tipping over, one or more of these issues is usually to blame.
- The weight is positioned too high in the body instead of low near the base.
- The bottom of the frog is too narrow to provide a stable footprint.
- The stuffing is distributed unevenly, throwing off the balance point.
- The weighted filling has shifted to one side rather than staying centered.
- The legs are attached at slightly uneven angles.
The fix is usually simple. Keep the bulk of the weight low and centered in the body, and resist the urge to overstuff the bottom into a rounded shape. A relatively broad, flat base gives the frog a much more stable center of gravity than a plump, rounded one.
Cute Ways to Customize Your Beanbag Frog
Once you have the basic construction down, customizing your frog is where the fun really begins. These variations are especially popular for gifting or for building a small collection.
- Classic green frog. Use different shades of green fabric paired with cream or pale yellow eyes for a traditional look.
- Strawberry frog. Swap the green for pink or red fabric and add tiny embroidered seed details for a playful twist.
- Woodland frog. Combine muted green, brown, and cream tones for an earthy, natural palette.
- Flower frog. Add a small embroidered flower or a tiny fabric flower accent near the head.
- Sleepy frog. Give your frog closed, embroidered eyes for a calm, resting expression.
- Tiny frog. Scale the pattern down for a miniature version that works well as a keychain or ornament.
- Giant cuddly frog. Scale the pattern up and switch to fleece or minky for an oversized, extra huggable version.
Easy Frog Face Ideas
The face is where a lot of a frog’s personality comes through, so it is worth spending a little extra time here.
- Embroidered eyes for a soft, handmade look
- Felt eyes glued or sewn on for contrast
- Safety eyes for a more polished, commercial appearance
- An embroidered smile in a contrasting thread color
- Felt cheeks for a rosy, cheerful expression
- Tiny embroidered nostrils for added detail
- Light blush added with fabric-safe coloring
- Decorative spots scattered across the back for a speckled frog look
If you are making a frog for a young child, avoid small attachable pieces like plastic safety eyes or loose beads. Embroidered details are both safer and, in many cases, more charming.
Beanbag Filling Ideas
The filling you choose for the weighted base has a real impact on the finished toy, so it helps to understand your options.
| Filling | Best For | Notes |
|---|---|---|
| Polyester fiberfill | Soft body | Lightweight, used for the upper body |
| Poly pellets | Weighted base | Should be securely enclosed |
| Dried beans | Decorative, non washable projects | Not ideal if moisture or laundering is a concern |
| Rice | Temporary craft projects | Can absorb moisture over time |
| Fabric scraps | Scrap based projects | Adds some weight but can feel lumpy |
Whatever you choose for the weighted portion, make sure it is securely contained inside its own small fabric pouch rather than loose within the main body. This keeps the filling from shifting unevenly and makes future washing much simpler. For toys meant for children, avoid loose dried food items altogether, since moisture, pets, and small hands all change the safety considerations.
How Much Stuffing Should You Use?
It is tempting to pack a stuffed animal until it feels firm, but that usually works against you with a beanbag frog. The goal is a body that feels soft, slightly weighted, and able to sit comfortably rather than one that is hard, overstuffed, and rigid.
Add fiberfill gradually, checking the shape of the frog after every small handful rather than filling the whole cavity at once. This lets you catch lumps and uneven spots before they become permanent.
Common Mistakes When Making a Stuffed Frog
Knowing what tends to go wrong ahead of time will save you a lot of frustration.
- Overstuffing the body. This makes the frog stiff and distorts its proportions.
- Adding too much weight. An overly heavy base can make the frog awkward to position or move.
- Making the opening too small. A narrow turning gap makes both turning and stuffing unnecessarily difficult.
- Forgetting seam allowance. Skipping this step results in a finished frog that is noticeably smaller than planned.
- Attaching details too late. Some facial features are far easier to sew before the body is fully closed.
- Uneven stuffing. This creates visible lumps and can prevent the frog from sitting correctly.
- Choosing slippery fabric as a first project. Minky looks beautiful but can be genuinely frustrating for someone new to sewing.
Beginner Tips for a Better Finished Frog
A few small habits make a noticeable difference in the final result.
- Start with cotton or fleece rather than minky.
- Make a paper pattern first, before cutting into your good fabric.
- Mark the center point of each pattern piece to help with alignment.
- Clip curved seams instead of forcing the fabric flat.
- Leave a generous turning opening so stuffing is easier.
- Add stuffing gradually rather than all at once.
- Keep the weighted filling centered and low.
- Test the frog’s balance before permanently closing the opening.
- Take your time with embroidered facial details.
- Press or finger press seams before you begin stuffing.
Can You Make a Beanbag Frog Without a Sewing Machine?
Absolutely, and many crafters prefer hand sewing for small projects like this one. It simply takes a bit longer.
A few basic stitches will get you through the entire project.
- A running stitch for quick, simple seams
- A backstitch for stronger, more secure construction
- A ladder stitch for closing the stuffing opening invisibly
Because a beanbag frog uses small pattern pieces, hand sewing the whole thing is genuinely manageable, even for someone who has never used a machine.
How to Make a No Sew Beanbag Frog
If you want an even faster option, a no sew version is possible using felt or fleece along with fabric adhesive. This approach works especially well for a quick gift or a one-off decoration.
Keep in mind that a no sew construction is generally less durable than a stitched frog, particularly if the toy will be handled often or played with regularly. It is best suited to a decorative piece rather than an everyday plaything.
How to Wash and Care for a Beanbag Frog
Washing instructions depend heavily on what materials you used, especially for the weighted filling.
If your frog contains poly pellets, rice, beans, or any other loose filling, hand washing or spot cleaning is usually the safer route, since machine washing can shift the filling or damage the pouch containing it. If you want a fully washable frog, design the weighted insert so it is securely enclosed and, ideally, removable before laundering.
It is also worth checking the care instructions for both your fabric and your specific filling material, since some combinations tolerate washing better than others.
Is a Homemade Beanbag Frog Safe for Children?
This is worth addressing honestly rather than glossing over.
A few key points to keep in mind:
- Use secure, reinforced stitching, particularly around the legs and any attached details.
- Avoid small, detachable parts for very young children.
- Skip plastic safety eyes for babies and toddlers, and use embroidery instead.
- Keep stuffing fully enclosed so nothing can be pulled loose.
- Think carefully about weighted filling choices, since some materials pose a greater risk if a seam fails.
- Consider the intended age range before finalizing your design.
- Supervise play with handmade toys, especially for younger children.
If you are making a frog specifically for a baby or toddler, it is worth designing with that age group in mind from the start rather than assuming a general pattern is automatically appropriate.
Frequently Asked Questions
What fabric is best for making a stuffed frog? Cotton and fleece are the easiest options for beginners because they are stable, easy to cut, and forgiving to sew.
How do you make a beanbag frog sit upright? Keep the weighted filling low and centered in the body, and give the frog a wide, relatively flat base rather than a fully rounded bottom.
What can you use to weight a stuffed animal? Poly pellets are the most common choice because they are lightweight, washable friendly when properly enclosed, and easy to work with.
Can I hand sew a beanbag frog? Yes, the small pattern pieces make this an easy project to complete entirely by hand using basic stitches.
How much stuffing should I put in a stuffed animal? Add it gradually and stop once the toy feels soft and slightly weighted rather than firm and rigid.
Can I make this frog without a sewing machine? Yes, a running stitch, backstitch, and ladder stitch are all you need to complete the entire project by hand.
What size should a beginner frog pattern be? Around 6 to 8 inches is a manageable starting size that is neither too fiddly nor too large to finish quickly.
Can I make the frog from scrap fabric? Yes, this is actually one of the best uses for leftover fabric scraps, since each frog only needs a small amount.
How do I make a stuffed frog softer? Fleece and minky both produce a softer finished toy than cotton, though minky is more challenging to sew.
How do I keep a stuffed animal from looking lumpy? Add stuffing in small amounts and check the shape frequently rather than filling one section completely before moving to the next.
Final Thoughts
A beanbag frog is a wonderfully satisfying project when you want something small enough to finish in an afternoon but still open ended enough to make entirely your own. Start with a simple cotton or fleece version, keep the weight low and centered in the body, and take your time with the stuffing and facial details. Once you have the basic shape figured out, it becomes easy to experiment with different fabrics, sizes, colors, and expressions, and before long you may find yourself with a whole collection of frogs, each one a little different from the last.
Related Projects You Might Enjoy
If you enjoyed this tutorial, these related posts continue the DIY and handmade theme.