
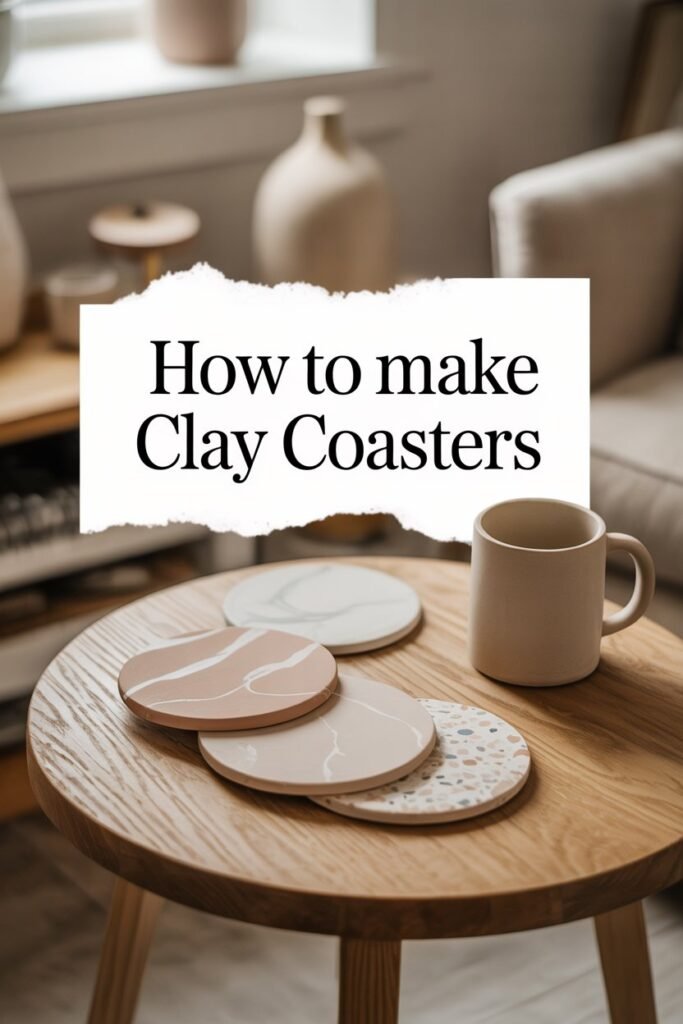
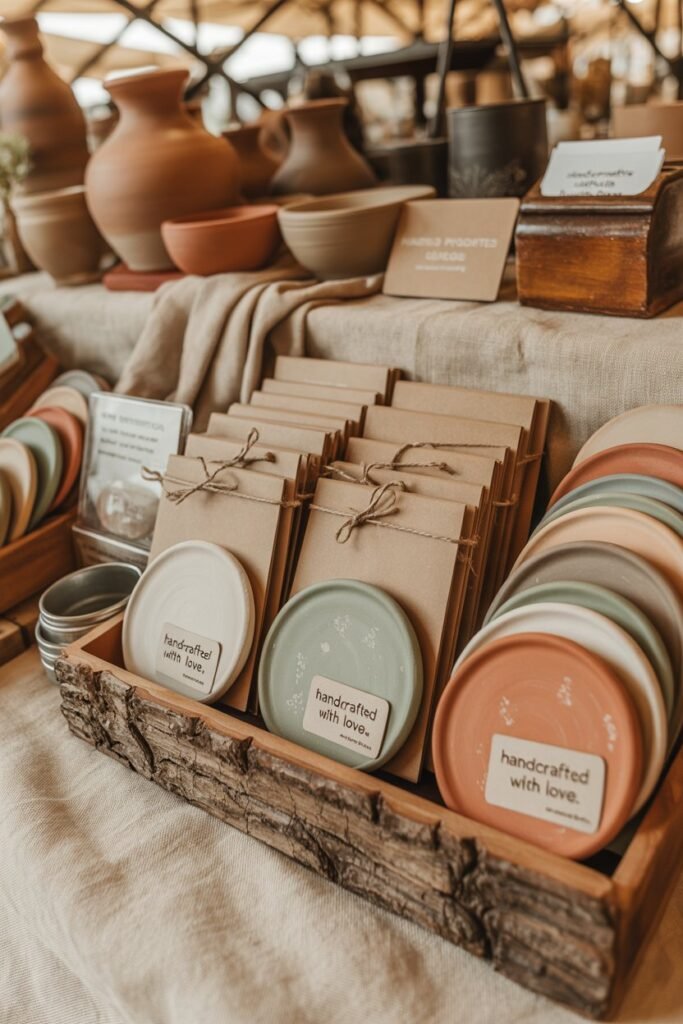
Clay coasters are one of the easiest and most rewarding DIY projects you can make at home. They are stylish, practical, affordable, and completely customizable.
Whether you love minimalist decor, colorful artistic designs, rustic aesthetics, or modern handmade pieces, learning how to make a clay coaster is a creative project that anyone can enjoy.
Homemade clay coasters are perfect for protecting tables from water stains while adding a personal touch to your living space.
They also make thoughtful handmade gifts for birthdays, housewarming parties, weddings, holidays, and special occasions.
The best part is that you do not need to be a professional artist to create beautiful results.
In this complete guide, you will learn everything you need to know about making clay coasters, including the best clay to use, tools you need, step-by-step instructions, decorating ideas, sealing methods, common mistakes to avoid, and creative inspiration for unique coaster designs.
If you have been searching for easy clay coaster ideas, DIY home decor projects, or beginner-friendly clay crafts, this detailed tutorial will help you create stunning handmade coasters from start to finish.
Disclaimer: This post may contain affiliate links, which means I may earn a small commission at no extra cost to you. Always follow product instructions and allow clay projects to dry and cure completely before use.
Amazon Shopping List: How to Make a Clay Coaster
- Air Dry Clay Pack (White or Natural Clay)
- Clay Roller or Acrylic Rolling Pin
- Round Cookie Cutters or Clay Circle Cutters
- Clay Sculpting Tools Kit
- Acrylic Paint Set for Decorating
- Clear Waterproof Sealer or Varnish
- Cork Sheets for Non-Slip Coaster Backing
Why Clay Coasters Are So Popular
DIY clay coasters have become extremely popular because they combine functionality with creativity.
Unlike store-bought coasters, handmade clay coasters allow you to express your personality through colors, patterns, textures, and shapes.
Here are some reasons people love making clay coasters:
- Affordable and beginner-friendly
- Great for relaxing creative time
- Perfect for personalized gifts
- Easy to customize for any decor style
- Ideal for small business craft ideas
- Fun activity for adults and teens
- Stylish addition to coffee tables and kitchens
Clay coasters also fit perfectly into modern trends like minimalist decor, handmade aesthetics, cottagecore style, earthy home design, and personalized DIY crafts.
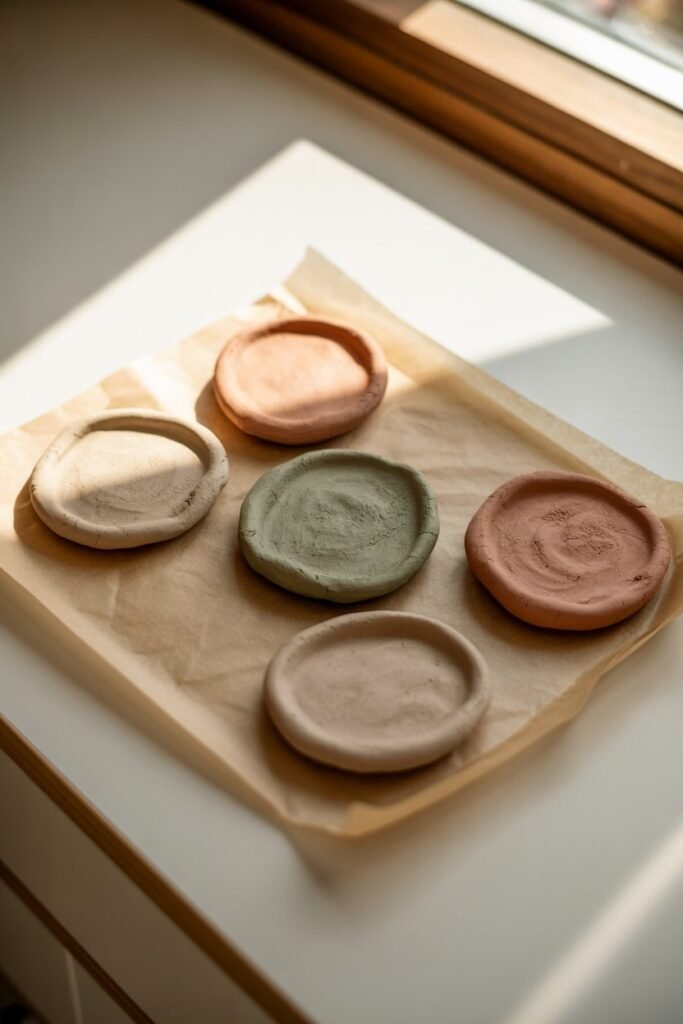
Best Types of Clay for Making Coasters
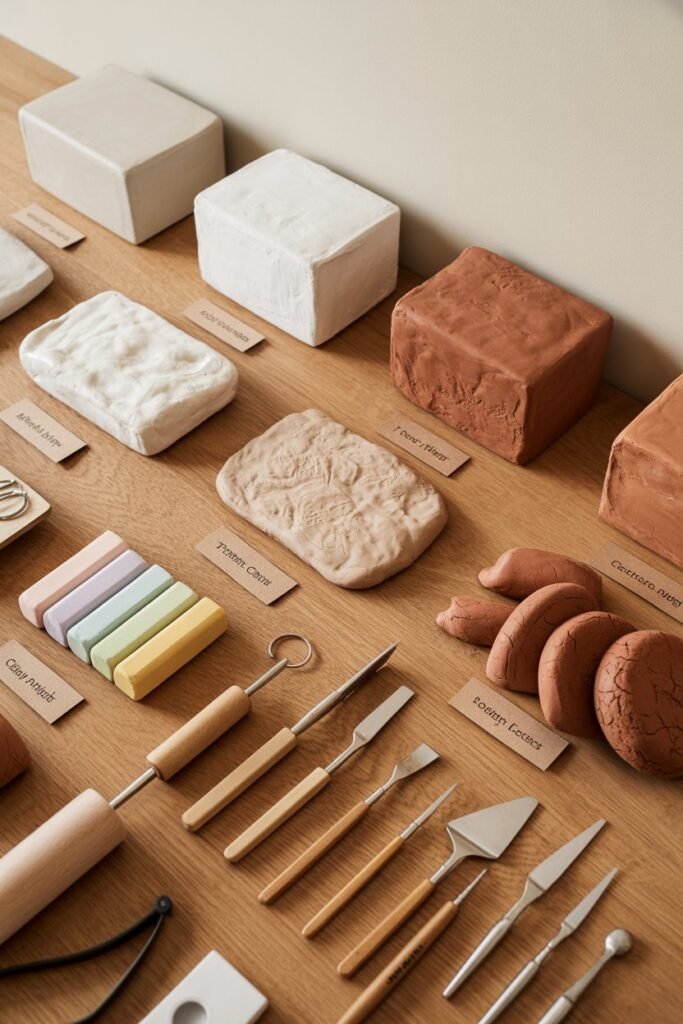
Before starting your project, it is important to choose the right clay. Different types of clay work differently, and each has its own benefits.
Air Dry Clay
Air dry clay is one of the best choices for beginners because it does not require baking.
Benefits:
- Easy to use
- Affordable
- Dries naturally
- No oven needed
- Perfect for beginners
Drawbacks:
- Can crack if too thin
- Needs sealing for water resistance
Air dry clay is ideal for simple DIY clay coaster projects at home.
Polymer Clay
Polymer clay hardens when baked in the oven.
Benefits:
- Very durable
- Smooth finish
- Great for detailed designs
- Water-resistant after baking
Drawbacks:
- Requires oven baking
- Slightly more expensive
Polymer clay is excellent for colorful and modern coaster designs.
Ceramic Clay
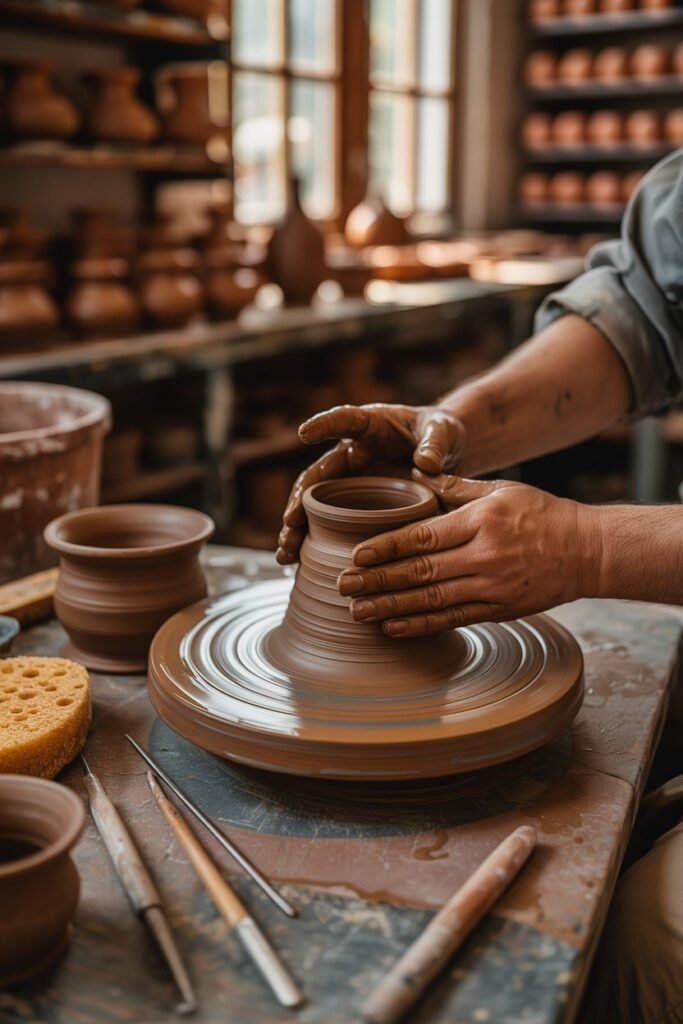
Ceramic clay is used for professional pottery projects.
Benefits:
- Extremely durable
- Professional appearance
- Heat resistant
Drawbacks:
- Requires kiln firing
- More advanced process
This option is best for experienced crafters.
Supplies You Need to Make Clay Coasters
One reason this DIY project is so popular is because it requires very few materials.
Basic Materials
- Clay of your choice
- Rolling pin
- Craft knife or clay cutter
- Round bowl or cookie cutter
- Sandpaper
- Acrylic paint
- Paintbrushes
- Sealant or varnish
Optional Decorative Supplies
- Gold leaf
- Texture stamps
- Alcohol ink
- Marble effect pigments
- Letter stamps
- Glitter
- Resin coating
- Pressed flowers
You can easily customize your clay coasters using these decorative materials.
How to Make a Clay Coaster Step by Step
Now let us go through the full process of creating beautiful clay coasters at home.
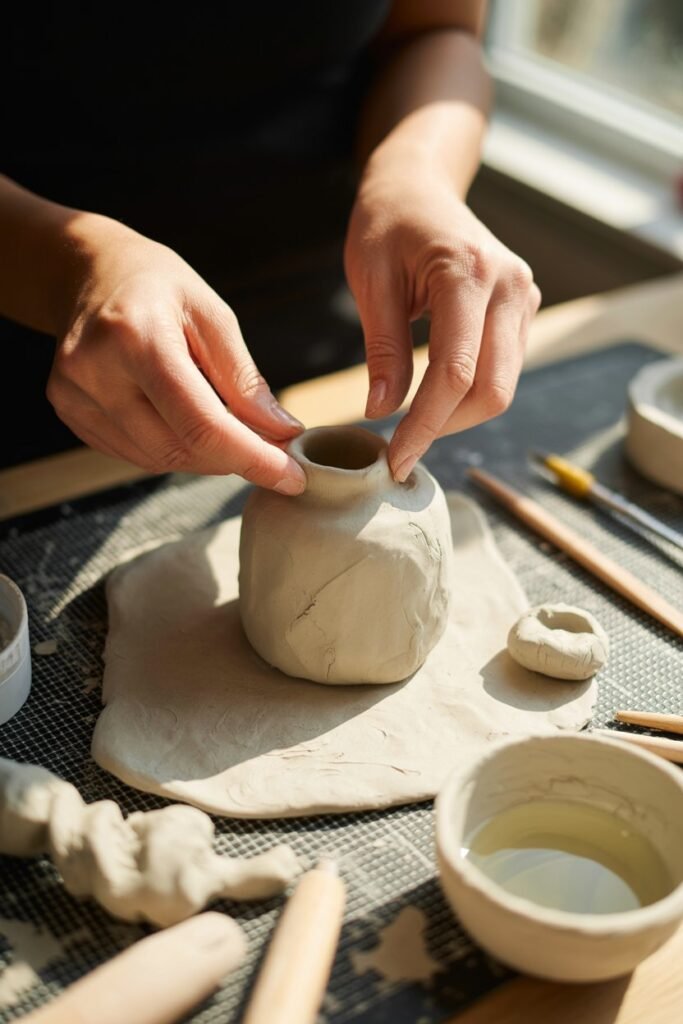
Step 1: Prepare Your Workspace
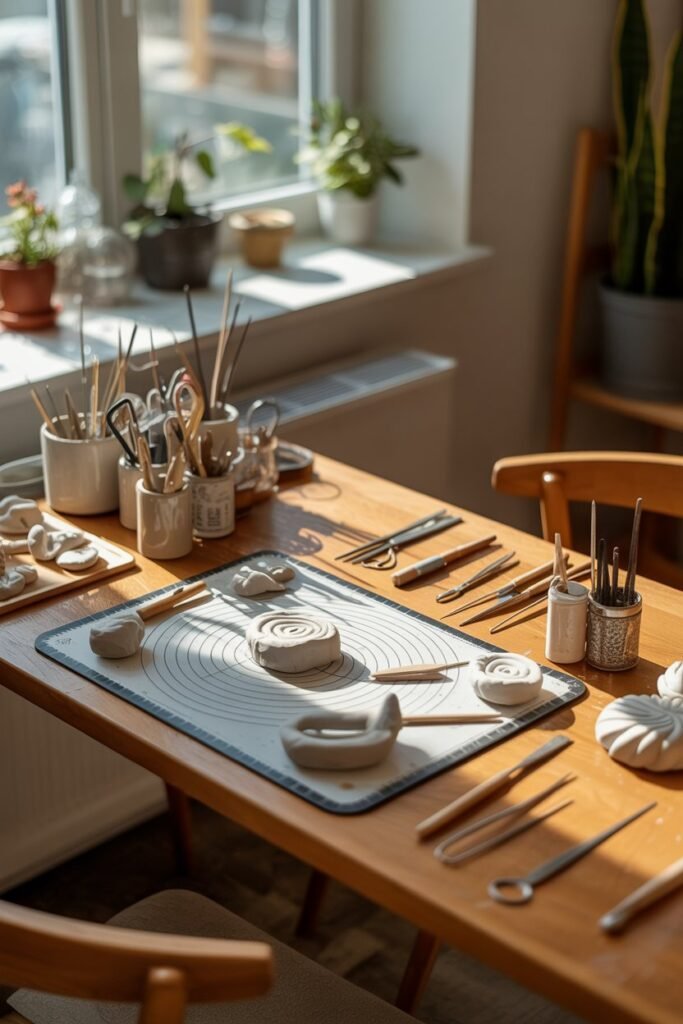
Start with a clean flat surface. Cover the area with parchment paper, a silicone mat, or plastic sheet to prevent sticking.
Keep your tools nearby and make sure your hands are clean to avoid fingerprints and dirt on the clay.
Step 2: Condition the Clay
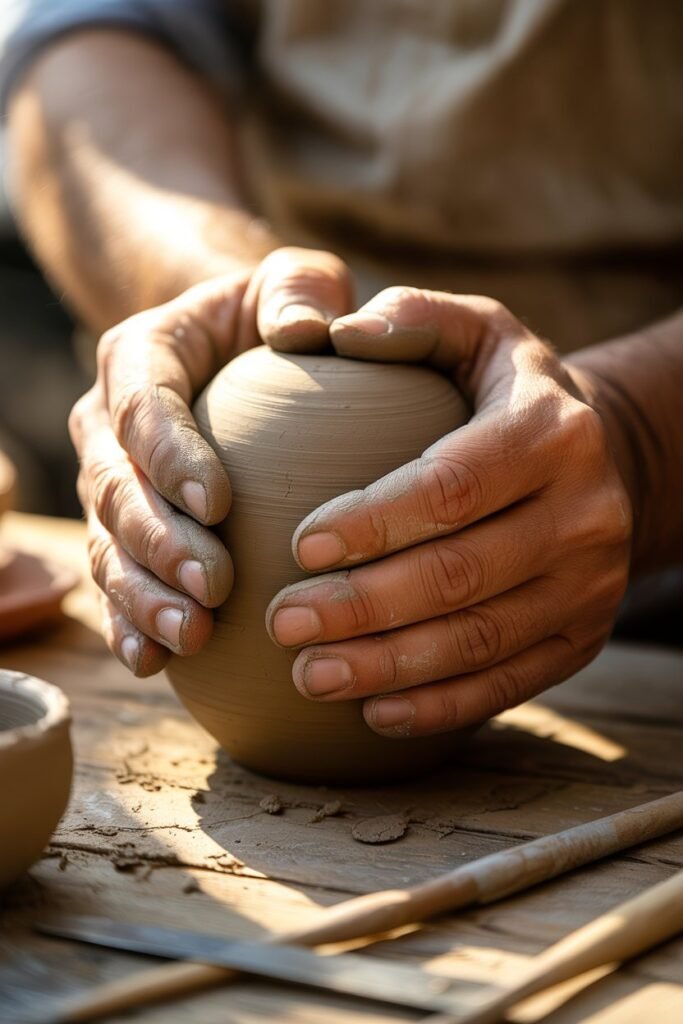
Knead the clay with your hands for several minutes until it becomes soft and flexible.
This step is especially important for polymer clay because conditioning prevents cracks and uneven texture.
Well-conditioned clay creates smoother coasters.
Step 3: Roll Out the Clay
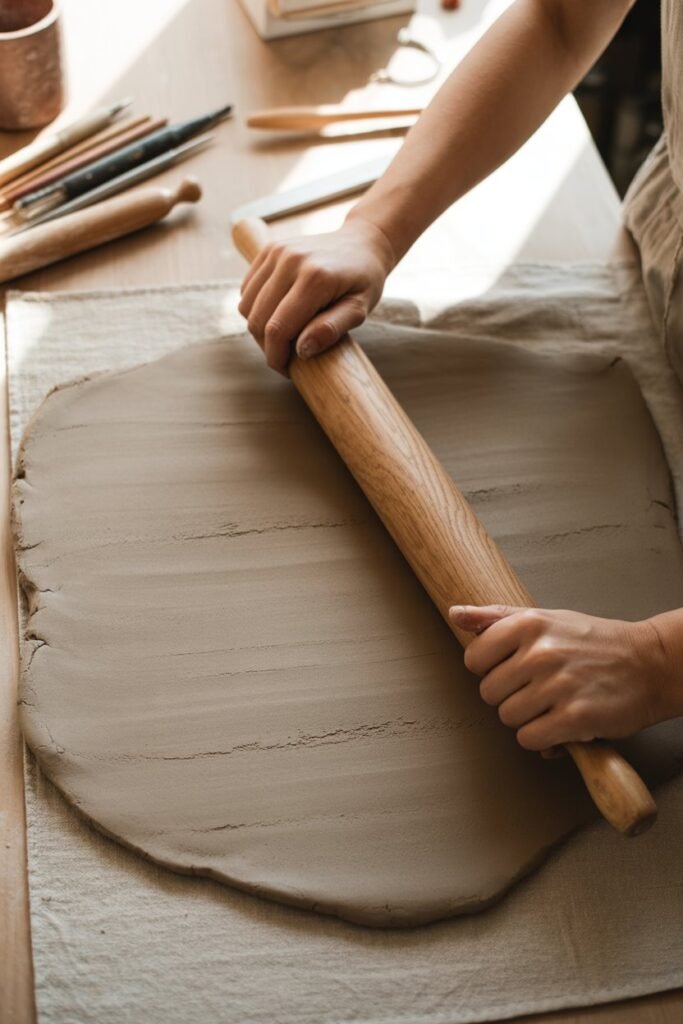
Use a rolling pin to flatten the clay evenly.
The ideal thickness for coasters is usually about:
- 1/4 inch thick
- Not too thin
- Not too thick
Uneven thickness can cause cracking or warping later.
Try to maintain a smooth surface while rolling.
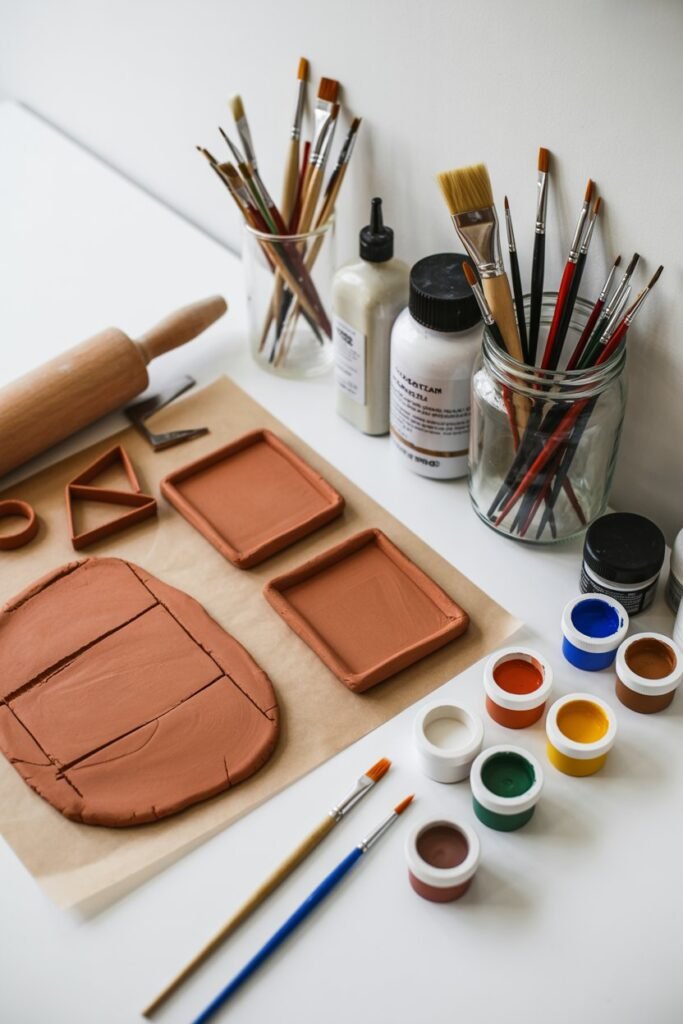
Step 4: Cut the Coaster Shape
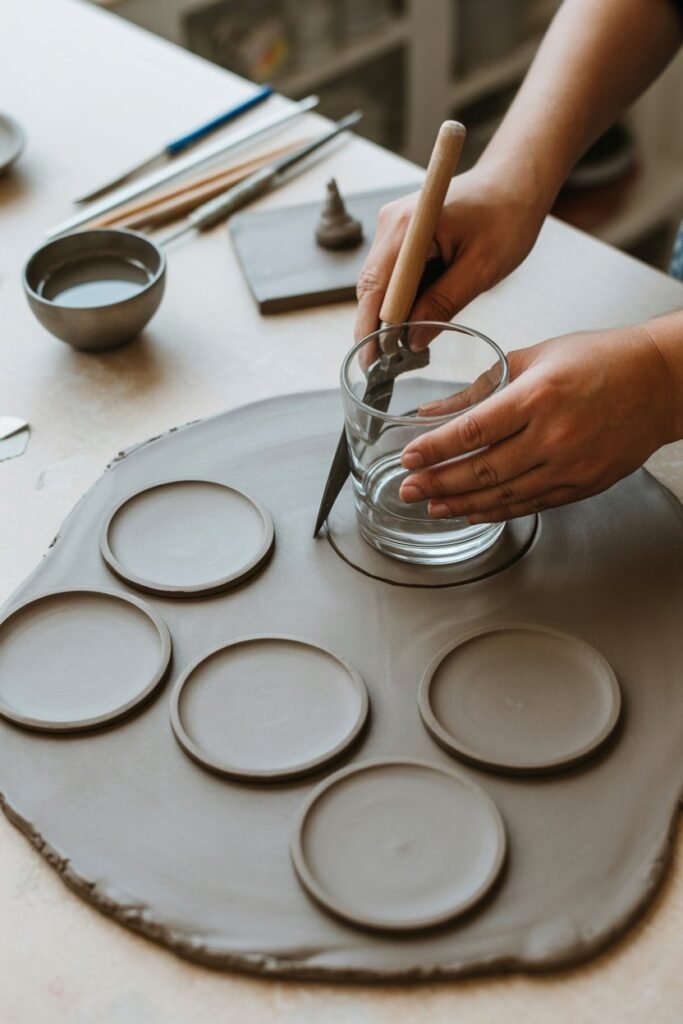
Use a round cutter, glass cup, or bowl to cut circular coaster shapes.
You can also experiment with:
- Hexagon coasters
- Oval coasters
- Square coasters
- Wavy edge coasters
- Organic abstract shapes
Unique shapes make your DIY clay coasters look more artistic and modern.
Step 5: Smooth the Edges
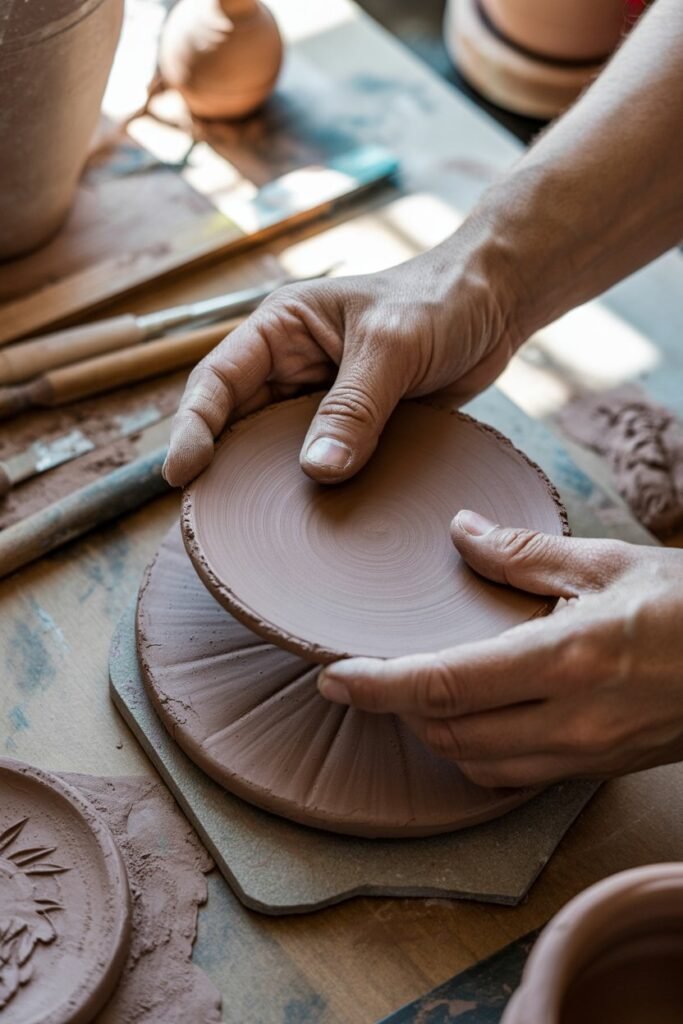
Use your fingers or a small amount of water to smooth rough edges.
You can also lightly sand the edges after drying for a cleaner professional finish.
This step helps the coaster look polished and elegant.
Step 6: Add Texture or Designs
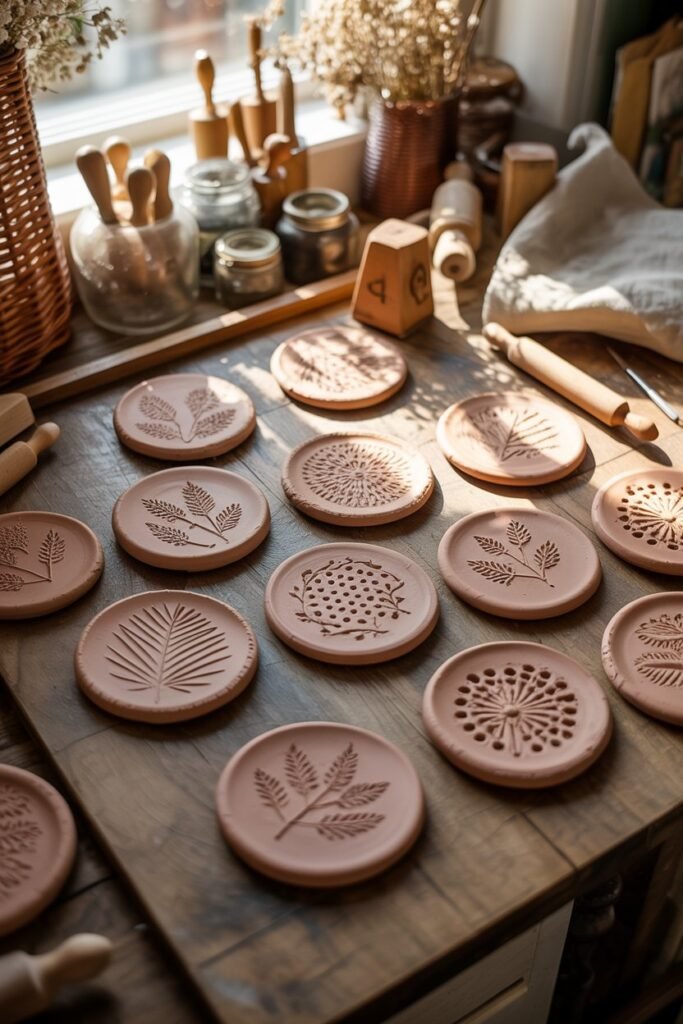
This is where the creative fun begins.
You can decorate your coasters using:
- Stamps
- Leaves
- Lace fabric
- Toothpicks
- Geometric patterns
- Floral impressions
- Marble swirl effects
Minimalist designs are especially trendy for modern home decor.
Step 7: Dry or Bake the Coasters
For Air Dry Clay
Allow the coasters to dry naturally for 24 to 72 hours depending on thickness.
Flip them occasionally for even drying.
For Polymer Clay
Bake according to package instructions.
Most polymer clay brands bake at low temperatures for around 15 to 30 minutes.
Avoid overheating because it may burn the clay.
Step 8: Sand the Surface
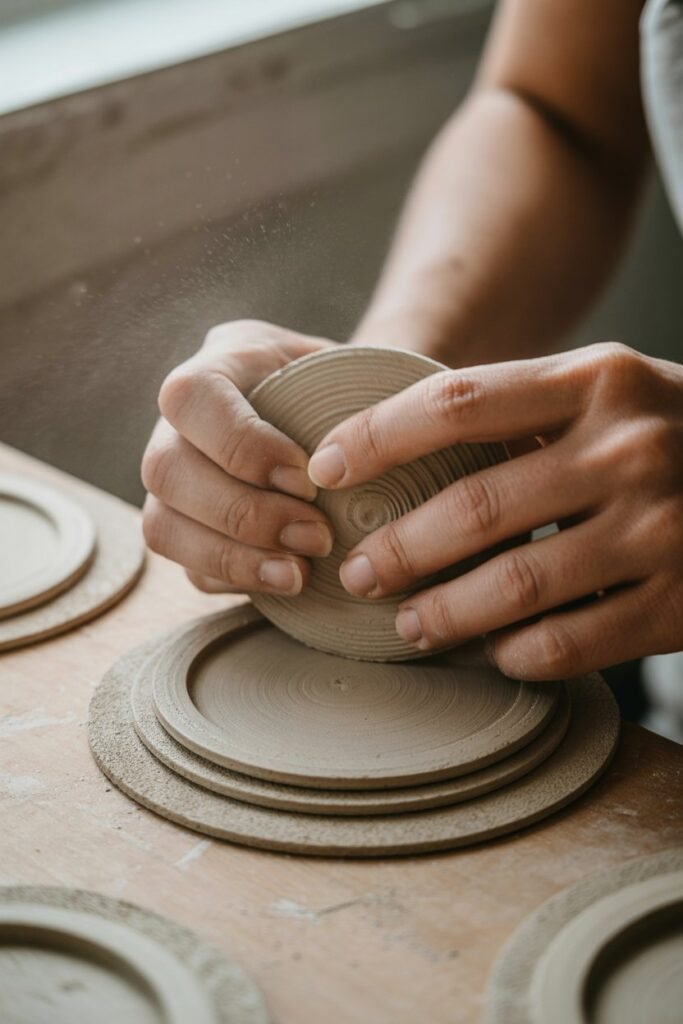
Once fully hardened, use fine-grit sandpaper to smooth rough areas.
Sanding creates a more professional appearance and prepares the surface for painting.
Always sand gently.
Step 9: Paint Your Clay Coasters
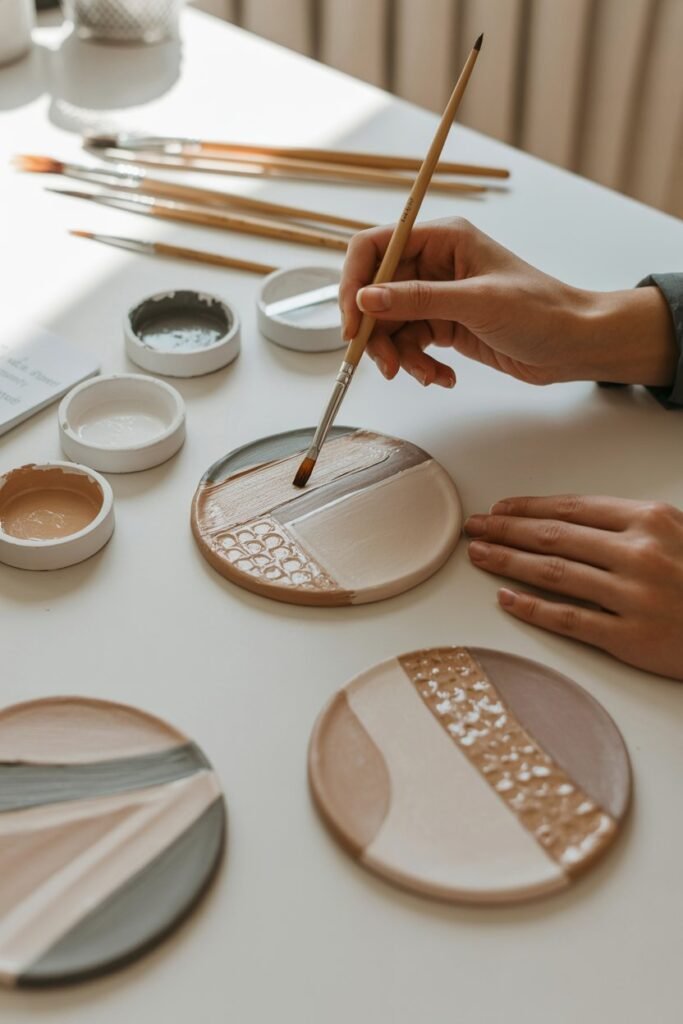
Acrylic paint works perfectly for decorating clay coasters.
Popular color ideas include:
- Neutral beige
- White and gold
- Terracotta
- Sage green
- Black and marble
- Soft pastel tones
- Boho earthy shades
You can create:
- Abstract art
- Minimal line art
- Floral patterns
- Modern geometric designs
- Personalized initials
Layer colors carefully and allow each layer to dry.
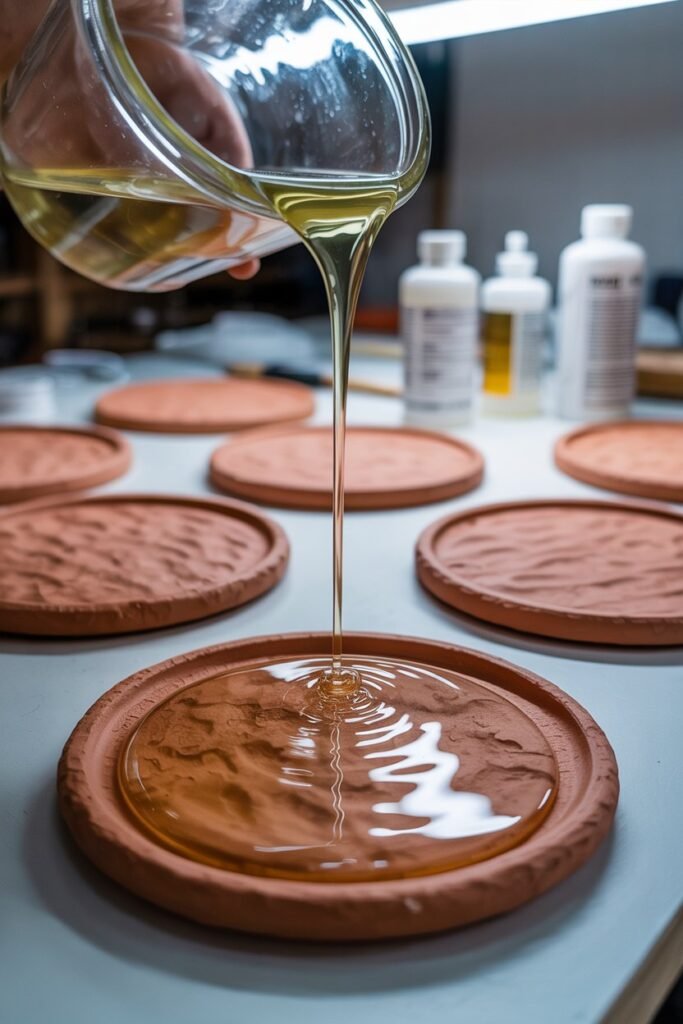
Step 10: Seal the Coasters
Sealing is one of the most important steps.
A sealant protects the coaster from:
- Water damage
- Stains
- Scratches
- Paint fading
You can use:
- Mod Podge
- Acrylic varnish
- Resin coating
- Waterproof spray sealant
Apply multiple thin layers for best results.
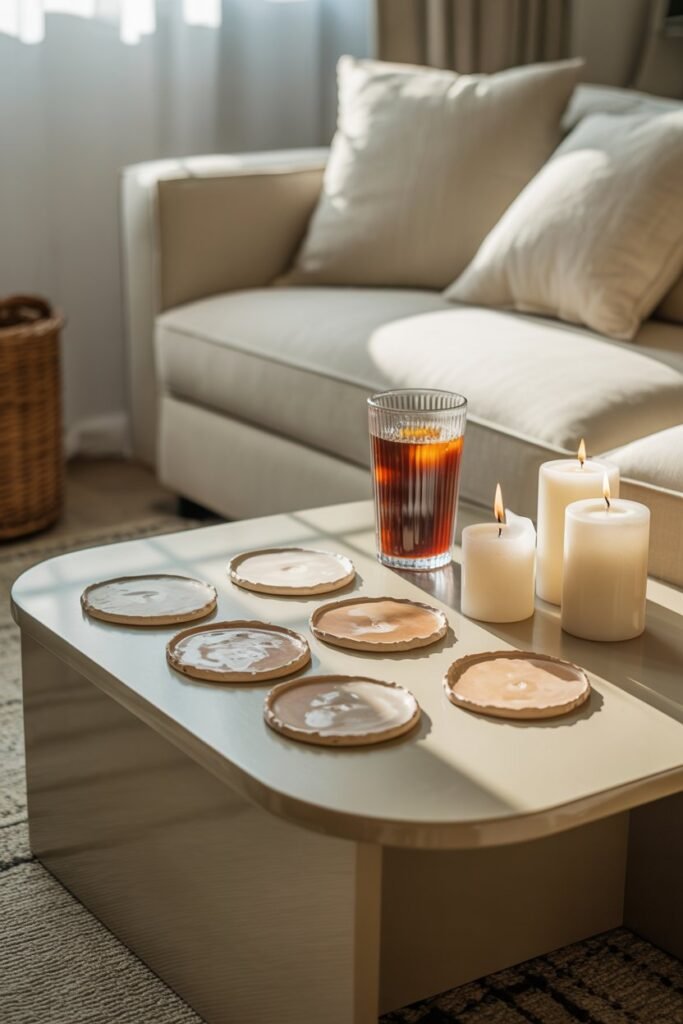
Creative Clay Coaster Ideas
If you want your coasters to stand out, try these stylish DIY ideas.
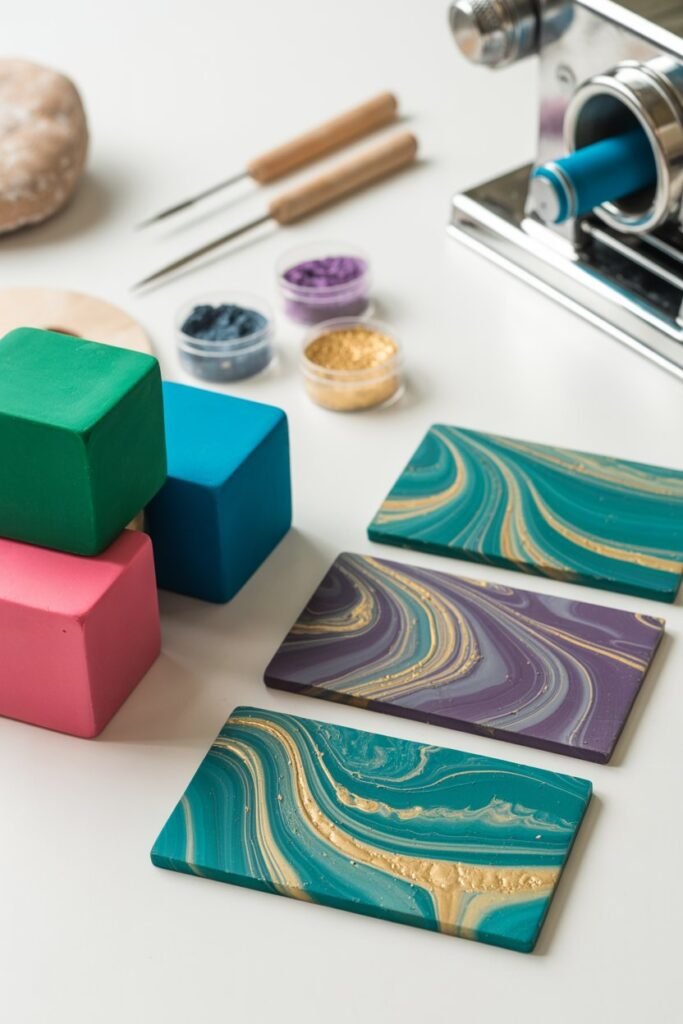
Marble Clay Coasters
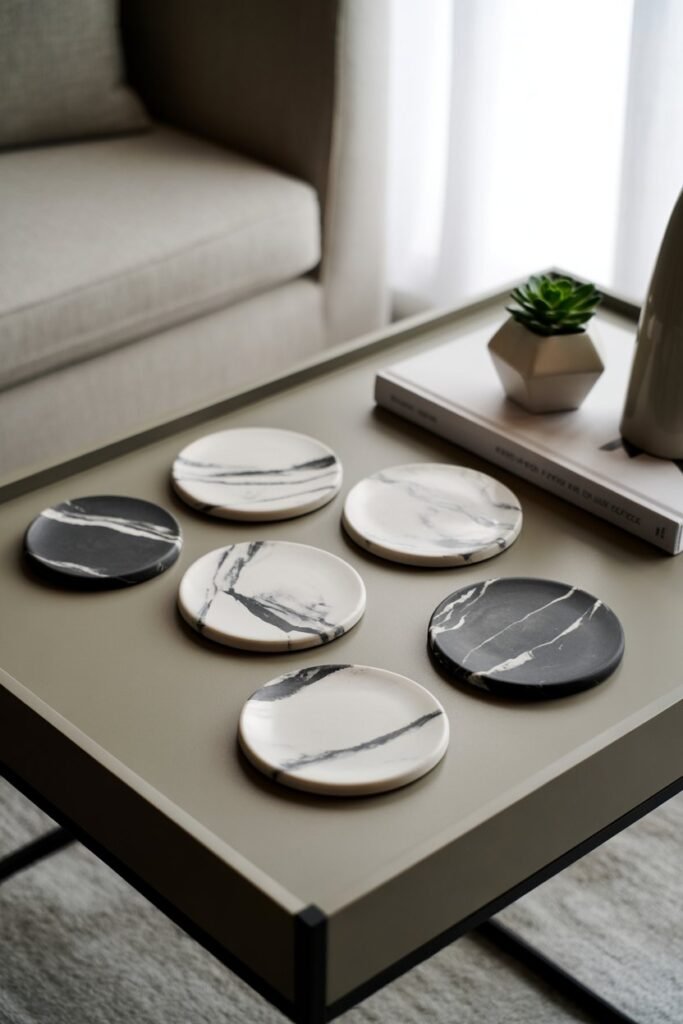
Mix two or more clay colors together slightly without fully blending them.
This creates a luxurious marble effect that looks elegant and modern.
White and gray marble coasters are especially popular.
Terrazzo Clay Coasters
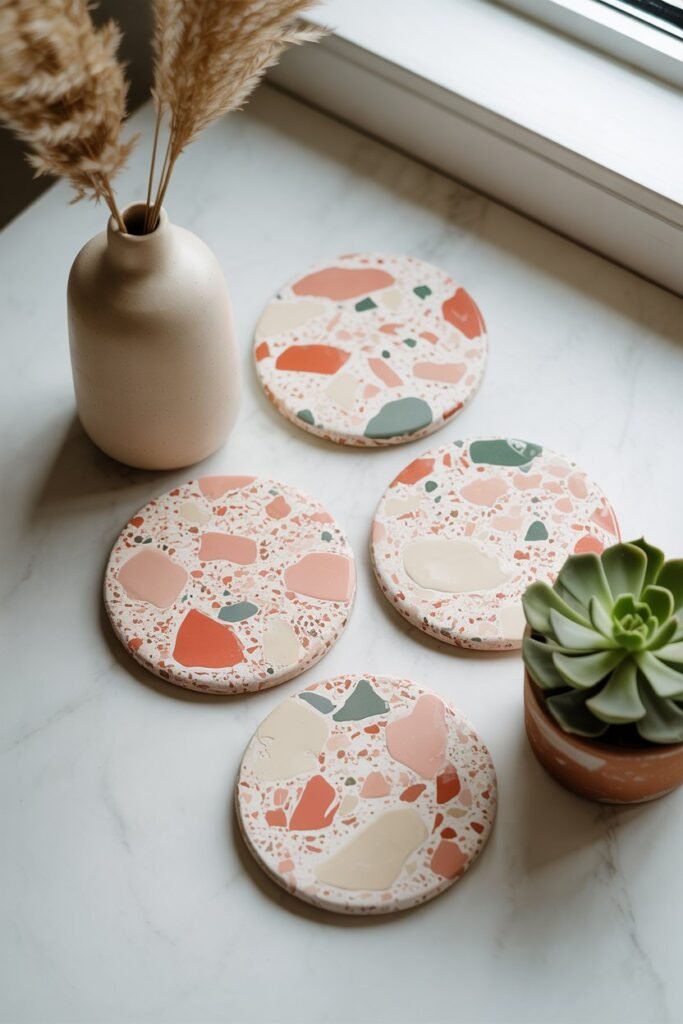
Terrazzo designs feature tiny colorful clay pieces embedded into a base color.
This trendy design works beautifully in modern interiors.
Minimalist Neutral Coasters
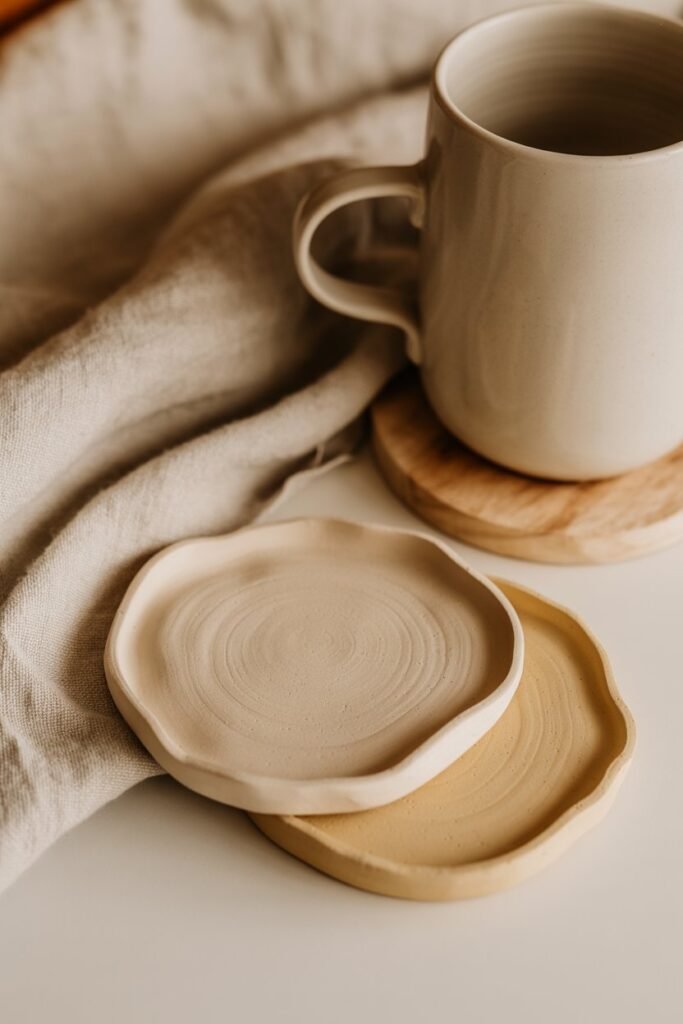
Neutral tones like cream, beige, taupe, and white create a calming sophisticated look.
These coasters pair perfectly with Scandinavian decor.
Floral Clay Coasters
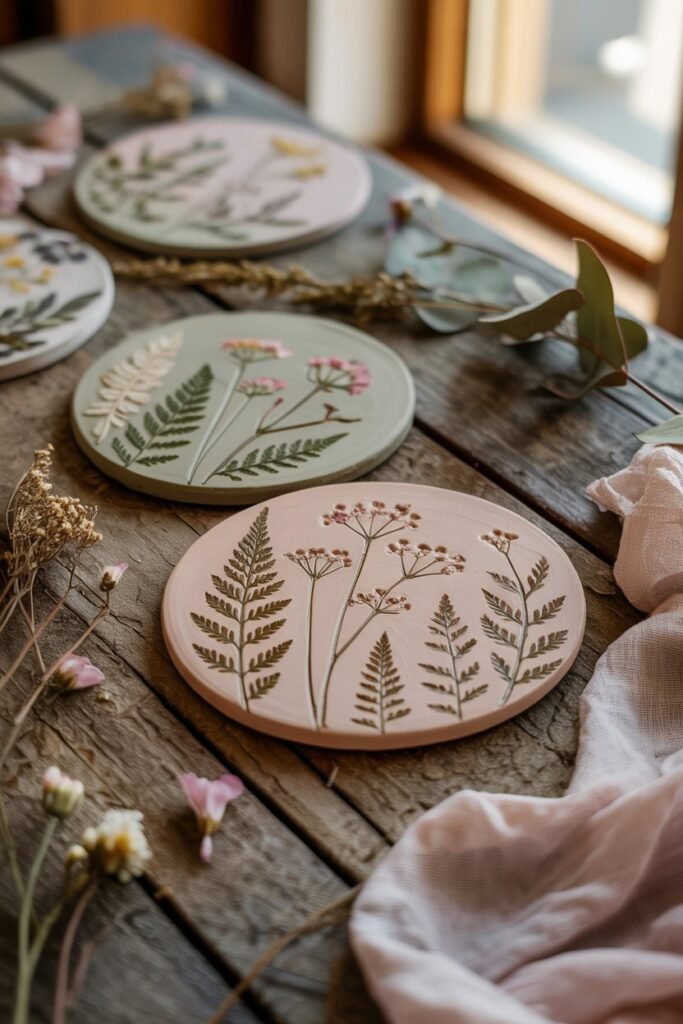
Press dried flowers or leaf patterns into the clay for a soft botanical style.
These make wonderful spring and summer decor pieces.
Gold Foil Coasters
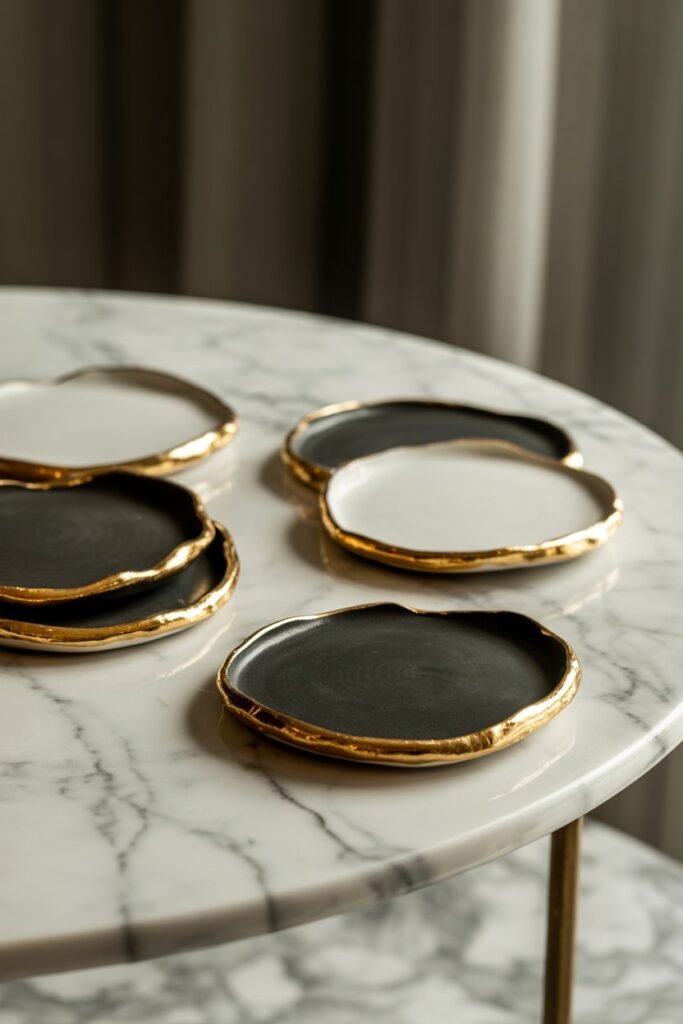
Adding gold leaf accents creates a luxurious high-end appearance.
Gold edges look especially beautiful on white or black coasters.
Personalized Name Coasters
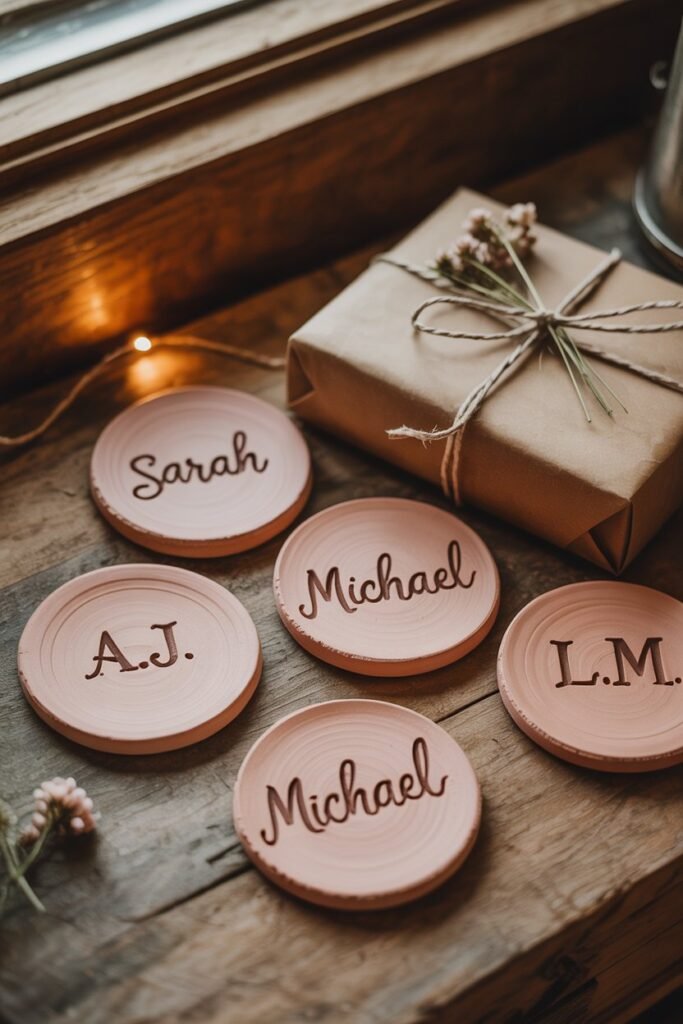
Stamp names, initials, or short quotes into the clay before drying.
These are perfect for gifts and weddings.
Rustic Textured Coasters
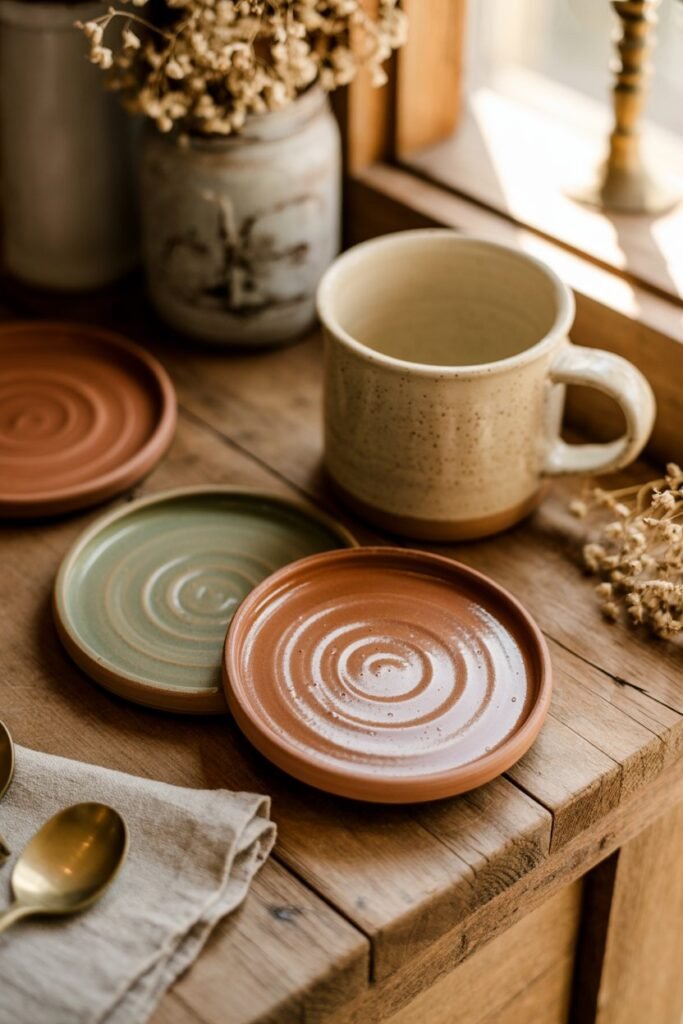
Use rough textures and earthy tones for a farmhouse-inspired design.
Rustic coasters work beautifully in cozy interiors.
Best Paint Colors for Clay Coasters
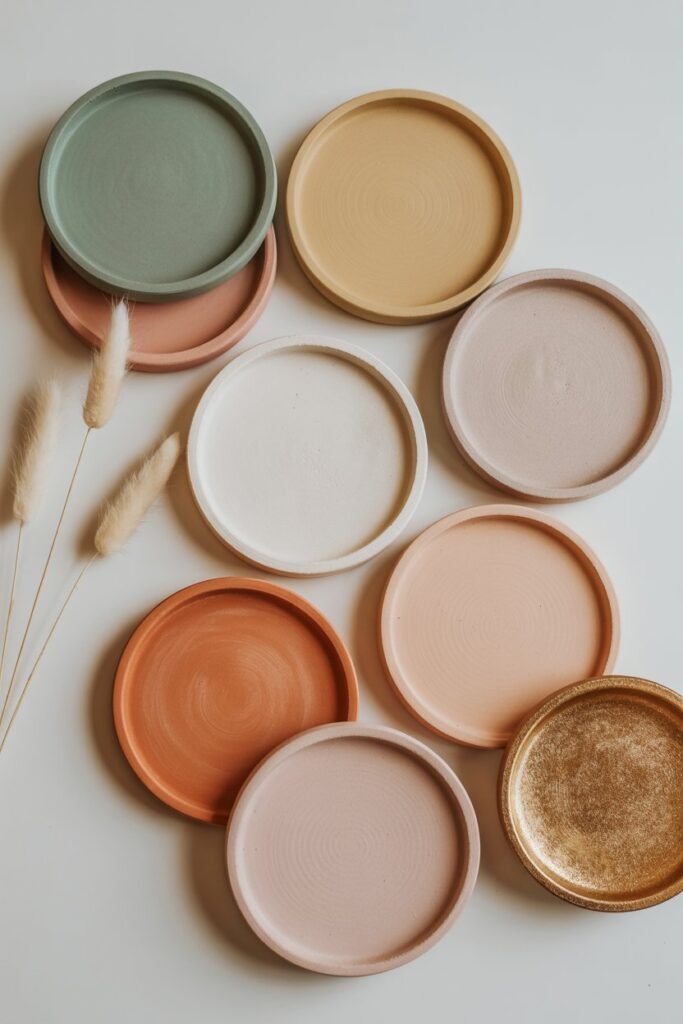
Choosing the right colors can completely transform your coaster design.
Popular Modern Color Combinations
- White and gold
- Black and beige
- Sage green and cream
- Terracotta and white
- Dusty pink and brown
- Gray marble effect
- Navy blue and gold
Soft earthy colors are especially popular in modern handmade decor trends.
How to Waterproof Clay Coasters
One of the biggest concerns with DIY clay coasters is water resistance.
Without sealing, moisture can damage the clay over time.
Tips for Waterproofing
- Use waterproof sealant
- Apply multiple coats
- Let each coat dry completely
- Seal both top and bottom
- Consider resin for extra durability
Resin-coated coasters often have a glossy professional finish.
Common Mistakes to Avoid
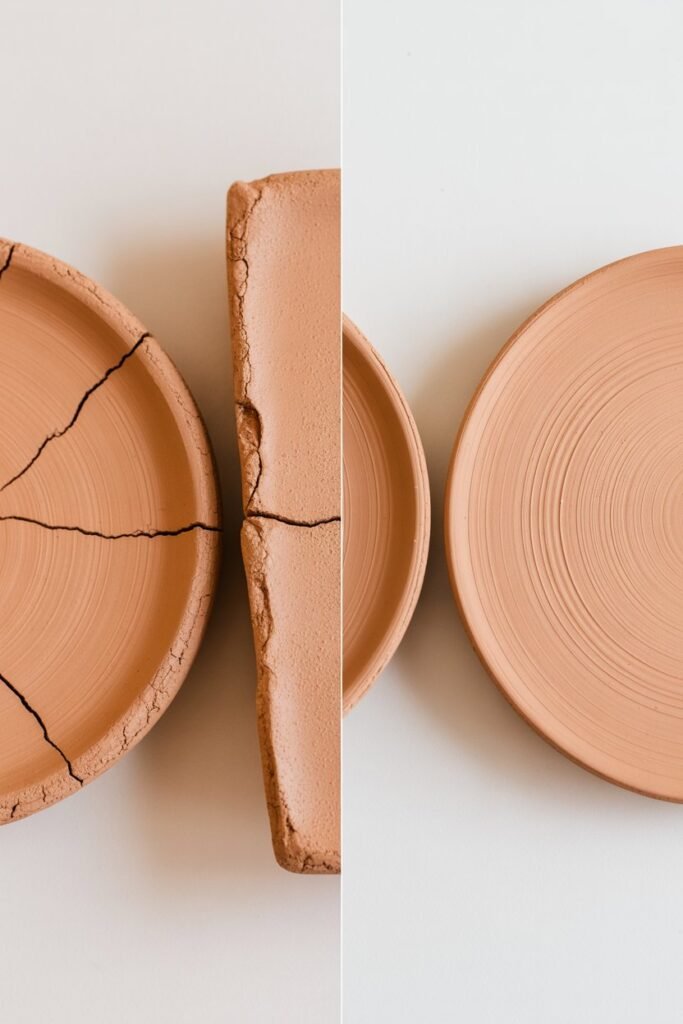
Even beginners can achieve beautiful results by avoiding these common mistakes.
Making the Clay Too Thin
Thin clay may crack during drying.
Always keep enough thickness for durability.
Skipping the Sealant
Unsealed coasters absorb moisture quickly.
Always finish with a protective coating.
Uneven Rolling
Uneven thickness leads to warping.
Roll the clay evenly from all sides.
Overbaking Polymer Clay
Too much heat can burn or discolor the clay.
Follow package instructions carefully.
Rushing the Drying Process
Allow proper drying time to prevent cracks.
Patience improves the final result.
DIY Clay Coasters as Gifts
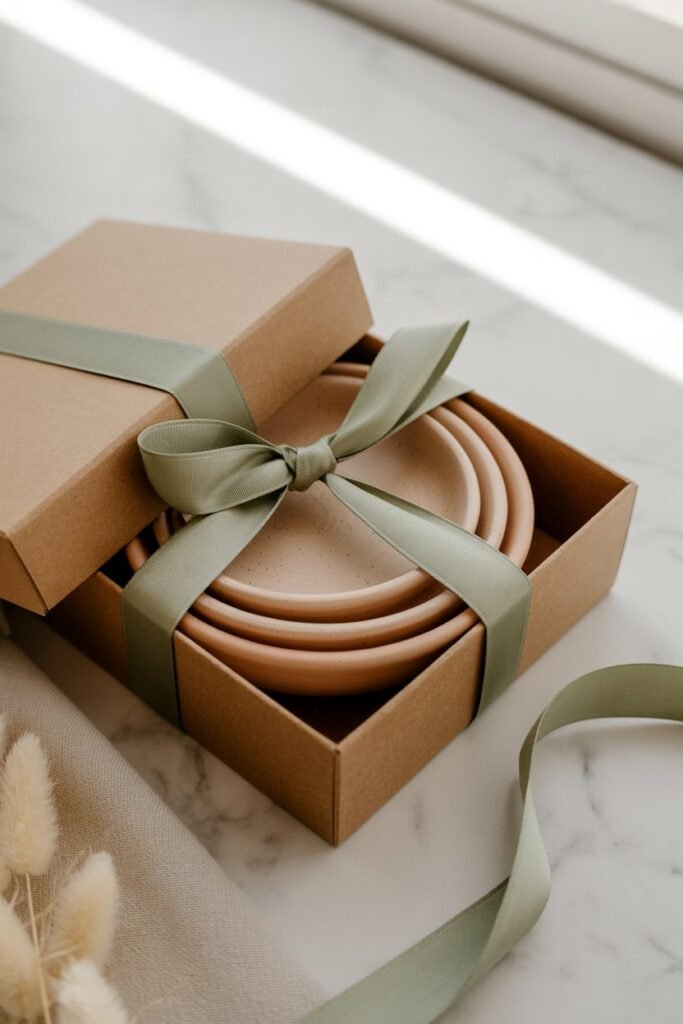
Handmade clay coasters make thoughtful and affordable gifts.
They are perfect for:
- Housewarming gifts
- Birthday presents
- Wedding favors
- Christmas gifts
- Mother’s Day gifts
- Handmade craft markets
You can package them beautifully with ribbon, kraft paper, or gift boxes.
Personalized designs make them even more special.
How to Store Clay Coasters
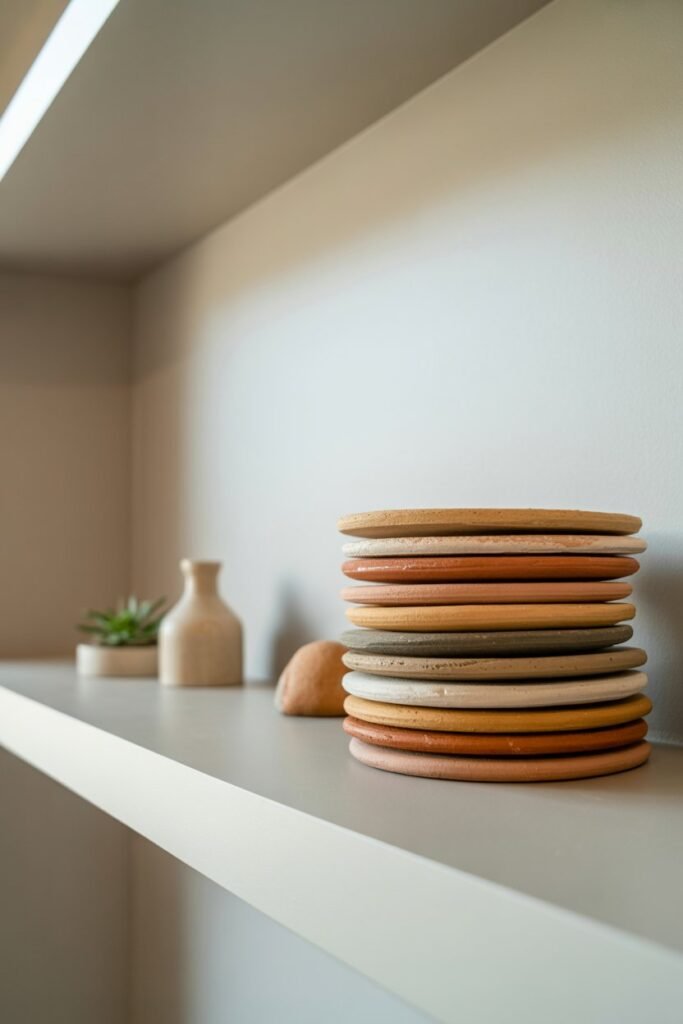
To keep your coasters looking beautiful:
- Store in dry areas
- Avoid extreme heat
- Clean gently with damp cloth
- Do not soak in water
- Reapply sealant if needed
Proper care helps handmade coasters last longer.
Can You Sell Handmade Clay Coasters?
Absolutely. Clay coasters are popular handmade products for small craft businesses.
Many people sell clay coasters on:
- Etsy
- Craft fairs
- Instagram shops
- Local markets
- Handmade decor websites
To stand out:
- Use unique designs
- Create matching sets
- Invest in good photography
- Offer personalized options
- Package products professionally
Handmade home decor remains a strong market trend.
Frequently Asked Questions
What Is the Best Clay for Beginners?
Air dry clay is the easiest option for beginners because it does not require baking.
How Thick Should a Clay Coaster Be?
About 1/4 inch thick is ideal for durability.
Do Clay Coasters Need Sealant?
Yes. Sealant protects against moisture and damage.
Can I Use Acrylic Paint on Clay?
Yes. Acrylic paint works very well on both air dry and polymer clay.
How Long Do Air Dry Clay Coasters Take to Dry?
Usually between 24 and 72 hours depending on thickness.
Can Clay Coasters Handle Hot Drinks?
Yes, especially when properly sealed.
However, avoid extreme direct heat with delicate designs.
Final Thoughts
Learning how to make a clay coaster is a fun and rewarding DIY project that combines creativity with practicality.
Whether you prefer minimalist aesthetics, colorful artistic patterns, rustic textures, or elegant marble effects, handmade clay coasters allow endless customization possibilities.
This simple craft is beginner-friendly, affordable, and perfect for decorating your home or creating thoughtful handmade gifts.
With the right materials, patience, and creativity, you can create stunning coasters that look stylish and professional.
The best part about DIY clay coasters is that every piece becomes unique.
No two handmade coasters are ever exactly the same, which makes them even more beautiful and personal.
Start experimenting with shapes, textures, and colors, and you may discover an enjoyable hobby that turns into a creative passion or even a small business opportunity.