DIY Air Dry Clay Projects That Make Perfect Gifts
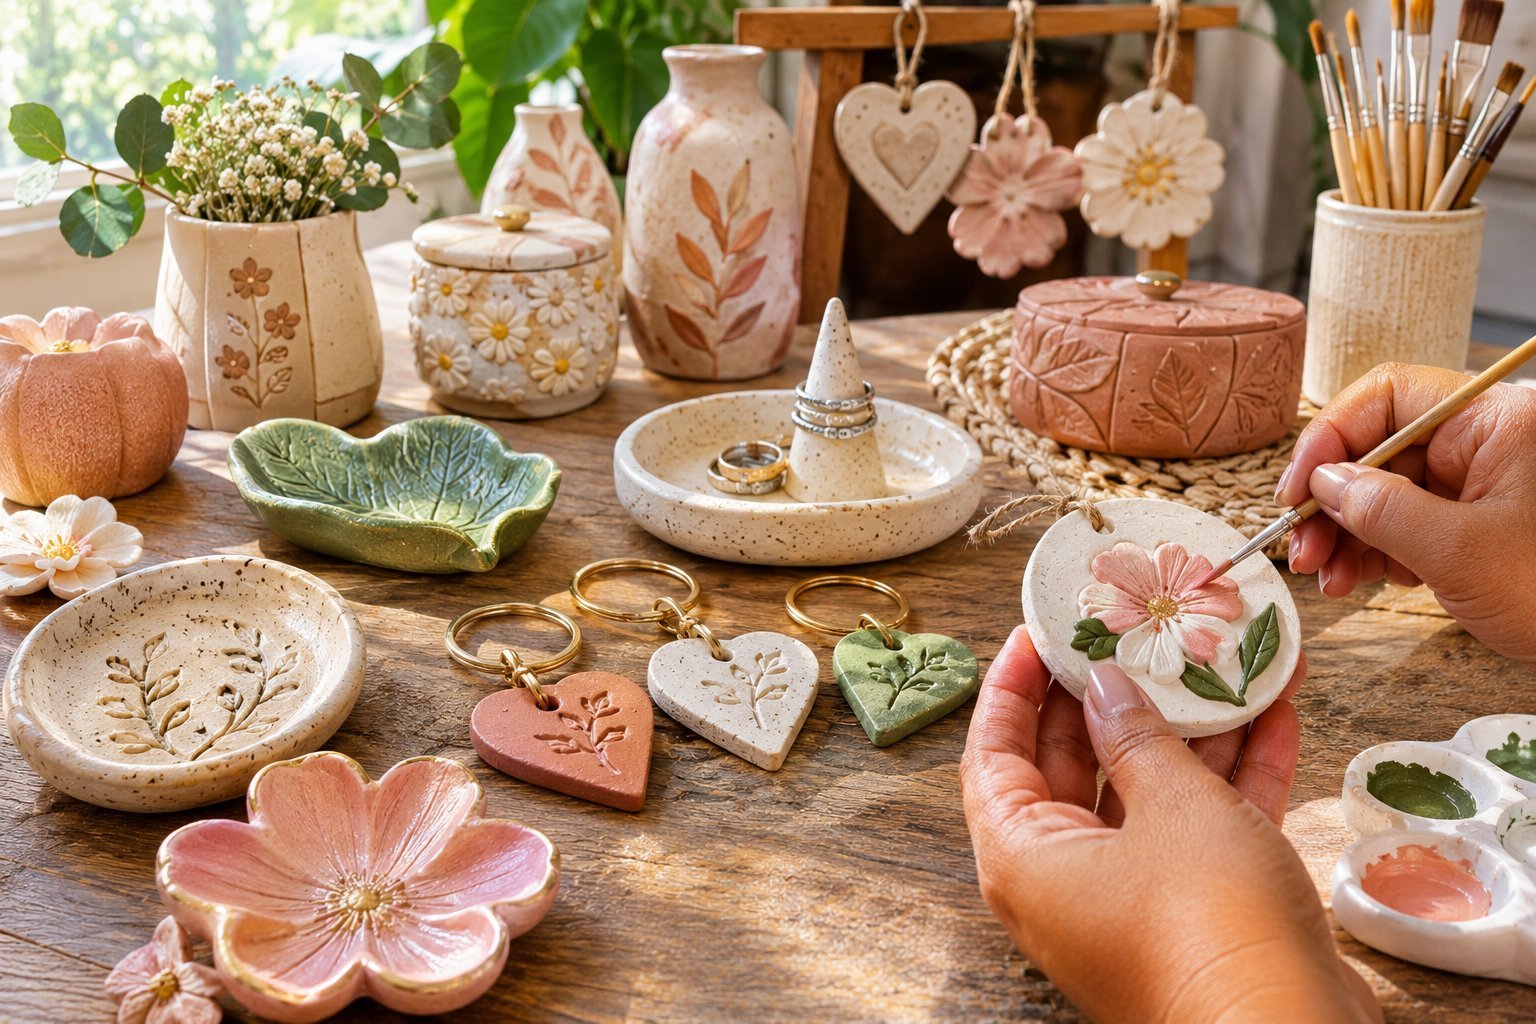
Handmade gifts have a special way of making people feel appreciated, especially when someone has taken the time to create something just for them.
You do not need expensive equipment, a pottery wheel, or a professional studio to make something beautiful. With a little air dry clay, a few basic tools, and some creativity, you can create thoughtful gifts that look surprisingly elegant.
One thing I love about DIY clay projects is how many different things you can make from such a simple material.

A small piece of clay can become a personalized jewelry dish, a decorative candle holder, a beautiful keepsake, or even a handmade ornament for someone special.
You can also experiment with different shapes, textures, and colors to give each project its own personality.
Whether you are preparing a birthday present, looking for affordable Christmas gift ideas, or simply want to make something meaningful for a friend, these DIY air dry clay projects are worth trying.
Most require only a few supplies, and you can customize them to suit different tastes and occasions.
Why Air Dry Clay Is Perfect for Handmade Gifts
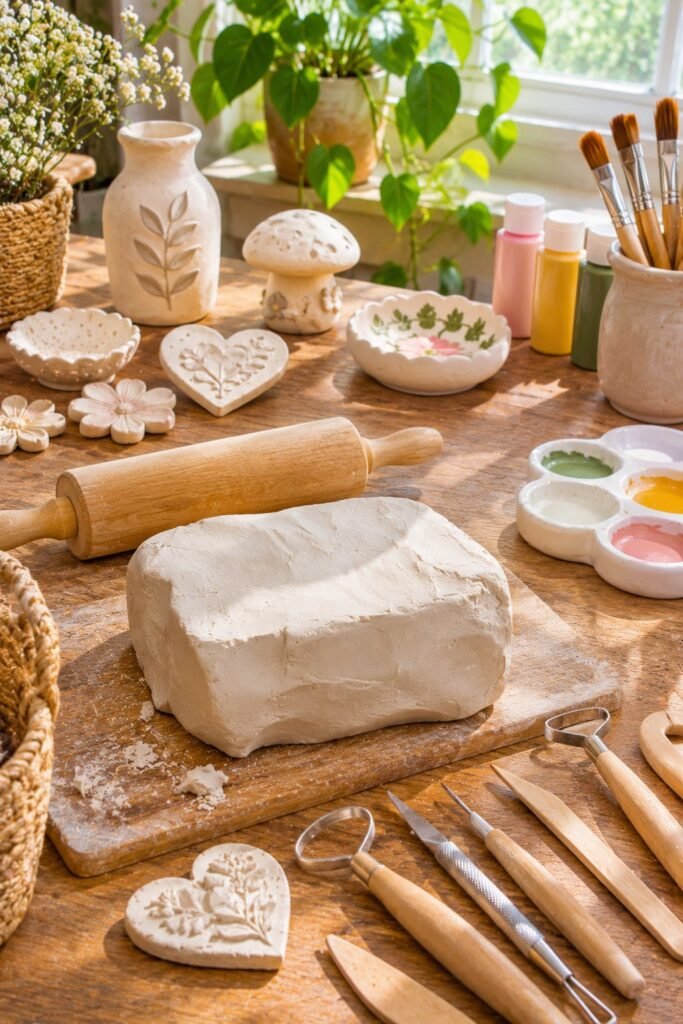
Air dry clay is a convenient material for making handmade gifts because it does not require a kiln or specialized pottery equipment. Unlike traditional pottery clay, many air dry clay products harden naturally when left exposed to air.
This makes it particularly useful for beginners and people who enjoy small creative projects at home.
Another advantage is how easily you can personalize your creations. You can press patterns into the surface, carve initials, create different shapes, paint finished pieces, or experiment with decorative finishes.
For example, a simple handmade jewelry dish can become much more meaningful when you add someone’s initials or choose colors that match their home.
Air dry clay is also relatively affordable, especially when compared with buying ready-made decorative gifts. A single package can provide enough material for several small projects, depending on their size and thickness.
A few things to know before starting:
- Different air dry clay brands have different drying times, so always follow the manufacturer’s instructions.
- Thicker projects generally take longer to dry than thinner pieces.
- Clay can shrink slightly as it dries, so avoid making delicate designs unnecessarily thin.
- Sanding after drying can help smooth rough edges.
- Most air dry clay is not waterproof or food safe unless the manufacturer specifically confirms otherwise. A decorative sealer does not automatically make it suitable for food contact.
Essential Supplies for DIY Air Dry Clay Projects
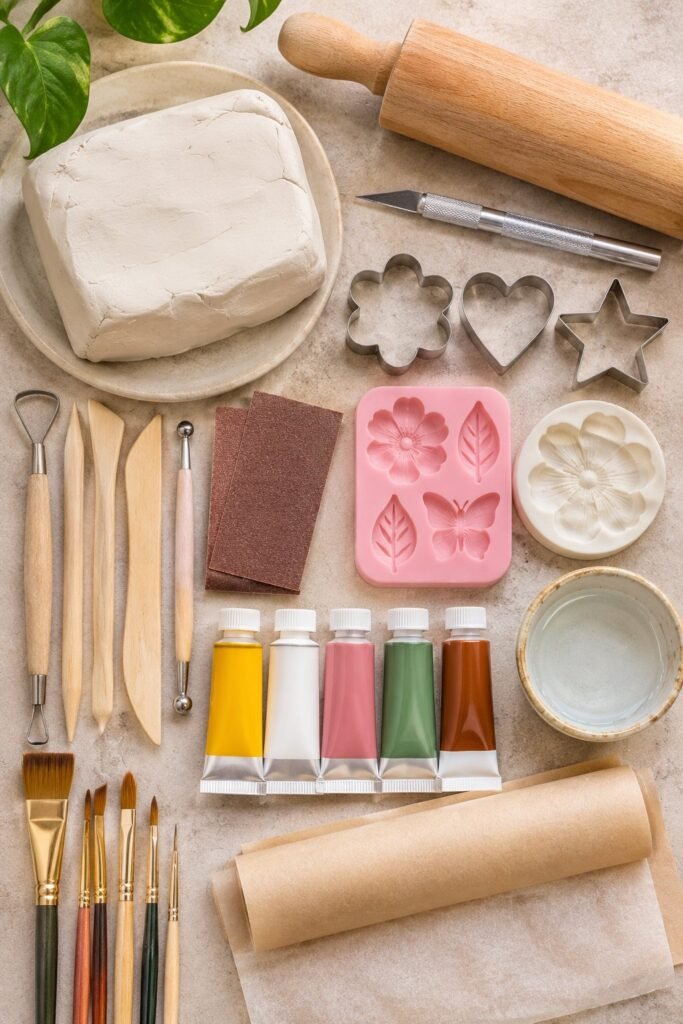
You do not need a large collection of tools to get started. Many useful supplies are probably already available around your home.
Here are some materials worth gathering before beginning.
| Supply | What it is used for |
|---|---|
| Air dry clay | The main material for your projects |
| Rolling pin | Flattening clay evenly |
| Craft knife | Cutting simple shapes |
| Cookie cutters | Creating consistent designs |
| Acrylic paint | Adding color after drying |
| Paintbrushes | Applying paint and details |
| Sandpaper | Smoothing rough edges |
| Silicone molds | Creating decorative shapes |
| Parchment paper | Providing a clean working surface |
| Clay sculpting tools | Adding texture and details |
| Decorative sealer | Protecting suitable finished pieces |
You do not have to purchase everything at once. A rolling pin, a basic cutting tool, some acrylic paint, and a package of air dry clay are enough to begin several beginner-friendly projects.
15 DIY Air Dry Clay Projects That Make Perfect Gifts
1. Handmade Air Dry Clay Jewelry Dishes
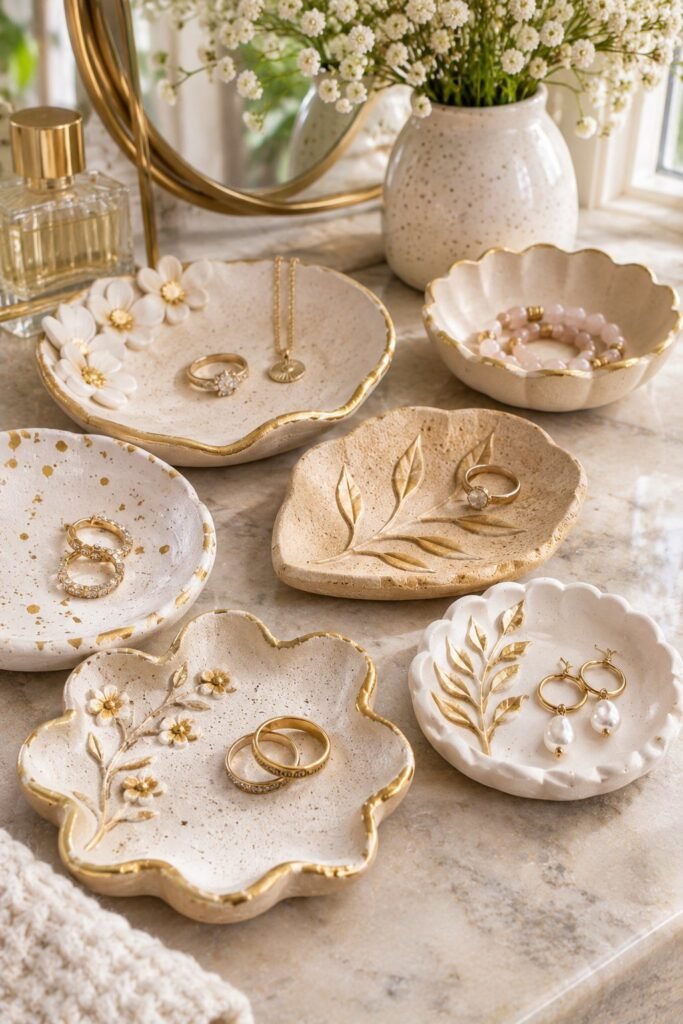
A handmade jewelry dish is one of the easiest and most useful gifts you can make with air dry clay.
It is perfect for someone who enjoys wearing rings, earrings, bracelets, or necklaces and needs somewhere to keep small accessories.
I particularly like this project because you can create several different designs using the same basic technique. You can make a simple round dish, an irregular organic shape, or a scalloped design with gently curved edges.
What you need:
- Air dry clay
- Rolling pin
- Small bowl
- Craft knife
- Sandpaper
- Acrylic paint
- Paintbrush
- Decorative sealer suitable for the clay
How to make it:
- Take a small amount of clay and knead it until it becomes smooth and workable.
- Roll the clay into an even sheet, approximately 5 to 7 millimeters thick.
- Cut out your preferred shape using a bowl, cookie cutter, or craft knife.
- Gently lift the edges and place the clay inside a shallow bowl to create a curved dish.
- Leave it to dry according to the manufacturer’s instructions.
- Once completely dry, carefully sand the edges to remove rough areas.
- Paint the dish in your preferred color and allow the paint to dry.
- Add a suitable decorative finish if desired.
Gift idea: Personalize the bottom with the recipient’s initials or create a soft neutral design using beige, cream, or white paint.
Remember that air dry clay jewelry dishes should be used for dry accessories rather than water or food.
2. Personalized Clay Keychains
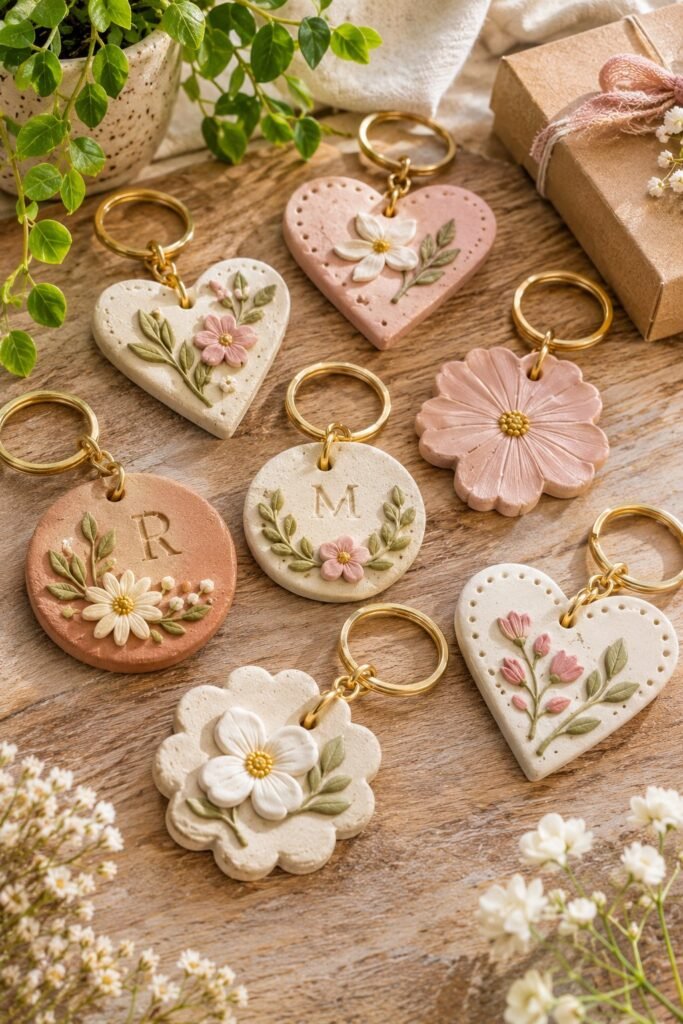
Personalized keychains are lovely small gifts because they are practical, inexpensive, and easy to customize.
You can make them in different shapes, including hearts, circles, stars, flowers, initials, and simple geometric designs.
They are especially suitable for birthday gifts, friendship presents, teacher appreciation gifts, or small handmade additions to gift baskets.
What you need:
- Air dry clay
- Rolling pin
- Cookie cutters
- Keychain hardware
- Acrylic paint
- Small drill or suitable hole-making tool
- Paintbrushes
How to make it:
- Roll out the clay into an even sheet.
- Cut out your preferred shapes.
- Make a small hole near the top of each shape before the clay dries.
- Add initials, simple patterns, or decorative details.
- Allow the pieces to dry completely.
- Smooth the edges with fine sandpaper.
- Paint and decorate the finished pieces.
- Attach the keychain hardware after everything is completely dry.
Gift idea: Make matching keychains for two friends or create one featuring someone’s initials and favorite color.
Make sure the hole is large enough for the hardware but not so close to the edge that the clay becomes fragile.
3. Air Dry Clay Candle Holders
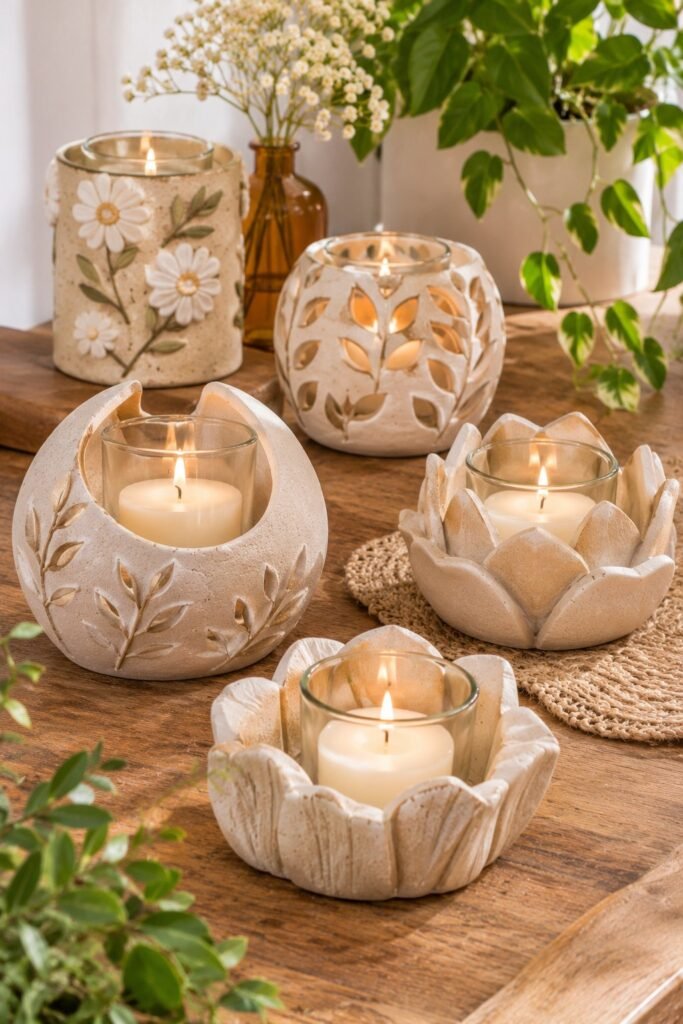
A handmade candle holder can make a beautiful decorative gift, particularly for someone who enjoys cozy interiors and simple home accessories.
You can create different designs, from small rounded holders to sculptural candle stands with textured surfaces.
However, there is an important safety consideration with this project. Air dry clay is not automatically heat resistant or suitable for direct contact with an open flame.
For a safer decorative gift, design the clay holder to accommodate a removable, appropriately sized glass candle insert. Keep the clay away from direct flame and follow the candle manufacturer’s safety instructions.
What you need:
- Air dry clay
- Rolling pin
- Sculpting tools
- Glass candle insert
- Acrylic paint
- Suitable decorative sealer
How to make it:
- Knead the clay until smooth.
- Shape a sturdy base around the dimensions of your glass insert.
- Build up the sides without making the opening too narrow.
- Smooth the surface and add decorative patterns.
- Allow the piece to dry completely.
- Sand any rough edges.
- Paint the outside in a color that complements the recipient’s home.
- Place the removable glass insert inside only after the clay is completely dry.
Gift idea: Create a pair of matching holders in warm beige or soft white for someone who enjoys minimalist home decor.
4. Handmade Clay Ring Holders
If you want something small, attractive, and practical, a clay ring holder is a wonderful option.
These little accessories are designed to keep rings together while adding a decorative touch to a bedside table, dresser, or vanity.
You can make a simple cone-shaped holder or experiment with more artistic shapes.
What you need:
- Air dry clay
- Rolling pin
- Sculpting tools
- Sandpaper
- Acrylic paint
- Paintbrush
How to make it:
- Take a small portion of clay and roll it into a ball.
- Shape the ball into a cone with a slightly wider base.
- Smooth the surface using your fingers and a little water if recommended for your clay.
- Add small decorative details if desired.
- Leave it to dry completely.
- Sand the base so it sits evenly.
- Paint it in a color of your choice.
Gift idea: Make two or three ring holders in complementary colors and package them together as a small jewelry gift set.
5. DIY Air Dry Clay Photo Frames
A handmade photo frame is a thoughtful gift because it gives someone a place to display a favorite memory.
You can make the frame simple and modern or decorate it with flowers, leaves, textured patterns, or small sculpted details.
This project is especially lovely for birthdays, anniversaries, Mother’s Day, and family celebrations.
What you need:
- Air dry clay
- Rolling pin
- Craft knife
- Small sculpting tools
- Acrylic paint
- A small photograph
- Suitable backing material or frame support
How to make it:
- Roll the clay into an even sheet.
- Cut two matching shapes for the frame’s front and backing, leaving an opening for the photograph.
- Create a smaller opening in the front piece.
- Add decorative details around the border.
- Create a stable stand or suitable support for the finished frame.
- Allow all clay components to dry completely.
- Sand and paint the pieces.
- Assemble the frame using an appropriate adhesive and add the photograph.
Gift idea: Include a printed photograph of a special memory to make the gift more personal.
DIY Air Dry Clay Projects That Make Perfect Gifts (Part 2)
6. Mini Air Dry Clay Flower Vases
Mini clay vases are beautiful handmade gifts for anyone who enjoys decorating their home with flowers and simple accessories.
What makes this project interesting is that you do not need to create a perfectly shaped vase. Slightly uneven edges, organic curves, and textured surfaces can give handmade pieces a lovely artistic appearance.
You can make small decorative vases in different shapes and paint them in neutral colors to complement modern interiors.
What you need:
- Air dry clay
- Rolling pin
- Sculpting tools
- Small container for shaping
- Acrylic paint
- Paintbrush
- Sandpaper
How to make it:
- Knead your clay until it becomes soft and smooth.
- Roll it into a thick sheet or use a hand-building technique to form the walls.
- Shape the clay around a small mold to create your preferred vase design.
- Carefully join the edges and smooth the seams using the method recommended for your clay.
- Create a stable base and ensure the vase can stand upright.
- Leave it to dry completely, following the manufacturer’s instructions.
- Sand any rough areas and paint the outside.
- Add decorative patterns or a simple textured finish.
Gift idea: Create a collection of two or three miniature decorative vases in complementary colors.
One important thing to remember is that ordinary air dry clay is porous and may soften or deteriorate when exposed to water. These vases are best used for dried flowers or decorative stems rather than fresh flowers in water.
7. Handmade Clay Trinket Boxes
A small trinket box is another lovely project because it combines decoration with practical storage.
It can be used to keep earrings, rings, small accessories, or other personal belongings. You can make the design simple or add decorative details that make it look more like a boutique gift.
I particularly like the idea of creating a small round box with a separate lid. It looks elegant without requiring complicated tools.
What you need:
- Air dry clay
- Rolling pin
- Small bowl or container for shaping
- Sculpting tools
- Sandpaper
- Acrylic paint
- Suitable adhesive if needed
How to make it:
- Roll out a portion of clay into an even sheet.
- Shape the clay around a small container to form the base and sides.
- Smooth the edges and make sure the box has a stable bottom.
- Create a separate flat piece for the lid.
- Shape a small decorative knob from leftover clay.
- Allow all pieces to dry completely.
- Sand the edges until the lid fits comfortably over the base.
- Paint the box and add your preferred decorative details.
Gift idea: Personalize the lid with the recipient’s initials, a small flower design, or a simple geometric pattern.
Make sure the lid is not too tight. Air dry clay can shrink slightly during drying, so it is worth checking the fit as the pieces dry.
8. DIY Air Dry Clay Coasters
Handmade clay coasters are practical gifts for people who enjoy decorating their coffee tables, dining areas, or home offices.
You can create round, square, oval, or irregularly shaped designs. The surface can also be decorated with pressed leaves, simple patterns, or painted geometric details.
What you need:
- Air dry clay
- Rolling pin
- Round or square cookie cutter
- Sculpting tools
- Sandpaper
- Acrylic paint
- Decorative sealer
How to make them:
- Knead the clay until smooth.
- Roll it into a sheet of even thickness.
- Cut out several coaster shapes using your preferred cutter.
- Add decorative patterns using sculpting tools or textured materials.
- Smooth the edges with your fingers.
- Allow the coasters to dry completely.
- Sand rough edges and paint the surfaces.
- Apply a suitable decorative finish according to the manufacturer’s instructions.
Gift idea: Make a set of four matching coasters and package them with a simple ribbon.
One thing to keep in mind is that air dry clay is not automatically waterproof, heat resistant, or suitable for holding hot drinks directly. Use these as decorative accessories unless the specific clay and finishing products are confirmed suitable for the intended use.
9. Personalized Clay Gift Tags
If you enjoy wrapping presents beautifully, handmade clay gift tags are a simple project worth trying.
Instead of purchasing ordinary paper tags, you can create small clay decorations that make gifts feel more personal.
These tags can also be kept as little keepsakes after the present has been opened.
What you need:
- Air dry clay
- Rolling pin
- Cookie cutters
- Wooden skewer or suitable hole-making tool
- Acrylic paint
- Ribbon or twine
- Small letter stamps
How to make them:
- Roll the clay into a thin, even sheet.
- Cut out small shapes such as hearts, circles, stars, or flowers.
- Make a small hole near the top of each tag.
- Press initials, short names, or simple decorative patterns into the surface.
- Leave the tags to dry completely.
- Sand the edges if necessary.
- Paint them in colors that complement the gift wrapping.
- Thread a ribbon or piece of twine through the hole.
Gift idea: Create personalized tags for Christmas presents, wedding favors, birthday gifts, or baby shower packages.
You can also make several designs at once and keep them ready for future occasions.
10. Air Dry Clay Floral Wall Decorations
Clay flowers can make beautiful decorative gifts, especially for someone who appreciates handmade artwork and nature-inspired home accessories.
You can create small individual flowers, leaves, or a complete decorative arrangement that can be displayed on a wall or shelf.
The best part is that you can experiment with different flower shapes without needing advanced sculpting skills.
What you need:
- Air dry clay
- Rolling pin
- Small flower cutters
- Sculpting tools
- Acrylic paint
- Paintbrush
- Suitable adhesive or mounting materials
How to make them:
- Roll the clay into a thin, even sheet.
- Cut out flower and leaf shapes.
- Use sculpting tools to create veins, petals, and other details.
- Gently shape the petals to give each flower a natural appearance.
- Allow the pieces to dry completely.
- Sand any rough edges.
- Paint the flowers and leaves in your chosen colors.
- Arrange the finished pieces into a decorative composition using suitable mounting materials.
Gift idea: Make a small floral wall arrangement using cream, soft pink, and muted green colors.
Keep the individual pieces relatively lightweight and use appropriate mounting hardware for the wall surface.
11. DIY Air Dry Clay Christmas Ornaments
Handmade Christmas ornaments are thoughtful gifts because they can become part of someone’s holiday decorations for years.
You can make simple stars, trees, hearts, snowflakes, bells, or personalized shapes.
This is also a good project to complete with family members because everyone can create their own designs.
What you need:
- Air dry clay
- Rolling pin
- Christmas cookie cutters
- Wooden skewer
- Ribbon
- Acrylic paint
- Paintbrushes
- Decorative string
How to make them:
- Roll the clay into an even sheet.
- Cut out different Christmas shapes.
- Create a small hole near the top of each ornament.
- Add patterns, names, initials, or decorative textures.
- Allow the pieces to dry completely.
- Sand the edges to make them smooth.
- Paint the ornaments in festive colors.
- Attach ribbons or string once the pieces are completely dry.
Gift idea: Personalize each ornament with a family member’s name or the year it was made.
You can package several ornaments in a small gift box for a thoughtful Christmas present.
12. Handmade Clay Incense Holders
An incense holder is another creative project for someone who enjoys decorative accessories and relaxing home environments.
You can make a simple flat design or experiment with small sculptural shapes.
However, it is important to use a design appropriate for the type of incense being burned. Ordinary air dry clay is not automatically fireproof or heat resistant.
For safety, use a suitable commercially made heat-resistant insert or holder for the burning end of the incense. The clay should serve as a decorative base and should not be exposed to direct flame or excessive heat.
What you need:
- Air dry clay
- Rolling pin
- Sculpting tools
- Suitable incense holder insert
- Acrylic paint
- Decorative sealer
How to make it:
- Knead the clay until smooth.
- Shape a small flat base with enough thickness to remain stable.
- Create a decorative pattern around the surface.
- Allow the piece to dry completely.
- Sand rough edges.
- Paint the outside in a suitable decorative color.
- Fit the appropriate heat-resistant insert according to its instructions.
Gift idea: Make a minimalist incense holder in beige, cream, or terracotta-inspired colors and pair it with a decorative gift box.
13. Personalized Clay Initial Decorations
Initial decorations are simple to make but can feel surprisingly personal.
You can create someone’s first initial, a pair of initials, or even a complete name using individual clay letters.
These decorations can be displayed on shelves, bedside tables, desks, or other suitable surfaces.
What you need:
- Air dry clay
- Letter templates
- Craft knife
- Rolling pin
- Sculpting tools
- Acrylic paint
- Sandpaper
How to make them:
- Roll the clay into an even sheet.
- Place your chosen letter template over the clay.
- Carefully cut around the outline.
- Smooth the edges and add decorative details.
- Make sure the letter has enough thickness to stand or lie securely.
- Allow it to dry completely.
- Sand and paint the finished piece.
Gift idea: Create a personalized initial decoration for a birthday, wedding, anniversary, or housewarming present.
You can also combine two initials to create a meaningful gift for a couple.
14. Air Dry Clay Leaf-Imprint Decorations
Nature-inspired clay decorations are beautiful because they use the natural patterns found in leaves to create interesting designs.
You can make small decorative plaques, ornaments, or tabletop decorations using leaves from your garden.
The natural veins create patterns that look detailed without requiring complicated sculpting techniques.
What you need:
- Air dry clay
- Fresh leaves with visible veins
- Rolling pin
- Craft knife
- Acrylic paint
- Sandpaper
- Paintbrush
How to make them:
- Collect a few clean leaves with interesting natural patterns.
- Roll your clay into an even sheet.
- Place a leaf gently on the clay surface.
- Roll over it lightly to transfer the vein pattern.
- Carefully remove the leaf.
- Cut the clay into your preferred shape.
- Allow the piece to dry completely.
- Sand the edges and paint if desired.
Gift idea: Create a small collection of botanical decorations using different leaf shapes.
You can also leave the clay in its natural color for a simple, understated finish.
15. Handmade Clay Gift Sets
If you want to make something that feels more complete, combine several smaller projects into one handmade gift set.
This is a lovely way to use leftover clay and create a coordinated collection without starting an entirely new project.
For example, you could combine a jewelry dish, a ring holder, and a personalized keychain into one thoughtful present.
What you need:
- Air dry clay
- Rolling pin
- Basic sculpting tools
- Acrylic paint
- Sandpaper
- Suitable decorative sealer
- Gift box
- Tissue paper or wrapping materials
How to make it:
- Choose two or three small projects that complement one another.
- Decide on a consistent color palette.
- Make each piece using the appropriate technique.
- Allow everything to dry completely.
- Sand and decorate the finished pieces.
- Check that each item is completely dry before packaging.
- Arrange the pieces inside a gift box using tissue paper.
- Add a handwritten note to make the gift more personal.
Gift idea: Create a self-care gift set with a jewelry dish, a ring holder, and a small decorative keepsake.
The advantage of making a gift set is that even simple individual pieces can look more special when presented together.
Tips for Getting the Best Results With Air Dry Clay
Air dry clay is relatively beginner-friendly, but a few simple techniques can make a noticeable difference in the quality of your finished projects.
Keep the Clay at an Even Thickness
When rolling out clay, try to maintain an even thickness throughout the piece.
Uneven sections can dry at different rates, which may increase the risk of warping or cracking.
For small decorative projects, consistency is more important than making everything extremely thin.
Avoid Adding Too Much Water
A little water can help smooth certain types of air dry clay, but adding too much can make the material overly soft and difficult to work with.
Follow the instructions for your particular clay brand and use water sparingly.
Allow Enough Drying Time
One of the most common mistakes beginners make is painting or handling clay before it has dried completely.
The outside may feel dry while the inside still contains moisture.
Allow adequate drying time according to the manufacturer’s instructions, considering the thickness and size of the project.
Sand Rough Edges Carefully
Fine sandpaper can help create a smoother finish once the clay has completely dried.
Work gently, especially around thin edges and delicate decorative details.
Store Unused Clay Properly
Air dry clay can begin drying when exposed to air.
Wrap unused clay tightly according to the manufacturer’s storage instructions and place it in an airtight container where appropriate.
This helps prevent it from becoming difficult to work with.
Choose Suitable Paints and Finishes
Acrylic paint is commonly used to decorate fully dried air dry clay.
A suitable decorative sealer can help protect the finish, but remember that sealing does not automatically make the finished object waterproof, food safe, or heat resistant.
Always check the product instructions before deciding how to use a finished piece.
How to Package Air Dry Clay Gifts Beautifully
Presentation can make a handmade gift feel even more thoughtful.
You do not need expensive wrapping materials. A simple gift box, tissue paper, ribbon, and a handwritten note can create a lovely presentation.
Here are a few ideas:
- Use kraft paper boxes for a natural handmade appearance.
- Wrap delicate pieces individually to prevent scratches.
- Add shredded paper or tissue paper to keep items from moving around.
- Choose ribbons that complement the colors of your clay creations.
- Include a small handwritten card explaining that the item was handmade.
- Add a care note explaining that the item should be kept dry and handled carefully.
If you are giving several pieces together, arrange them so each item has enough space and is protected during transportation.
Final Thoughts on DIY Air Dry Clay Projects That Make Perfect Gifts
Making handmade gifts does not have to be expensive or complicated. With air dry clay and a few basic supplies, you can create beautiful little items that feel personal and meaningful.
What makes these projects particularly enjoyable is the freedom to experiment. You can change the shapes, colors, textures, and decorative details until each piece feels right for the person receiving it.
Whether you choose to make a jewelry dish, a personalized keychain, a decorative vase, or a complete handmade gift set, the important thing is the thought and creativity behind it.
I would recommend starting with one or two simple projects before moving on to more detailed designs. Once you become comfortable working with the clay, you can experiment with different techniques and create gifts for birthdays, holidays, housewarmings, and other special occasions.
Sometimes, the most memorable gifts are not the most expensive ones. They are the little things someone took the time to make especially for you.