How to Make Air Dry Clay Gnomes: Easy Beginner Tutorial

Making air dry clay gnomes is a fun and affordable craft project that can add a little personality to your home. These adorable little decorations are easy to customize, do not require a pottery kiln, and can be made with simple supplies you may already have at home.
Whether you want to decorate a shelf, create seasonal decorations, or make thoughtful handmade gifts, clay gnomes are a lovely project to try.
What I especially like about this craft is how much room it gives you to be creative. You can make traditional gnomes with long pointed hats, fluffy-looking beards, tiny noses, and simple bodies, or experiment with different colors and expressions.
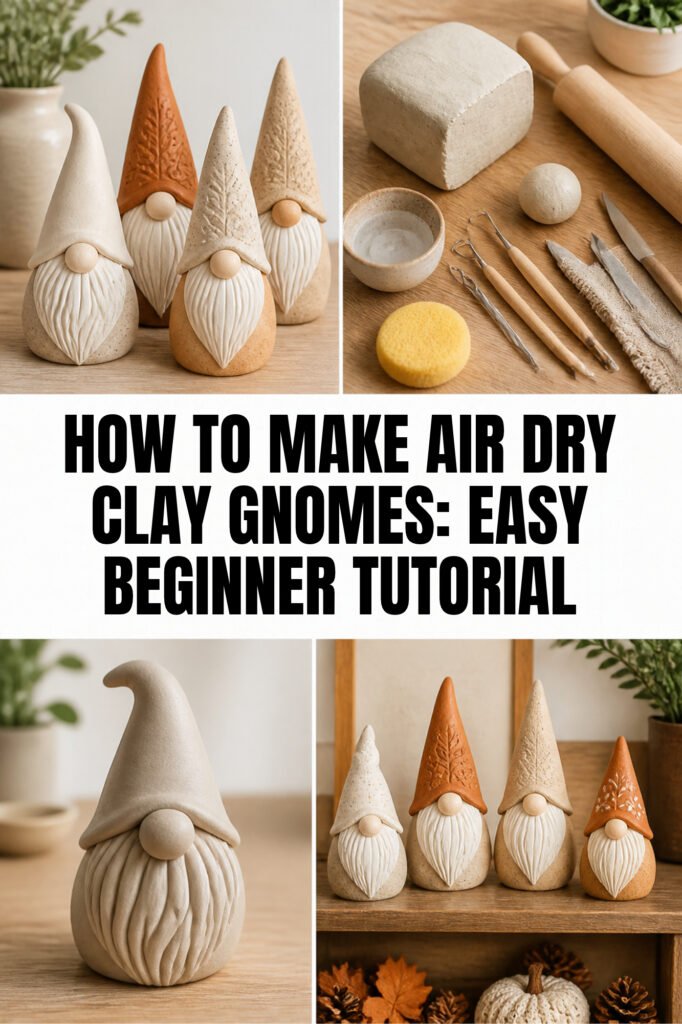
You do not need to be an experienced crafter to get a good result. The shapes are forgiving, and small imperfections can actually give each gnome its own character.
In this beginner-friendly tutorial, I will walk you through the materials, preparation, shaping, decorating, and drying process. I will also share practical tips to help prevent cracks, keep your gnomes stable, and achieve a neat finish without spending too much.
Why Make Gnomes With Air Dry Clay?

Air dry clay is a convenient material for making small decorative crafts because it hardens naturally when exposed to air. Unlike traditional pottery clay, most air dry clay projects do not require a kiln or specialized firing equipment.
This makes it a practical choice for beginners, families doing supervised craft activities, and anyone who enjoys making handmade decorations at home.
Gnomes are particularly suitable because their basic shapes are simple. Most designs can be created using a few rounded forms, a pointed hat, a small nose, and a beard.
There are several reasons to try this project:
- Beginner-friendly: You can make attractive gnomes without advanced sculpting skills.
- Affordable: A small package of air dry clay can produce several decorations, depending on their size.
- Customizable: You can change the colors, hats, beards, and facial details.
- No kiln required: The clay hardens naturally, although drying time depends on thickness and the manufacturer’s instructions.
- Great handmade gifts: Finished gnomes can make thoughtful presents for friends and family.
- Suitable for seasonal decorating: You can create Christmas, autumn, winter, spring, or everyday designs.
The best part is that there is no single correct way to make a clay gnome. You can keep the design simple or add more details as your confidence improves.
Materials You Need to Make Air Dry Clay Gnomes
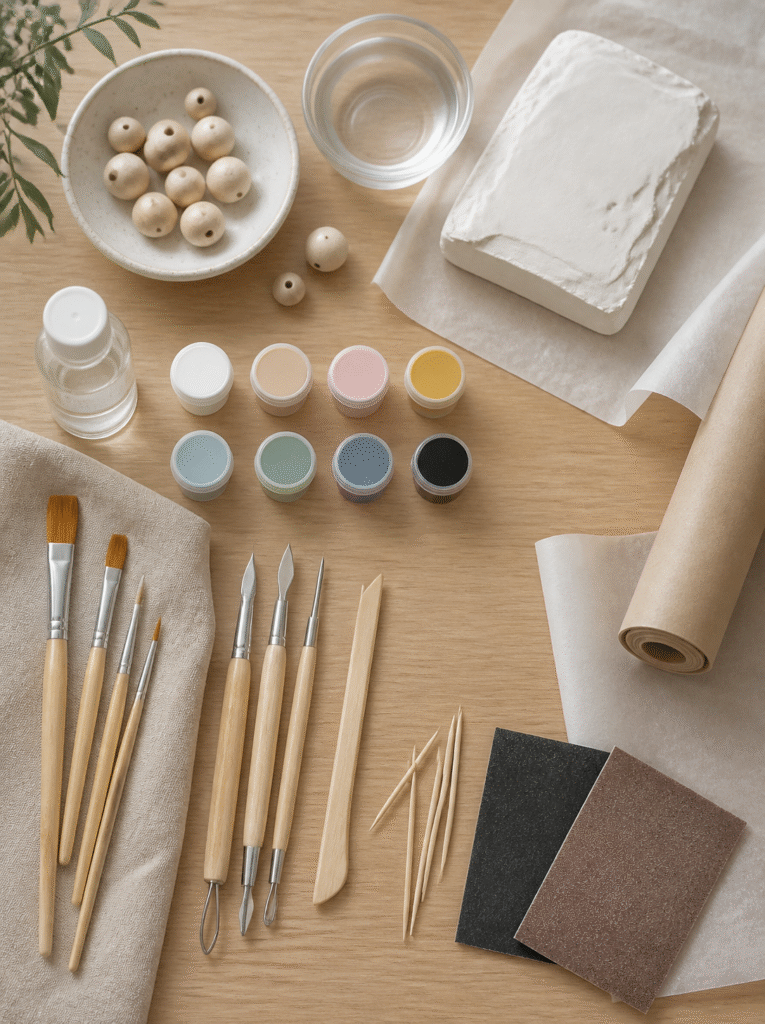
Before starting, gather everything you need so you can work comfortably without constantly stopping to look for supplies.
You do not need an expensive crafting kit. A few basic materials and household tools are enough for a simple beginner project.
Essential Materials
1. Air dry clay
This is the main material for your gnome. Choose a good-quality air dry clay that is easy to shape and suitable for small decorative sculptures.
White air dry clay is a popular choice because it can be painted after drying. Some brands also come in natural or colored varieties.
2. Acrylic paint
Acrylic paint works well for adding color to dry clay decorations. You can use traditional gnome colors such as red, green, white, and brown, or choose softer shades such as cream, beige, sage green, and dusty pink.
3. Small paintbrushes
Have a few different brush sizes available. Larger brushes are useful for painting the hat and body, while smaller brushes help with details.
4. Clay sculpting tools
You can use basic clay tools to shape the beard, smooth the surface, and add small decorative details. If you do not have specialized tools, a wooden craft stick, toothpick, or rounded household tool can help.
5. Water
A small amount of water can help smooth the clay and join separate pieces. Use it sparingly because too much moisture can make the clay difficult to handle.
6. Parchment paper or a craft mat
This gives you a clean working surface and helps prevent the clay from sticking to your table.
Optional Materials
You can also gather a few extra supplies to make your gnomes more decorative.
- Small pieces of felt.
- Twine or thin decorative cord.
- Wooden beads for noses.
- Fine sandpaper for suitable dried clay surfaces.
- Clear protective sealer compatible with your clay and paint.
- Decorative miniature accessories.
- Small pieces of fabric for seasonal details.
For your first project, I would keep the supplies simple. You can always experiment with additional materials once you understand how the clay behaves.
Choose a Simple Gnome Design Before You Start
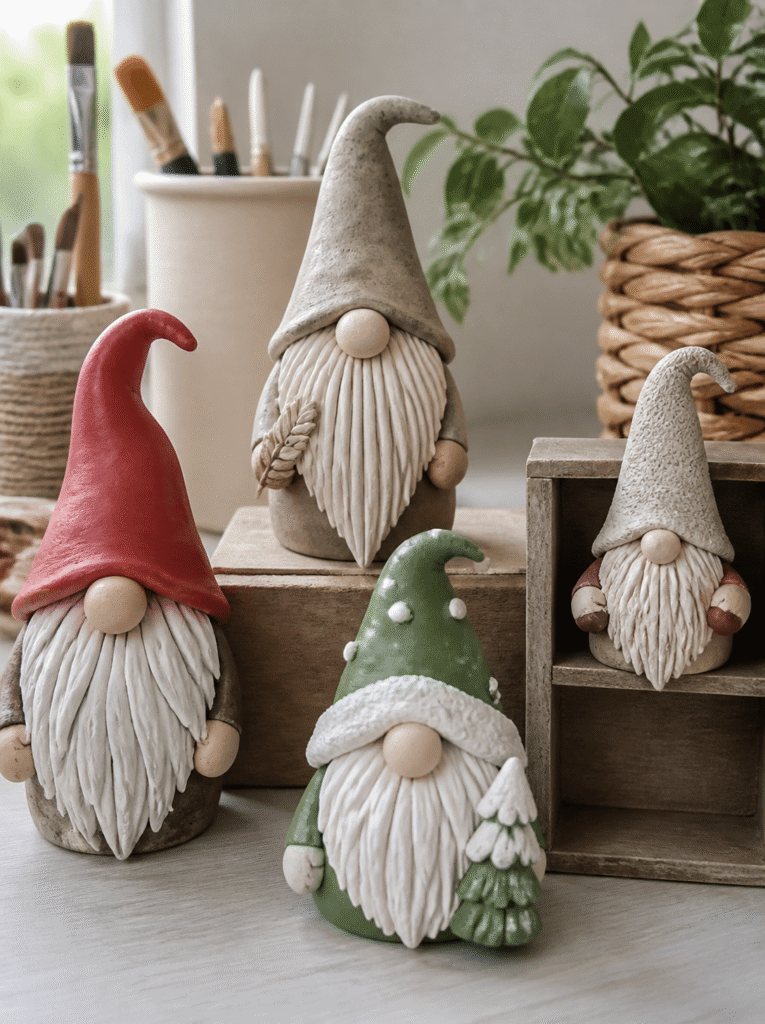
Before opening your clay, decide what kind of gnome you want to make.
This might seem like a small step, but having a basic design in mind makes the process easier. You will know which shapes to prepare and how much clay you need.
For beginners, a simple standing gnome with a pointed hat, rounded body, beard, and small nose is a good starting point.
You could also make a sitting gnome or a small decorative gnome without detailed facial features.
Here are a few design ideas to consider:
Traditional garden-style gnome: A rounded body, long pointed hat, large beard, and small nose.
Christmas gnome: A red or green hat, white beard, and festive decorative details.
Rustic farmhouse gnome: Neutral colors, a soft beige hat, natural-looking beard, and simple finishing.
Miniature shelf gnome: A small rounded body and oversized hat designed to fit on shelves or tabletops.
Seasonal gnome: A design using colors and details inspired by autumn, winter, spring, or another holiday.
If this is your first time working with air dry clay, avoid complicated poses or very thin details. Simple shapes are easier to construct and generally less fragile.
Step 1: Prepare Your Air Dry Clay
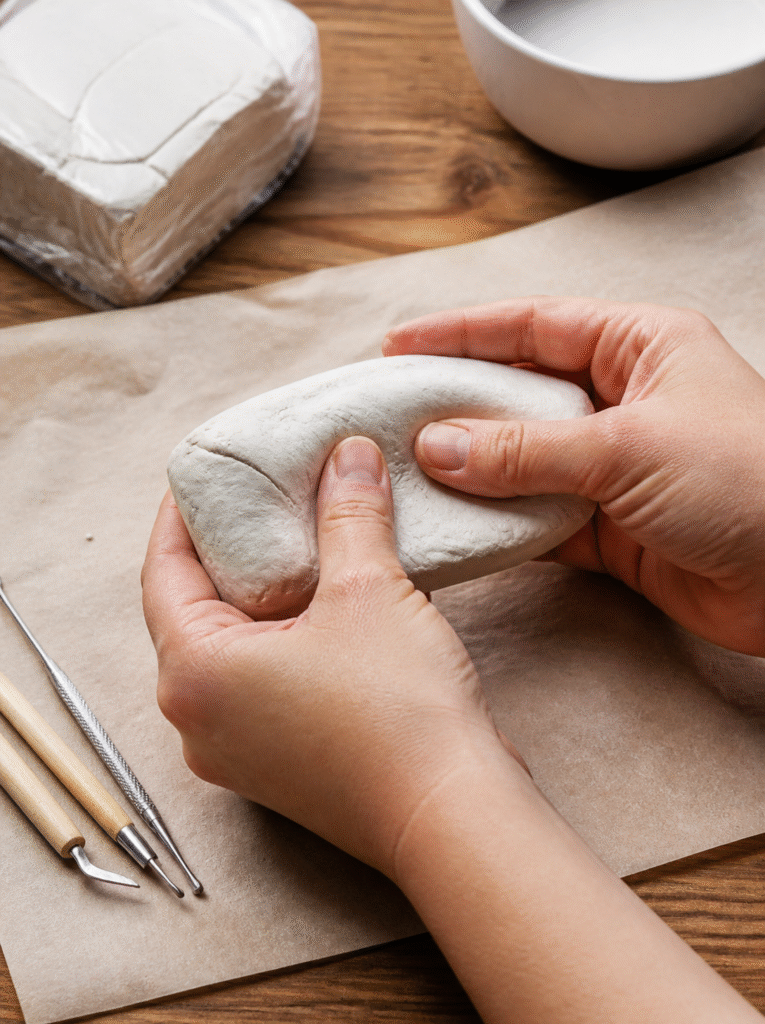
Start by taking a manageable amount of air dry clay from the package.
Before shaping it, knead it gently with your hands until it feels smooth and workable. This helps distribute moisture throughout the clay and makes it easier to form the different parts of your gnome.
If the clay feels slightly dry, follow the manufacturer’s instructions for conditioning it. A tiny amount of water may help with some clay types, but avoid adding too much.
If the clay feels sticky, work on a clean surface and allow it to rest briefly if the product instructions recommend doing so.
Keep the remaining clay covered in an airtight container or its original packaging while you work. Air dry clay begins losing moisture when exposed to air, so leaving the entire package open can cause unnecessary waste.
Beginner tip: Work with small portions rather than trying to shape the entire gnome from one large piece. This gives you more control and makes it easier to correct mistakes.
Step 2: Shape the Gnome’s Body

Take a portion of clay and roll it gently between your hands to form a rounded shape.
You can make the body slightly oval or create a wider base with a narrower top. The wider base is particularly useful because it helps the finished gnome stand upright.
Place the body on your parchment paper or craft mat and check whether it sits evenly.
If the bottom is uneven, gently press it against a flat surface to create a stable base.
You do not need to make the body perfectly smooth. A few natural variations can give the gnome a handmade appearance.
For a traditional design, make the body large enough to support the hat and beard without becoming too top-heavy.
If you want to create several gnomes, experiment with different body sizes. A small collection of gnomes in different heights can look attractive when displayed together.
Step 3: Create the Gnome’s Pointed Hat

The pointed hat is one of the most recognizable parts of a traditional gnome.
Take another portion of clay and roll it into a cone shape. Start with a rounded ball, then gently roll and shape one end until it becomes narrower.
The wider end will sit on top of the body, while the narrow end forms the tip of the hat.
You can bend the tip slightly to one side if you want a softer, playful appearance.
Before attaching the hat, check its size against the body. It should be large enough to create the classic gnome silhouette without making the entire sculpture unstable.
If you are using a separate piece of clay for the hat, lightly score the surfaces where the pieces will join. Add a small amount of water or the joining method recommended by your clay manufacturer, then press the pieces together gently.
Smooth the connection carefully so the hat looks like a natural part of the sculpture.
Helpful tip: Keep the hat reasonably thick. Extremely thin tips can become fragile or break during handling.
Step 4: Make the Gnome’s Beard
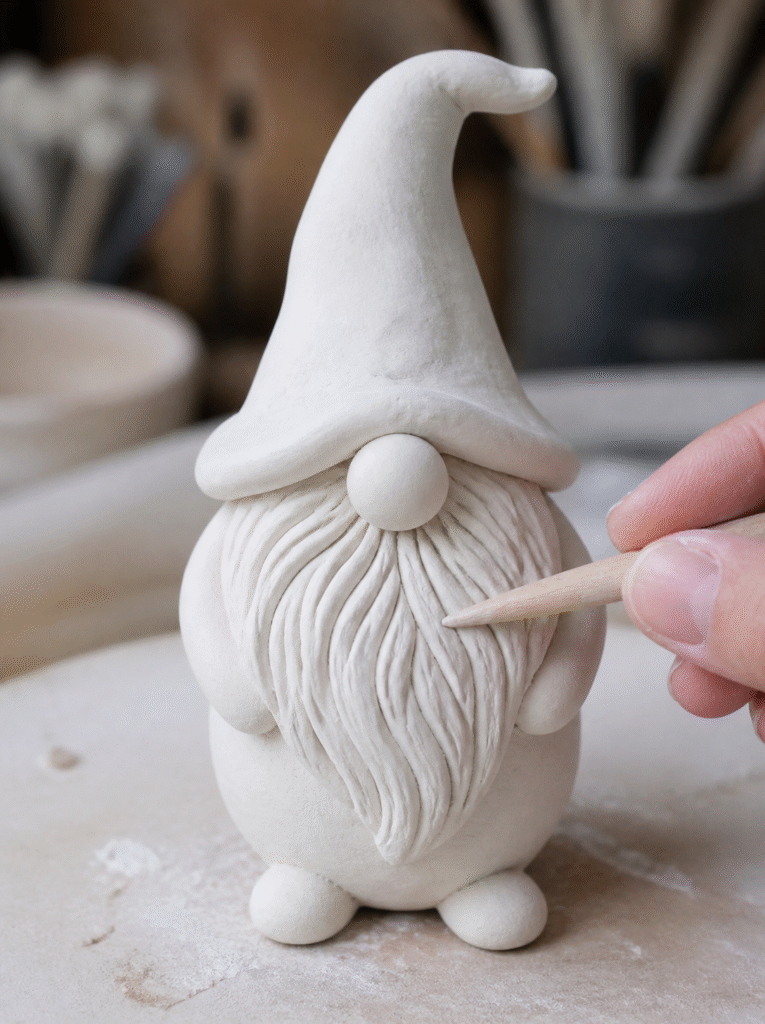
The beard is what gives many traditional gnomes their charming appearance.
There are several ways to create it, depending on the look you prefer.
For a simple beard, flatten a small piece of clay into a rounded triangular or teardrop shape. Position it on the front of the body beneath the hat.
You can then use a toothpick or sculpting tool to create gentle lines running downward. These lines give the beard the appearance of flowing hair.
For a fuller beard, add a few small pieces of clay around the main shape and blend their edges carefully.
You can also create a slightly wavy beard by shaping the lower edge into soft curves.
Avoid making the beard too thin because delicate sections can dry unevenly and become more likely to break.
If you want a different style, you can leave the beard smooth and paint it white, cream, or light gray after drying.
The important thing is to make sure the beard is securely attached before moving the gnome.
Step 5: Add a Small Nose

A small nose is one of the easiest details to add, but it makes a big difference to the finished design.
Take a tiny piece of clay and roll it into a small ball.
Place it near the top of the beard, just below the edge of the hat.
Press it gently into position and smooth the surrounding area so it looks naturally connected.
You can make the nose slightly rounded or oval depending on the appearance you want.
If you prefer a simpler project, you can use a small wooden bead instead. Make sure it is attached securely with an adhesive suitable for the materials.
At this point, your gnome should already have its basic shape: a body, pointed hat, beard, and nose.
Take a moment to check that all the pieces are attached properly before allowing the clay to dry.
Step 6: Add Small Decorative Details

Once the main shape is complete, you can add a few decorative details to make your gnome more interesting.
This is where you can experiment with different textures and designs without making the project too complicated.
For example, you can create small buttons on the body, a decorative band around the hat, or tiny patches that make the gnome look more rustic.
You can also use a sculpting tool to add texture to the hat. Small lines, dots, and gentle patterns can make a simple clay sculpture look more detailed.
Here are some ideas:
- Add small clay buttons to the front of the body.
- Create a textured beard using short curved lines.
- Add a small flower or star to the hat.
- Make a tiny belt around the body.
- Create a folded-looking hat brim.
- Add miniature hearts or seasonal decorations.
I recommend choosing just two or three details for your first gnome. Too many small decorations can make the sculpture look crowded and increase the chance of delicate pieces breaking.
Remember to attach every detail securely while the clay is still workable.
Step 7: Smooth the Surface and Check the Shape
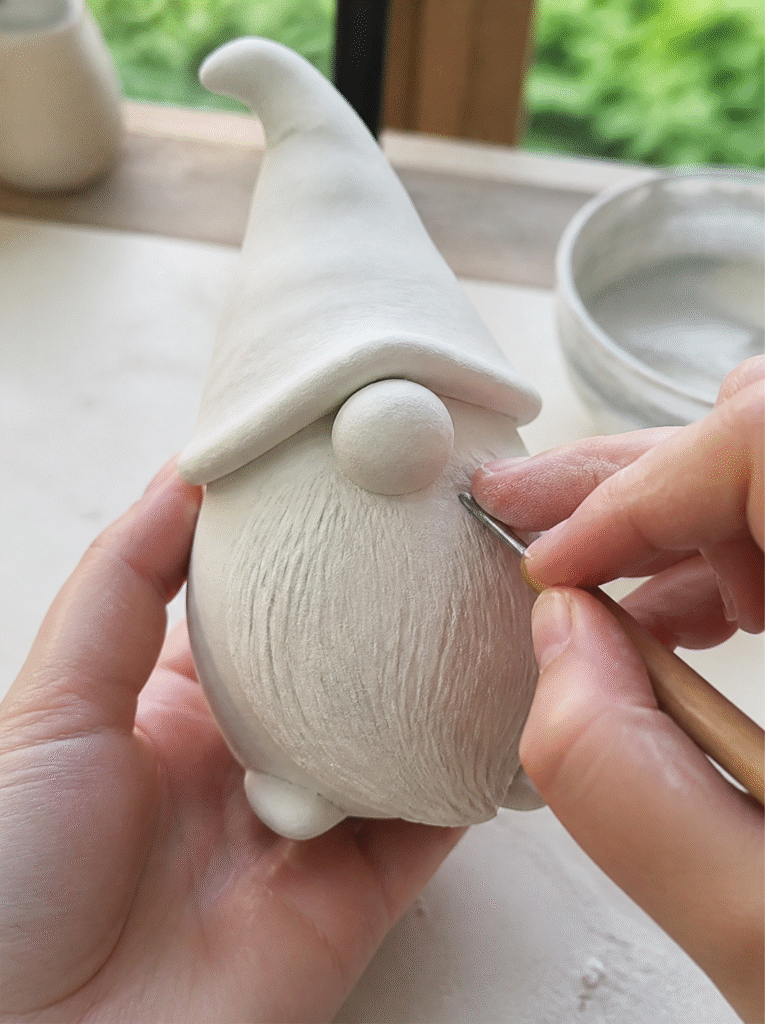
Before leaving your gnome to dry, inspect the entire sculpture.
Look for cracks, rough edges, loose pieces, and uneven areas. Small imperfections are normal when working with air dry clay, but it is easier to correct them before the clay hardens.
Use a slightly damp fingertip or suitable sculpting tool to smooth rough connections.
Pay particular attention to where the hat meets the body, where the beard attaches, and around the nose.
Check the bottom of the gnome too. It should sit flat enough to remain upright when completely dry.
If the sculpture leans heavily to one side, gently adjust it while the clay is still soft.
You can also remove unwanted fingerprints and smooth the surface with a small amount of water if your clay manufacturer’s instructions allow it.
Avoid repeatedly wetting the sculpture. Too much water can weaken the surface or make certain areas dry unevenly.
Step 8: Allow the Clay Gnome to Dry Completely

Drying is one of the most important stages of making air dry clay gnomes.
It can be tempting to start painting as soon as the outside feels firm, but the inside may still contain moisture.
Place your finished gnome on a flat surface in a dry, well-ventilated area. Keep it away from direct sunlight, heaters, and strong sources of heat because rapid drying can increase the risk of cracking or warping.
The drying time depends on the clay brand, sculpture thickness, room temperature, and humidity.
Small, thin decorations may dry faster than larger sculptures with thick bodies and hats.
Tips for better drying:
- Leave enough space around the gnome for air circulation.
- Follow the drying instructions on the clay package.
- Turn the sculpture carefully if the manufacturer’s instructions recommend it.
- Avoid handling it unnecessarily while it is drying.
- Make sure the bottom is also completely dry.
- Do not paint until the entire sculpture has hardened.
If you notice a small crack during drying, avoid immediately adding a large amount of water. Some manufacturers provide specific repair instructions for their clay products.
Patience is important here. Allowing the sculpture to dry properly gives you a better surface for painting and decorating.
Step 9: Sand Any Rough Areas

Once the gnome is completely dry, inspect its surface again.
Some air dry clay products develop slightly rough areas, especially around the edges or where separate pieces were joined.
If the clay manufacturer’s instructions permit sanding, use fine-grit sandpaper to gently smooth suitable areas.
Work slowly and avoid applying too much pressure. The goal is to remove small imperfections, not change the shape of the sculpture.
You can focus on:
- Rough edges around the base.
- Uneven areas on the hat.
- Small bumps on the body.
- Visible joins between clay pieces.
- Rough surfaces around the beard.
Wear a suitable dust mask and avoid breathing sanding dust. Clean the sculpture gently afterward before painting.
If the surface is already smooth, you can skip this step.
Step 10: Paint Your Air Dry Clay Gnome

Now comes one of the most enjoyable parts of the project: adding color.
Acrylic paint is a popular choice for decorating dry air dry clay because it is available in many colors and works well for small decorative sculptures.
Before painting, make sure your gnome is completely dry and free from dust.
You can start with the hat because it is usually the largest colored area.
For a traditional design, try a red, green, or deep blue hat. For a softer farmhouse appearance, cream, beige, sage green, or dusty pink can look beautiful.
Next, paint the body using a color that complements the hat.
For the beard, white, cream, or light gray works well. You can use a slightly darker shade to add gentle lines and create the appearance of individual beard strands.
The nose can be painted a soft peach or warm skin-tone color, depending on the look you want.
Beginner painting tips:
- Start with larger areas before adding small details.
- Apply thin coats instead of one thick coat.
- Allow each coat to dry before adding another.
- Use a small brush around the nose and beard.
- Keep the color combinations simple.
- Clean your brushes between colors.
You do not need to paint every part of the gnome. Leaving some areas in their natural clay color can create a beautiful handmade appearance.
Step 11: Add the Finishing Touches

After the paint has dried, you can add a few final details to give your gnome more character.
For example, you could paint small dots on the hat, add a decorative band, or create subtle shading around the beard.
A little texture can make a simple sculpture look more interesting.
If you want a rustic appearance, consider using muted colors and natural-looking details. For a festive design, brighter colors and small seasonal decorations can work beautifully.
You can also add a small piece of felt to the base if you want to protect the surface where the gnome will be displayed.
Keep the final details lightweight and securely attached.
Step 12: Seal and Protect Your Finished Gnome

If your gnome will be displayed regularly, you may want to protect the painted surface with a suitable clear sealer.
Choose a product that is specifically compatible with your air dry clay and acrylic paint.
Some sealers provide a matte finish, while others create a satin or glossy appearance.
A matte finish is a good choice if you prefer a natural handmade look. A glossy finish can make brighter colors stand out more.
Before applying the sealer to the entire gnome, test it on a small inconspicuous area or a separate clay sample.
Follow the manufacturer’s instructions for application, drying time, and ventilation.
It is important to understand that sealing does not automatically make an air dry clay sculpture waterproof. Most ordinary air dry clay decorations are best kept indoors and protected from moisture.
Creative Air Dry Clay Gnome Ideas to Try
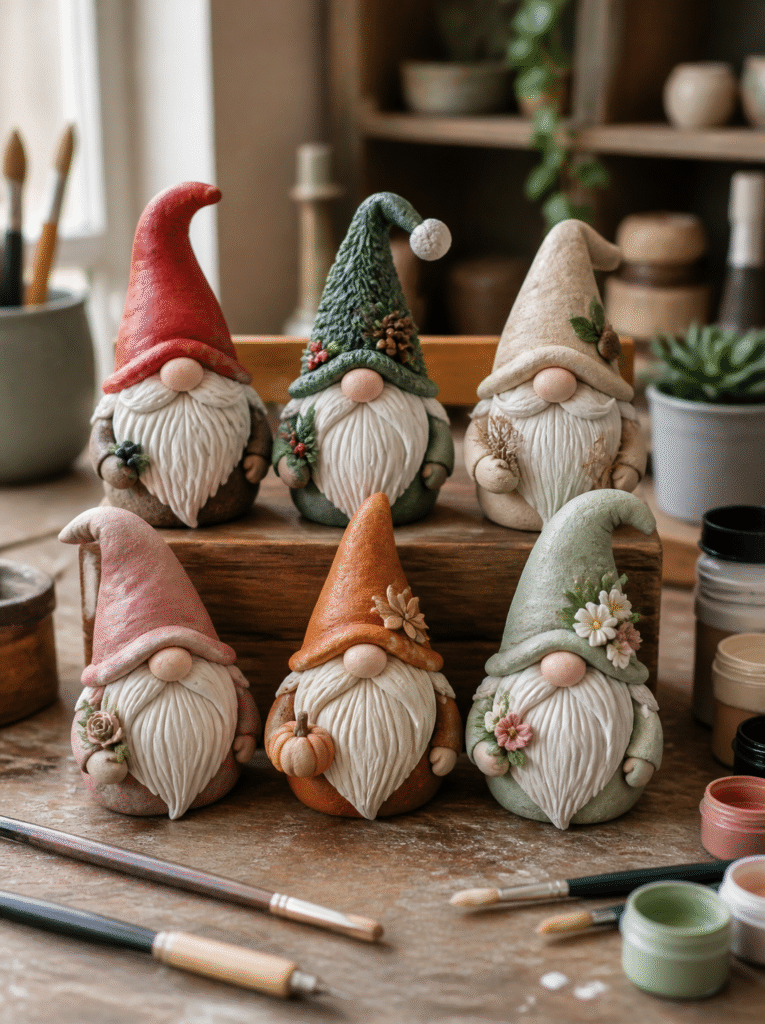
Once you have made your first gnome, you can experiment with different designs.
The basic body, beard, and hat can be adapted in many ways, which makes this a craft you can return to throughout the year.
1. Christmas Air Dry Clay Gnomes
Create festive decorations using red, green, white, and gold.
Give your gnome a pointed red hat, a fluffy-looking white beard, and small decorative details such as stars or snowflakes.
These can look lovely on a Christmas shelf, mantel, or tabletop.
2. Miniature Shelf Gnomes
If you prefer small decorations, make miniature gnomes that can sit on shelves, desks, or bedside tables.
Use a simple rounded body, a short pointed hat, and a small beard.
Their small size also makes them useful for practicing different shapes without using much clay.
3. Rustic Farmhouse Gnomes
For a farmhouse-inspired design, choose natural colors such as beige, cream, brown, and muted green.
Keep the beard simple and use subtle textures on the hat.
You can also add a small fabric or twine detail once the sculpture is completely dry.
4. Autumn Gnomes
Autumn gnomes can be decorated with warm colors such as burnt orange, mustard yellow, brown, and deep red.
You could add a miniature pumpkin, leaf, or other seasonal decoration to the hat.
These designs work particularly well as part of a fall display.
5. Valentine Gnomes
For a Valentine’s Day design, try pink, red, cream, and white.
Add a small clay heart to the hat or body and keep the beard simple.
You can make two matching gnomes as a decorative pair or create different sizes for a small display.
6. Spring Garden Gnomes
Spring designs can include pastel hats, small flowers, and soft green details.
You could create a little flower on the hat or add a miniature clay leaf to the body.
Keep these decorations indoors unless the clay and all finishing products are specifically rated for outdoor conditions.
Common Mistakes to Avoid When Making Air Dry Clay Gnomes

Even though this is a beginner-friendly project, a few common mistakes can affect the finished result.
Here are some things to watch out for.
Using too much water: Excessive moisture can make the clay sticky and difficult to shape. Use only small amounts when needed.
Making the hat too thin: A very thin pointed hat can become fragile. Keep the structure thick enough to support itself.
Attaching pieces without proper joining: Separate pieces can loosen if they are not connected properly. Follow your clay manufacturer’s joining instructions and blend the edges carefully.
Making the base uneven: A gnome that does not sit flat may fall over after drying. Check the base before leaving it to harden.
Drying too quickly: Placing the sculpture near direct heat can increase the risk of cracking. Allow it to dry gradually in a suitable environment.
Painting before the clay is dry: Moisture trapped inside can affect the finish. Make sure the entire sculpture is dry before painting.
Using too many decorative details: Small pieces can break easily, especially on beginner projects. Start with simple decorations and add more as your skills improve.
How to Display Your Finished Clay Gnomes

After all the work, you will want to display your finished gnomes somewhere they can be seen and appreciated.
A small collection can look especially attractive when you group different sizes and colors together.
Here are a few display ideas:
- Arrange them on a living room shelf.
- Place one on a bedside table.
- Use them as part of a seasonal centerpiece.
- Display them on a fireplace mantel.
- Add them to a craft room shelf.
- Use them as handmade gifts for friends and family.
Choose a dry indoor location away from water, excessive humidity, and places where the decorations could easily fall.
If you are displaying several gnomes together, use a small tray or decorative base to keep the arrangement organized.
Frequently Asked Questions
Do air dry clay gnomes need to be baked?
No. Air dry clay hardens naturally when exposed to air. Follow the manufacturer’s instructions for drying time and avoid placing the sculpture in an oven unless the specific product instructions explicitly allow it.
How long do air dry clay gnomes take to dry?
Drying time depends on the clay brand, thickness, humidity, and room temperature. Small pieces may dry faster than thick sculptures. Always make sure the inside is completely dry before painting.
Can beginners make air dry clay gnomes?
Yes. Gnomes are suitable for beginners because their basic shapes are relatively simple. You can start with a rounded body, pointed hat, beard, and nose before trying more detailed designs.
What paint works best on air dry clay gnomes?
Acrylic paint is a popular option for decorating completely dry air dry clay. Apply thin coats and allow each layer to dry before adding more details.
How do I stop air dry clay gnomes from cracking?
Use properly conditioned clay, avoid making sections unnecessarily thick or thin, attach separate pieces carefully, and allow the sculpture to dry gradually. Follow the manufacturer’s instructions because different clay products behave differently.
Can I put air dry clay gnomes outside?
Most ordinary air dry clay decorations are not suitable for permanent outdoor exposure because moisture can damage them. A sealer does not necessarily make them waterproof. Keep them indoors unless the clay and finishing products are specifically designed for outdoor use.
Can I make air dry clay gnomes without sculpting tools?
Yes. You can use simple household items such as toothpicks, wooden craft sticks, and rounded tools to shape and decorate your gnomes.
Final Thoughts on Making Air Dry Clay Gnomes
Making air dry clay gnomes is a simple and enjoyable way to create handmade decorations without investing in expensive equipment.
The basic design is easy to learn, and once you understand how to shape the body, hat, beard, and nose, you can experiment with different styles and seasonal designs.
My advice is to start with one simple gnome rather than trying to create a complicated collection immediately. Pay attention to how the clay feels, take your time when attaching the different pieces, and allow everything to dry properly before painting.
You do not need perfect sculpting skills to make something beautiful. Small differences in shape and texture can give each gnome its own personality.
With a little patience and creativity, you can turn a small amount of air dry clay into charming decorations for your home or thoughtful handmade gifts.