
There is something especially satisfying about turning a few pieces of soft fabric into a handmade ferret plushie that actually has personality. Ferrets have such a distinctive shape, with their long bodies, small rounded ears, short legs, curious faces, and fluffy tails, which makes them a really fun animal to recreate as a plush toy.
I enjoy craft projects like this because they do not require a huge collection of expensive supplies, yet the finished piece can look completely unique. A handmade ferret plushie can become a thoughtful gift for an animal lover, a cute addition to a child’s room, or simply a fun sewing project to keep for yourself.
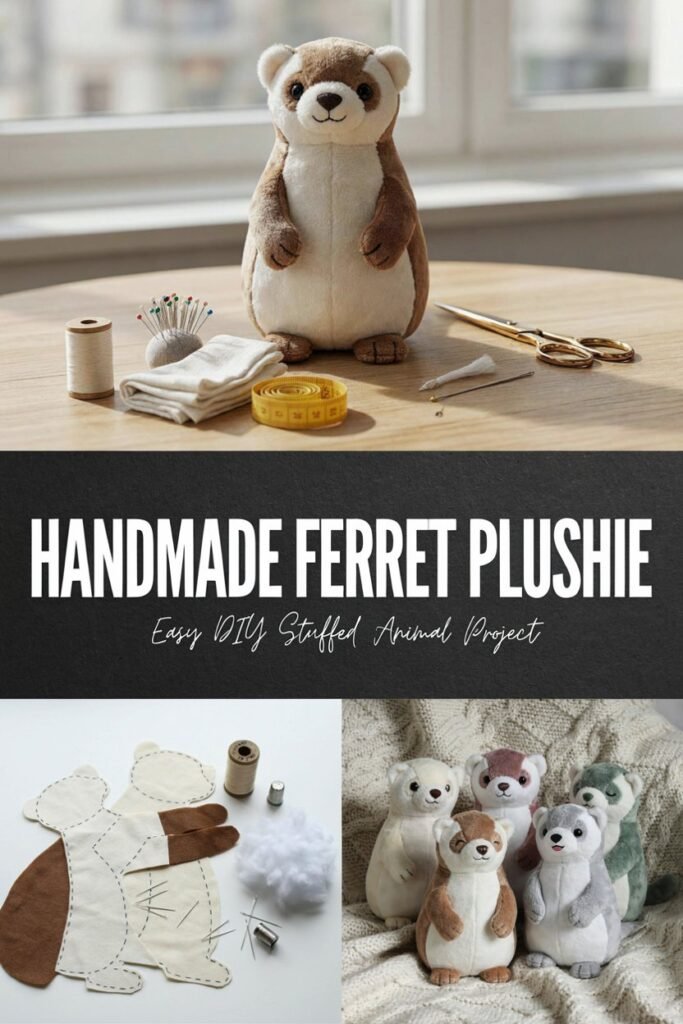
The key is getting the proportions right before worrying about the small decorative details. In this guide, I will walk through the process from choosing fabric and preparing the pattern to sewing, stuffing, shaping, and finishing the plushie. I will also share the little practical things that make the project easier and help prevent the common mistakes that can make a stuffed animal look uneven.
Why Make a Handmade Ferret Plushie?
A handmade ferret plushie is one of those projects where the small imperfections can actually make the finished toy feel more special. Unlike a mass produced stuffed animal, you can decide exactly how you want yours to look.
You can make a traditional brown or cream colored ferret, create a black and white pattern, or use a completely unexpected fabric combination. You can also make the body long and slim or give it a slightly rounder shape for a softer, more cuddly appearance.
I particularly like projects where the final result does not have to be perfectly identical to a pattern. With a ferret plushie, you have some flexibility because the animal already has a naturally unusual body shape.
The most important thing is making sure the body, head, tail, and legs look balanced together.
If the body is too short, it can start looking more like another small animal. If the body is extremely long without enough shaping, the plushie can look flat once stuffed. Taking a little time to plan the proportions before cutting the fabric makes a noticeable difference.
What You Need for This Plushie Project
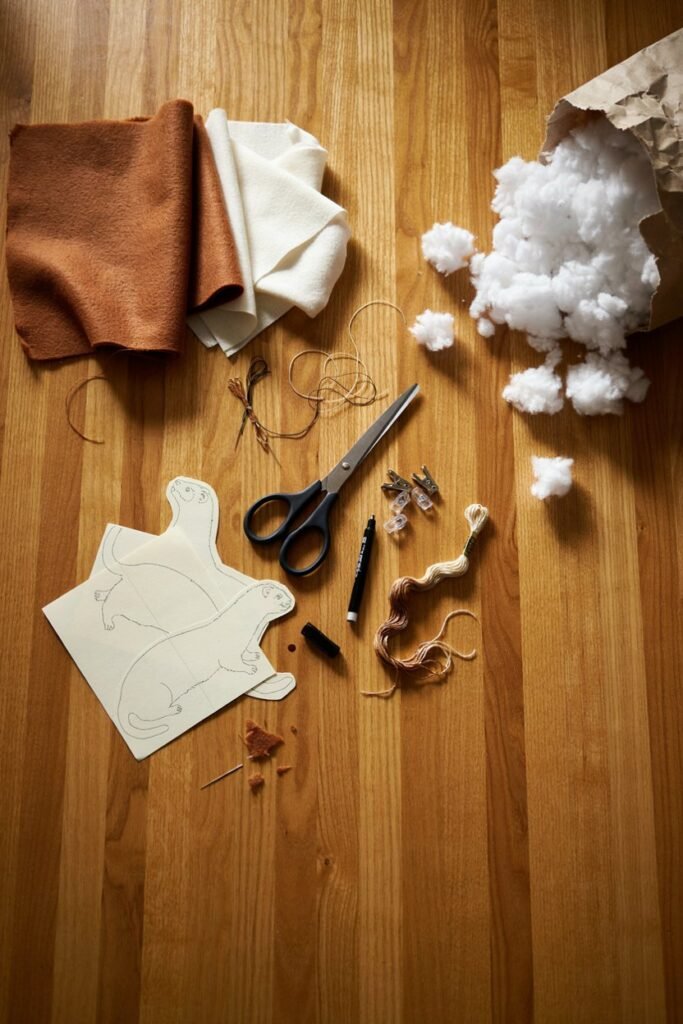
You do not need a complicated sewing setup for this project. Most of the supplies are basic craft materials that can be used for other stuffed animals too.
Basic Materials
- Soft fleece, minky, felt, or another plush friendly fabric
- Polyester fiberfill stuffing
- Matching sewing thread
- Hand sewing needle
- Sewing machine if you prefer machine sewing
- Fabric scissors
- Paper for creating the pattern
- Fabric marking pen or washable pencil
- Pins or sewing clips
- Embroidery thread
- Safety eyes or embroidery thread for the eyes
- Small amount of black fabric or embroidery thread for the nose
The fabric you choose will have a big effect on the final appearance.
For a beginner friendly version, I would recommend fleece because it is relatively easy to handle and does not fray as aggressively as some woven fabrics. Minky can give you a much softer and more luxurious result, but it can move around while sewing and may require a little more patience.
If you are making the plushie for a young child, embroidered facial details are worth considering instead of small detachable pieces.
Choosing the Right Fabric
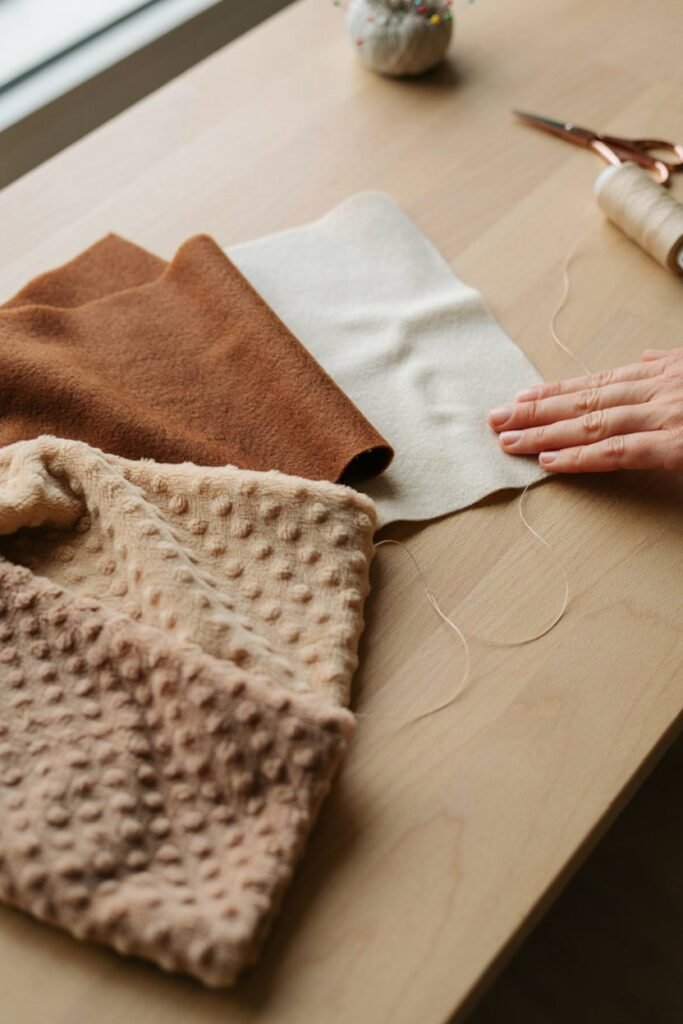
Fabric choice is one of the decisions that can make or break a stuffed animal project.
A fabric may look beautiful on the table but behave completely differently once you start cutting and sewing it. Stretchy fabric can make an adorable soft plushie, but it can also make it harder to maintain the shape of your pattern pieces.
For my own projects, I like to think about the finished texture before choosing the fabric. If I want something that feels especially cuddly, I lean toward soft fleece or plush fabric. If I want more defined facial features, a fabric with slightly less stretch can make shaping easier.
You can also combine fabrics.
For example, the main body could use a soft brown fabric while the face, belly, or paws use a lighter cream fabric. This gives the finished ferret more visual definition without requiring complicated sewing techniques.
Before cutting your actual fabric, I recommend placing the pattern pieces on the material and looking at them together.
This simple step lets you see whether the colors will work together and whether you have enough fabric for every part.
Planning the Ferret Shape
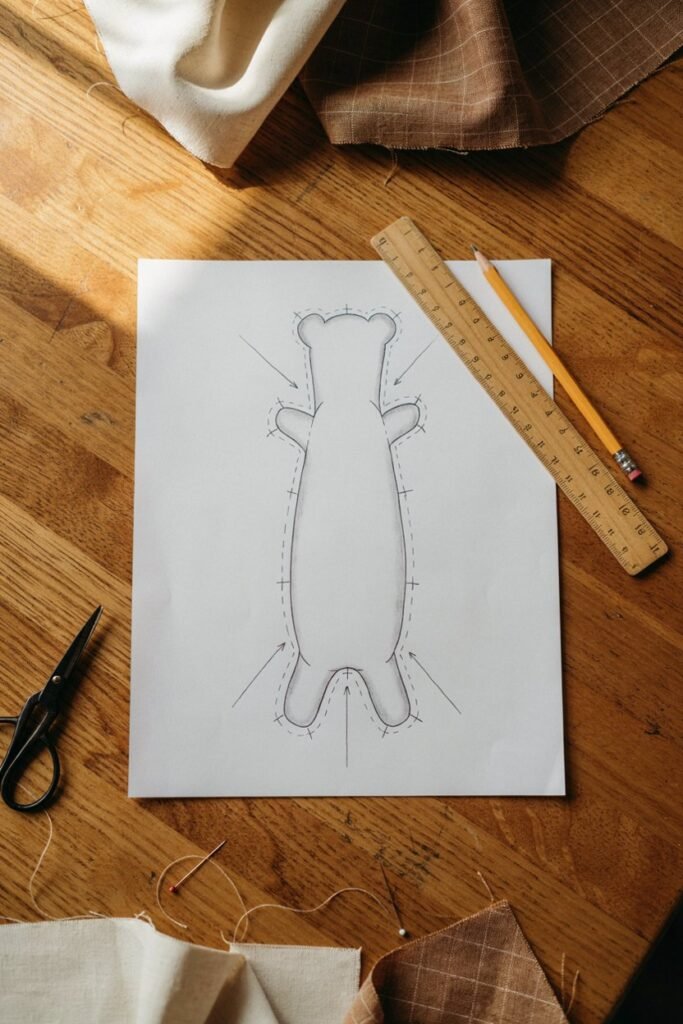
The distinctive shape of the ferret is what makes this project interesting.
The body should be noticeably longer than it is tall. The head is relatively small compared with the body, while the legs are short. The tail should extend naturally from the rear rather than looking like a separate piece attached afterward.
I would start with the body because it determines the proportions of almost everything else.
Draw a simple elongated body shape on paper. You do not need to make the pattern complicated at this stage. Think about the outline you want rather than trying to add every detail immediately.
Once you are happy with the basic shape, create a second version with a seam allowance around the outside.
A seam allowance gives you room to sew the pieces together without making the finished plushie smaller than intended.
I generally prefer giving myself slightly more room rather than cutting everything extremely close to the final outline. It is much easier to trim excess fabric later than to discover that a piece is too small.
Creating a Simple Pattern
If you are comfortable drawing, you can make your own ferret plushie pattern using paper and a pencil.
The main pieces will usually include the body, head, ears, legs, paws, and tail. Depending on the design, you may also want separate pieces for the belly, muzzle, or inner ears.
Fold your paper in half when creating symmetrical pieces such as the body and head.
Draw one side of the shape, cut it while the paper is folded, and then open it.
This gives you a more symmetrical pattern without having to carefully draw both sides separately.
Do not worry if your first pattern looks slightly basic.
The important part is understanding that stuffed animals change shape when you add stuffing. A flat paper pattern will not look exactly like the finished three dimensional plushie.
This is why I like making a quick test version when I have enough scrap fabric available.
A test version allows you to see whether the body is too narrow, the head is too large, or the legs need to be moved before you use your nicer fabric.
Preparing the Fabric
Before cutting, smooth the fabric on a clean, flat surface.
Make sure there are no folds underneath the pattern pieces. Even a small fold can change the shape of a piece and cause problems later when two pieces need to line up.
Place the pattern pieces on the fabric and secure them with pins or clips.
Pay attention to the direction of the fabric if you are using minky, faux fur, or another material with a visible nap. Keeping the fabric direction consistent can make the finished plushie look much more professional.
Mark each piece before moving it.
I find it helpful to write simple labels such as body, head, ear, leg, and tail directly on paper pattern pieces and keep the cut fabric organized.
This sounds like a small thing, but it prevents a surprising amount of confusion once you have several similar looking pieces sitting on the table.
Cutting the Main Body Pieces
The body is the foundation of the plushie, so take your time with this part.
Depending on the pattern you create, you may need two large body pieces or several smaller pieces that form the back and belly.
If you are making a very simple beginner design, two matching body pieces can be enough.
Place the pattern on the fabric and carefully cut around it, remembering to include your seam allowance if it is not already included in the pattern.
Try not to stretch the fabric while cutting.
This is especially important with fleece and other stretchy materials because pulling the fabric can cause your pieces to become slightly distorted.
Once the pieces are cut, lay them together and check the edges.
They should be reasonably similar in size and shape.
If one side is noticeably different, correct it before sewing. It is much easier to fix the pattern now than after the body has been stitched and stuffed.
A Few Things I Would Do Before Sewing
Before bringing the pieces to the sewing machine, I like to arrange the entire project on the table.
Put the body pieces together, position the head, place the ears where you think they should sit, and lay the legs and tail nearby.
You are essentially creating a rough visual preview of the finished ferret.
This helps you catch proportion problems early.
It also gives you a better idea of where each part needs to be attached.
For a plushie with a long body, I would pay particular attention to the placement of the legs. If the legs are too far toward the center, the ferret can lose its natural shape. If they are too close to the ends, the body may not look balanced.
The same applies to the ears.
Small rounded ears placed too high or too far apart can completely change the expression of the finished plushie.
My Biggest Tip Before You Start Sewing
Do not rush into sewing simply because all the pieces are already cut.
Spend a few minutes checking the pattern, fabric direction, seam allowances, and placement of each part.
I have found that a few extra minutes of preparation can save much more time later.
It is also worth keeping a small amount of scrap fabric nearby. You can use it to test your stitch length, check the thread tension, and practice any embroidery before working directly on the plushie.
Once everything looks right, you are ready to start turning those flat fabric pieces into an actual ferret.
Sewing the Main Body
Start by placing the two main body pieces together with the right sides facing inward.
Line up the edges carefully and secure them with sewing clips or pins.
Before sewing around the entire body, look at the pattern and identify where you want to leave the opening for stuffing. I prefer leaving an opening along the underside because it is easier to hide when the plushie is finished.
Sew around the body using a consistent seam allowance.
You do not need an extremely small stitch, but you want the stitches close enough together that the stuffing cannot easily push through the seam.
Take your time around curves.
The curved areas around the head, belly, and rear end need a little more attention than straight sections. If you rush around a curve, the fabric can bunch together and create small folds.
When you reach the area where you want the stuffing opening, stop sewing and secure the thread.
Turn the body right side out carefully.
At this stage, do not start stuffing immediately.
Instead, use your fingers to gently push out the seams and check the overall shape.
This is one of those little steps I would not skip. It gives you a chance to notice whether the body has an awkward curve or whether one section needs a small adjustment before you add stuffing.
Shaping the Curves
The body of a ferret should have a soft continuous shape rather than looking like a simple tube.
Once the body has been turned right side out, gently work your fingers along the inside of the seams.
You can also use a blunt turning tool to help push out corners, but be careful not to use anything sharp enough to puncture the fabric.
Pay particular attention to the nose area, the back, and the rear of the body.
You want the fabric to sit smoothly along the seam.
If you are using fleece, this process is usually fairly easy because the material has some flexibility.
If you are working with a plush fabric, be more careful because aggressive pushing can distort the surface.
Making the Head
The head is one of the most important parts of the project because it gives the ferret its personality.
A ferret has a relatively narrow face, so I would avoid making the head too round.
Start with the head pattern pieces and sew them together according to your design.
Leave a small opening for turning and stuffing.
Once the head is turned right side out, gently shape the muzzle with your fingers.
This is where I usually spend a little extra time.
The face does not need to be perfectly symmetrical to look cute, but the general shape should be balanced.
If the muzzle is too wide, the plushie can lose some of the characteristic ferret appearance. If it is too narrow, there may not be enough room for the nose and facial details.
Before attaching the head permanently, place it against the body.
This gives you a much better idea of whether the proportions work.
Creating the Muzzle
For a more detailed handmade ferret plushie, you can create a separate muzzle piece instead of relying entirely on the main head shape.
A small piece of cream, white, or light colored fabric works well for this.
Cut the muzzle according to your pattern and sew the pieces together if your design requires multiple sections.
Turn the muzzle right side out and lightly stuff it.
You do not want to fill this piece as firmly as the main body.
A small amount of stuffing is usually enough to give the muzzle some definition without making it look bulky.
Position it on the front of the head and secure it temporarily.
Look at the plushie from the front and from both sides before stitching it permanently.
I find this especially useful because the muzzle can look perfectly positioned from one angle while being noticeably off center from another.
Making the Ears
The ears are small, but they make a surprisingly large difference to the finished ferret.
For a simple design, cut four ear pieces.
Pair two pieces together for each ear and sew around the outer edge while leaving a small opening.
Turn the ears right side out.
You can leave them lightly stuffed or completely unstuffed depending on the look you want.
For a soft plushie, I usually prefer keeping the ears relatively flat.
A tiny amount of stuffing can give them some dimension, but too much will make them look oversized.
Fold the opening inward and stitch it closed.
Before attaching the ears, place them on the head and experiment with the position.
Move them slightly closer together or farther apart until the face looks balanced.
Once you are happy with the placement, stitch them securely to the head.
Making the Short Legs
The legs are another area where proportion matters.
Ferrets have relatively short legs compared with their long bodies, so the legs should not dominate the design.
Depending on your pattern, you can make each leg from two fabric pieces or create a simpler tube shape.
Sew the pieces together, leaving an opening for turning and stuffing.
Turn each leg right side out.
Add a small amount of stuffing and shape the leg with your fingers.
Do not pack the stuffing too tightly.
The legs should have enough structure to hold their shape but still feel soft when you squeeze them.
If you are making the plushie for display rather than play, you can make the legs slightly firmer.
For a cuddly toy, softer stuffing generally gives a more appealing result.
Positioning the Legs
Before sewing the legs onto the body, arrange all four of them where you think they should sit.
This is another stage where I prefer to stop and look at the plushie from different angles.
The front legs should sit naturally beneath the front section of the body, while the rear legs should be positioned farther back.
Try not to place them too close to the center.
A long body needs enough space between the front and rear legs to preserve that recognizable ferret silhouette.
Pin or clip the legs in place and check the plushie from the side.
If the legs look uneven, reposition them before stitching.
It is much easier to move a pinned leg than to remove several rows of stitches afterward.
Sewing the Legs Securely
Once you are happy with the placement, sew each leg securely to the body.
For a plushie that will be handled frequently, I recommend reinforcing the attachment points.
You can sew around the base several times or use a strong hand stitching technique to make sure the legs do not pull away from the body.
This is especially important when the fabric is soft and stretchy.
The weight of the stuffing can put additional pressure on the seams, so a little reinforcement now can make the finished plushie much more durable.
Creating the Tail
The tail is one of the easiest pieces to make, but it is also an important part of the ferret’s recognizable shape.
Cut two long, narrow tail pieces.
Sew them together around the outer edge while leaving the base open.
Turn the tail right side out carefully.
Because the tail is narrow, turning it can take some patience.
A blunt turning tool can help, but avoid forcing anything through the fabric because you do not want to damage the seam.
Add a small amount of stuffing.
I prefer keeping the tail relatively flexible rather than packing it tightly.
A slightly flexible tail can be gently curved after the plushie is finished, which gives the ferret a more natural appearance.
Attaching the Tail
Position the tail at the rear of the body.
Before stitching it permanently, check how it looks when the plushie is lying flat and when it is sitting upright.
The tail should flow naturally from the body.
If you place it too high, the proportions can look unusual. If it sits too low, it may disappear beneath the body.
Once the position looks right, stitch the tail securely to the back of the plushie.
Take several passes around the attachment point if you expect the plushie to be handled regularly.
Stuffing the Body
Stuffing is probably the part of the project where patience matters most.
It is tempting to fill the body quickly and pack in as much stuffing as possible.
I would avoid doing that.
Instead, add small amounts at a time.
Start with the farthest areas of the body and gradually work toward the opening.
Use your fingers to distribute the stuffing evenly.
The goal is not simply to make the body firm.
You want the stuffing to support the shape while keeping the plushie soft.
If you notice a hollow area, add a small amount of stuffing and work it into place.
If one side feels harder than the other, gently redistribute the filling rather than immediately adding more.
This makes a big difference to the finished appearance.
Getting the Ferret Body Shape Right
A handmade ferret plushie should have a little flexibility in its body.
The body should feel filled without becoming stiff.
I usually check the shape by gently pressing different areas with my fingers.
The back should feel reasonably even, while the belly can have a slightly softer feel.
Look at the plushie from above.
This is a good way to spot uneven stuffing.
If one side appears wider than the other, move some of the filling before closing the opening.
Also check the body from the side.
You want a gentle curve rather than a completely straight stuffed tube.
That small amount of shaping is what helps the plushie look more like an animal and less like a simple fabric pillow.
Closing the Stuffing Opening
Once the body has the shape you want, it is time to close the opening.
Fold the raw fabric edges inward.
Use a ladder stitch or another neat hand sewing technique to close the opening.
Pull the thread firmly enough to bring the edges together, but do not pull so hard that the fabric puckers.
Work slowly and keep the stitches small.
When the opening is closed, secure the thread and hide the remaining thread tail inside the plushie if possible.
Run your fingers over the area afterward.
The finished seam should blend naturally into the surrounding fabric.
Connecting the Head to the Body
Once the body is stuffed and closed, position the head.
This is another point where I recommend taking a moment before sewing.
Look at the ferret from the front.
Then turn it slightly to the side.
The head should sit naturally at the front of the long body without looking as though it has been placed too high or too low.
Use pins or clips to hold the head in position.
Once you are satisfied, hand stitch around the neck area.
Make several passes where necessary to create a secure attachment.
The head is one of the parts that will receive a lot of handling, so this is not a place where I would rely on only a few loose stitches.
Check the Shape Before Finishing the Face
At this stage, the basic ferret should already be recognizable.
You should have the long body, short legs, narrow head, small ears, and flexible tail.
Before adding the eyes, nose, and other facial details, take a few minutes to look at the overall shape.
This is the easiest point to make small corrections.
If the head seems too large, you can adjust its position.
If one leg looks lower than the other, you may still be able to reposition it.
If the tail is not sitting naturally, it can be corrected before the final decorative work.
I have found that stepping away from the project for a few minutes and looking at it again with fresh eyes can reveal things that are easy to miss when you have been focused on one seam for a long time.
Once the body proportions are right and everything feels secure, the fun finishing stage begins.
Finishing Your Handmade Ferret Plushie
Once the body, head, legs, ears, and tail are attached, the handmade ferret plushie finally starts to develop its personality. This is my favorite part of the project because the basic sewing is already finished and the smaller details can completely change the expression of the animal.
I have learned that facial details are worth taking slowly. A tiny adjustment to the position of the eyes or nose can make the difference between a plushie that looks ordinary and one that has a really sweet expression. I like to place everything temporarily before permanently attaching anything. That gives me a chance to step back and see how the face looks as a whole instead of making decisions while sitting close to the fabric.
Adding the Eyes
The eyes are probably the most noticeable facial detail on your handmade ferret plushie.
You have several options depending on who the plushie is intended for.
Safety eyes can create a polished stuffed animal appearance, while embroidered eyes give you more control over the expression and eliminate small detachable pieces.
If you are using safety eyes, mark their positions before making any holes in the fabric.
Place both eyes and look at the face from directly in front.
Make sure they are reasonably level and that the distance between them feels natural.
Do not rely entirely on measurements.
Your pattern may be symmetrical, but the way the fabric sits after stuffing can slightly change the shape of the head. Looking at the actual stuffed head before attaching the eyes is much more reliable.
For a handmade plushie intended for a young child, embroidered eyes are a particularly useful option because there are no small plastic components that can become detached.
Creating the Nose
A small dark nose gives the ferret its characteristic facial appearance.
You can embroider the nose using black embroidery thread or attach a small piece of suitable fabric.
For a simple design, I prefer embroidery because it allows me to gradually build the shape.
Start with a small outline rather than trying to create a large solid nose immediately.
Add stitches gradually until you reach the size you want.
The nose should not overpower the muzzle.
If you are using a light colored muzzle, the contrast will naturally make a small dark nose noticeable.
Adding the Mouth
The mouth does not need to be complicated.
A couple of carefully placed embroidery stitches can create enough definition.
Keep the expression subtle.
One thing I have noticed with handmade plush animals is that adding too many facial lines can make the face look busy. I prefer letting the eyes and nose do most of the work.
If you want a slightly more expressive ferret, you can add a small curved line beneath the nose.
Test the placement with a washable fabric marker before embroidering it permanently.
Adding Inner Ear Details
If your ferret has contrasting inner ears, this is a good time to add them.
A small piece of pink, cream, gray, or another coordinating fabric can create more depth.
You can sew the inner ear piece onto the outer ear before attaching the ear to the head.
For a simpler version, you can embroider the inner ear shape.
Try to keep the detail relatively small.
Because ferret ears are naturally small, oversized inner ear sections can make the plushie look less realistic.
Creating the Ferret’s Color Pattern
One of the easiest ways to personalize your handmade ferret plushie is through the fabric colors.
You could create a classic dark brown ferret with a lighter face, a cream colored version, a black and white design, or a completely imaginative color combination.
If you are working with several fabrics, plan the color placement before sewing.
Draw a simple outline of your ferret on paper and shade in the different areas.
This lets you experiment without cutting into your fabric.
For a more realistic appearance, you can keep the body darker and use a lighter shade around the face.
For a playful handmade toy, there is no reason to stay with natural colors.
A pastel body, contrasting ears, or patterned belly can give the plushie a completely different personality.
Giving the Body More Definition
If your finished ferret looks a little too flat, do not immediately assume that you need more stuffing.
Sometimes the problem is distribution rather than quantity.
Gently massage the stuffing between your fingers and move it toward areas that need more support.
You can also press the body gently to create a more natural curve.
The long body should remain soft enough to bend slightly.
This is especially important if you want the plushie to look cuddly rather than rigid.
The neck area may need a little more support because the head adds weight.
If the head keeps falling forward, carefully add a little more stuffing to the upper body or reinforce the neck attachment.
Making the Tail Look Natural
The tail can be left straight, gently curved, or positioned slightly to one side.
I usually prefer giving it a gentle curve because it makes the finished ferret look more relaxed.
Do not make the curve too sharp.
A soft natural bend usually looks better than a tightly curled tail.
If your fabric has enough flexibility, you can shape the tail by hand.
For a firmer design, you can use additional internal structure, but this is not necessary for a basic plushie.
A simple stuffed fabric tail is usually enough.
Cleaning Up Loose Threads
Before considering the project finished, turn the plushie over and inspect all the seams.
Look for loose thread ends, uneven stitches, or small openings.
Trim loose threads carefully.
Do not cut too close to the actual seam because you could accidentally weaken it.
Pay particular attention to the areas where the legs, tail, and head are attached.
These areas receive more stress when the plushie is handled.
If you find a seam that looks weak, reinforce it now rather than waiting until the plushie is being used.
This small finishing check can make a handmade project feel much more professionally made.
How to Make the Plushie Extra Soft
The stuffing you choose has a major effect on how the finished plushie feels.
Polyester fiberfill is a practical option because it is lightweight, widely available, and easy to distribute.
The trick is using enough stuffing without compressing it too tightly.
Take small pieces of stuffing and separate them slightly before putting them inside.
This helps prevent large lumps.
If you push one large handful into the body at once, it can create uneven areas that are difficult to correct later.
Small amounts give you much more control.
For an especially soft plushie, avoid overstuffing.
You should be able to gently squeeze the body without it feeling completely rigid.
Common Handmade Ferret Plushie Mistakes
Even a relatively simple stuffed animal can have a few frustrating moments.
One common mistake is cutting fabric without allowing enough seam allowance.
Another is making the head too large for the body.
The head may look perfectly cute on its own, but once it is attached, it can overwhelm the long body shape.
Uneven legs are another common problem.
This is why I recommend temporarily positioning all four legs before sewing them permanently.
Another mistake is using too much stuffing.
A heavily stuffed body may hold its shape, but it can lose the soft appearance that makes a plushie appealing.
Finally, do not rush the face.
The eyes, nose, and muzzle determine much of the finished expression, so give yourself time to experiment with their positions.
How I Would Make the Project Easier Next Time
If I were starting another handmade ferret plushie, I would spend even more time refining the paper pattern before cutting the final fabric.
A good pattern makes every later step easier.
I would also keep the first version fairly simple.
There is a temptation to add lots of tiny details because they look interesting on a finished plushie. However, every additional piece creates another seam or attachment point.
Once you understand the basic construction, you can start experimenting with more complicated patterns.
Another thing I would keep nearby is a small collection of fabric scraps.
They are useful for testing stitches, checking embroidery, experimenting with color combinations, and practicing before working on the actual plushie.
Ways to Personalize Your Ferret Plushie
The great thing about making your own stuffed animal is that you do not have to follow one exact appearance.
You can personalize almost every part.
Change the Colors
Use colors inspired by a real ferret or create your own combination.
Change the Size
The pattern can be enlarged for a larger cuddle plushie or reduced for a small decorative version.
If you change the size significantly, remember that the thickness and strength of your seams may need to change as well.
Add a Name
An embroidered name on the belly can make the plushie feel more personal, especially if you are making it as a gift.
Add a Small Scarf
A simple removable fabric accessory can give your ferret a completely different appearance.
Make sure any accessories are securely made and appropriate for the person who will be using the plushie.
Create a Matching Family
Once you have a basic pattern that works, you can make several ferrets with different colors and facial details.
This can be a fun way to use leftover fabric from other projects.
Caring for a Handmade Ferret Plushie
Handmade plushies need a little more care than many commercially produced toys.
Always consider the specific fabric and materials you used before washing.
For many handmade designs, gentle surface cleaning is the safest option.
Use a soft cloth with a small amount of mild soap and water to clean small marks.
Avoid soaking the entire plushie unless you know that the fabric, stuffing, thread, and decorative components can safely handle it.
After cleaning, allow the plushie to dry completely.
Do not store it while it is still damp because moisture can create unpleasant odors and potentially damage the materials.
If the plushie becomes compressed after being stored, gently massage the body and redistribute the stuffing with your fingers.
When to Repair Your Plushie
One advantage of making your own stuffed animal is that repairs are usually possible.
If a seam begins to open, repair it as soon as you notice it.
Do not wait for the opening to become larger.
A small repair can usually be handled with matching thread and a neat hand stitch.
If an embroidered facial detail becomes loose, reinforce it before it completely comes undone.
Regularly checking the seams is particularly important if the plushie is frequently handled.
Frequently Asked Questions
Is a handmade ferret plushie difficult to sew?
A basic design is manageable for someone with beginner sewing skills. The most challenging parts are usually turning narrow pieces, shaping the stuffed body, and attaching the facial details neatly.
What fabric is best for a ferret plushie?
Fleece is a convenient choice for beginners because it is soft and relatively easy to sew. Minky and other plush fabrics can create a softer result but may require more patience while cutting and sewing.
Can I make a ferret plushie without a sewing machine?
Yes. A handmade ferret plushie can be sewn entirely by hand. It will take longer, but hand stitching gives you a lot of control over small curved sections and finishing details.
What should I use to stuff a ferret plushie?
Polyester fiberfill is a practical choice for most stuffed animal projects. Add it gradually so you can control the firmness and prevent lumps.
How do I make my plushie look more like a ferret?
Focus on the proportions. A relatively long body, short legs, narrow head, small rounded ears, and long tail help create the recognizable ferret silhouette.
How do I make a soft plushie without making it too bulky?
Use small amounts of separated fiberfill and distribute it gradually. Avoid compressing large amounts of stuffing into the body at once.
Can I make a ferret plushie from an existing stuffed animal pattern?
You can adapt a basic stuffed animal pattern, but the proportions will need to be adjusted. The body length, head size, legs, ears, and tail are particularly important when creating a recognizable ferret shape.
Is embroidery better than safety eyes?
It depends on the purpose of the plushie. Embroidered eyes are a good choice when you want a completely sewn facial design or when avoiding small detachable components is important. Safety eyes can provide a polished traditional stuffed animal appearance.
Final Thoughts
A handmade ferret plushie does not need an elaborate pattern or a professional sewing studio to turn out beautifully. The biggest difference usually comes from paying attention to proportion, taking your time with the seams, and checking the shape as you build it.
For me, the most rewarding part is seeing the project change gradually. At the beginning, you are simply working with flat pieces of fabric. Then the body starts taking shape, the head gives the animal its character, and the eyes and nose finally bring everything together.
Do not worry if your first version is not perfectly symmetrical.
Handmade projects have a little personality precisely because they are made by hand. If the seams are secure, the stuffing is comfortable, and the overall shape resembles the animal you intended to create, you have already accomplished the most important part.
Once you have a pattern that you like, you can also start experimenting with different fabrics, sizes, colors, and facial expressions. That is where this project becomes even more enjoyable because one basic pattern can become the starting point for several completely different handmade ferret plushies.
The best projects are often the ones that leave you thinking about what you want to make next.