
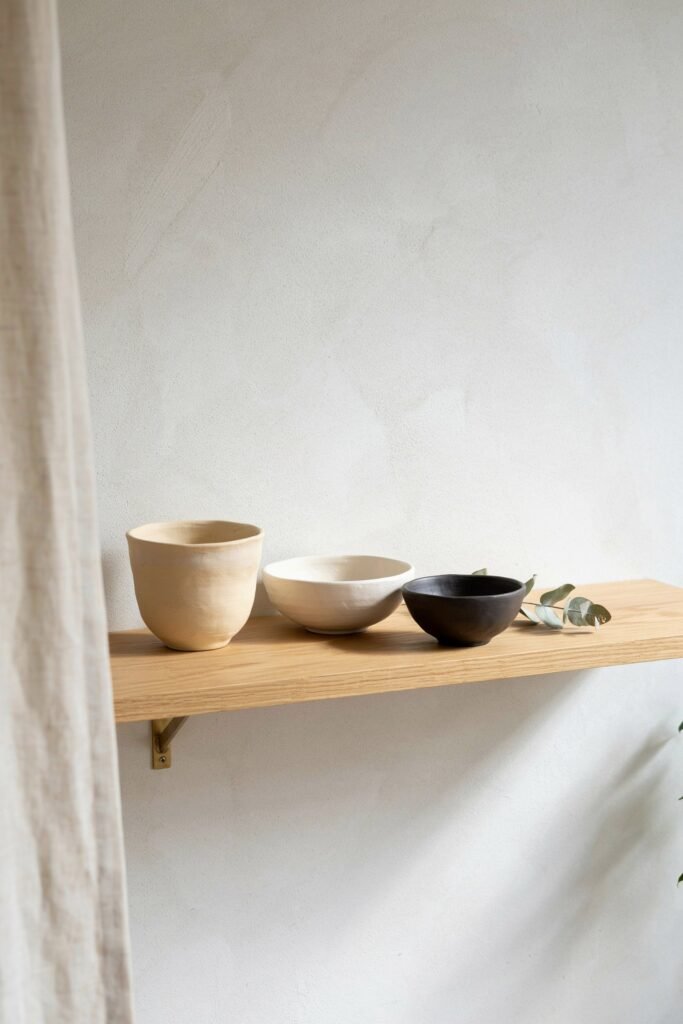
Handmade clay bowls have become one of the most popular DIY home décor projects for creative makers, craft lovers, and handmade gift sellers.
DIY stamped clay bowls are beautiful, affordable to make, beginner-friendly, and incredibly versatile.
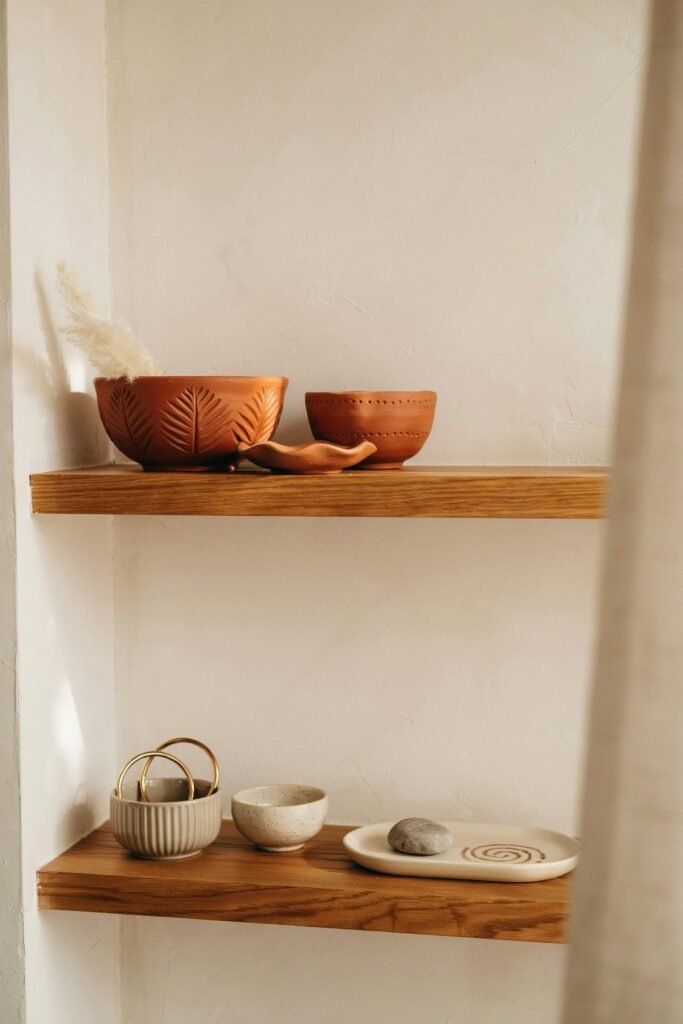
You can use them as jewelry dishes, key holders, candle trays, ring bowls, soap dishes, trinket holders, or decorative shelf accents.
The best part is that you do not need professional pottery skills or expensive ceramic equipment to make them.
With simple air-dry clay, stamps, lace, leaves, or textured materials, you can create elegant custom bowls right at home.
In this complete guide, you will learn:
- How to make stamped clay bowls step-by-step
- The best clay to use for beginners
- Essential tools and supplies
- Different stamped clay bowl ideas with instructions
- Tips to prevent cracking
- How to seal and paint your bowls
- Creative decorating techniques
- Common mistakes to avoid
- Ways to sell handmade clay bowls online
Whether you want a relaxing weekend craft, a personalized handmade gift, or a profitable DIY craft project, this guide will help you create beautiful stamped clay bowls from start to finish.
Disclaimer: This post may contain affiliate links, which means I may earn a small commission at no extra cost to you. Always follow manufacturer instructions for clay, paints, sealers, and crafting tools. Adult supervision may be needed for younger crafters using sharp tools or finishing products.
Amazon Shopping List: How to Make DIY Stamped Clay Bowls: Easy Handmade Bowls You Can Create at Home
- Air Dry Clay (White or Natural)
- Acrylic Rolling Pin for Clay Crafts
- Clay Sculpting and Cutting Tool Set
- Rubber or Wooden Stamps for Textures and Patterns
- Sanding Sponge or Fine Grit Sandpaper
- Acrylic Paint Set and Paint Brushes
- Clear Gloss or Matte Sealer for Air Dry Clay
Why DIY Stamped Clay Bowls Are So Popular
DIY clay bowl projects are trending because they are:
- Affordable and beginner-friendly
- Aesthetic and Pinterest-worthy
- Great for handmade gifts
- Easy to customize
- Perfect for home décor
- Fun for adults and teens
- Excellent for small craft businesses
Stamped clay bowls also fit many popular home décor styles including:
- Minimalist
- Farmhouse
- Boho
- Scandinavian
- Rustic
- Modern neutral décor
- Cottagecore
- Vintage-inspired interiors
Because each bowl is handmade, every piece becomes unique and personal.
Best Clay for DIY Stamped Bowls
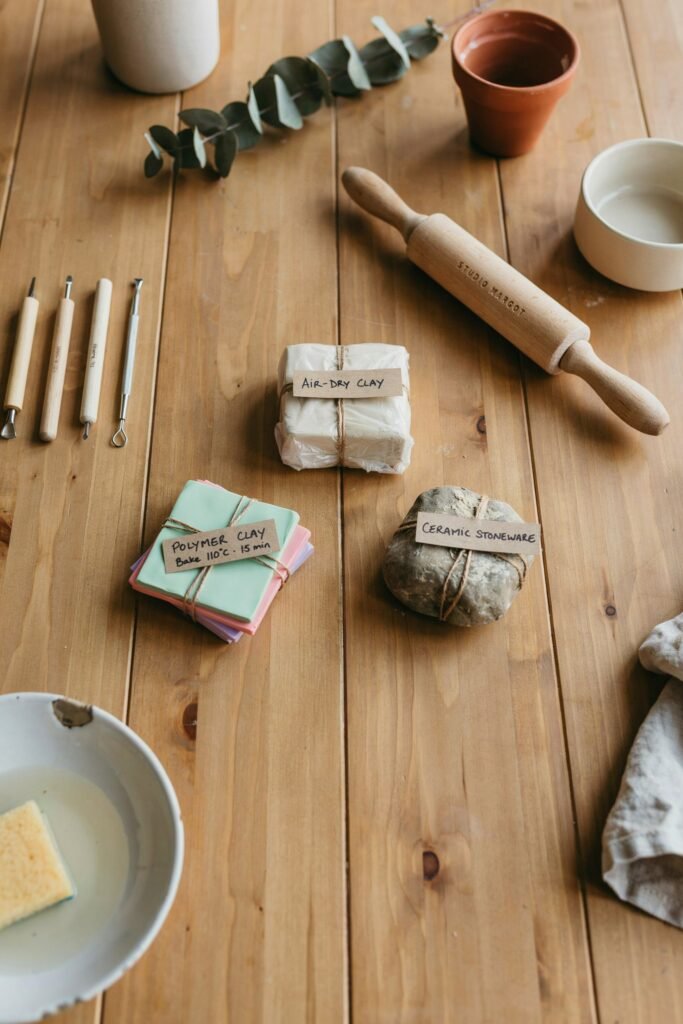
Choosing the right clay is important for durability and appearance.
1. Air-Dry Clay
Air-dry clay is the easiest option for beginners.
Benefits:
- No kiln required
- Affordable
- Easy to shape
- Widely available
- Perfect for home crafting
Best For:
- Jewelry dishes
- Decorative bowls
- Small trinket trays
2. Polymer Clay
Polymer clay hardens in a home oven.
Benefits:
- Strong and durable
- Smooth finish
- Great for colorful designs
- Excellent for detailed stamping
Best For:
- Decorative bowls
- Mini ring dishes
- Small elegant trays
3. Ceramic Clay
Ceramic clay requires kiln firing.
Benefits:
- Professional finish
- Long-lasting
- Food-safe when glazed
Best For:
- Advanced pottery projects
- Functional kitchen bowls
For most DIY crafters, air-dry clay is the easiest and most practical choice.
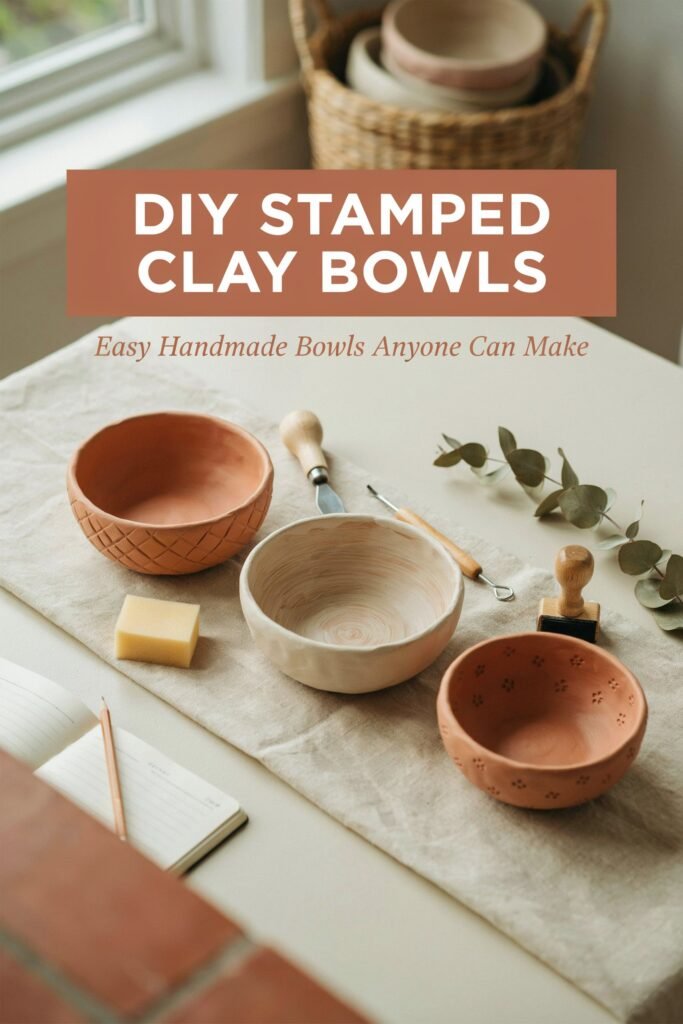
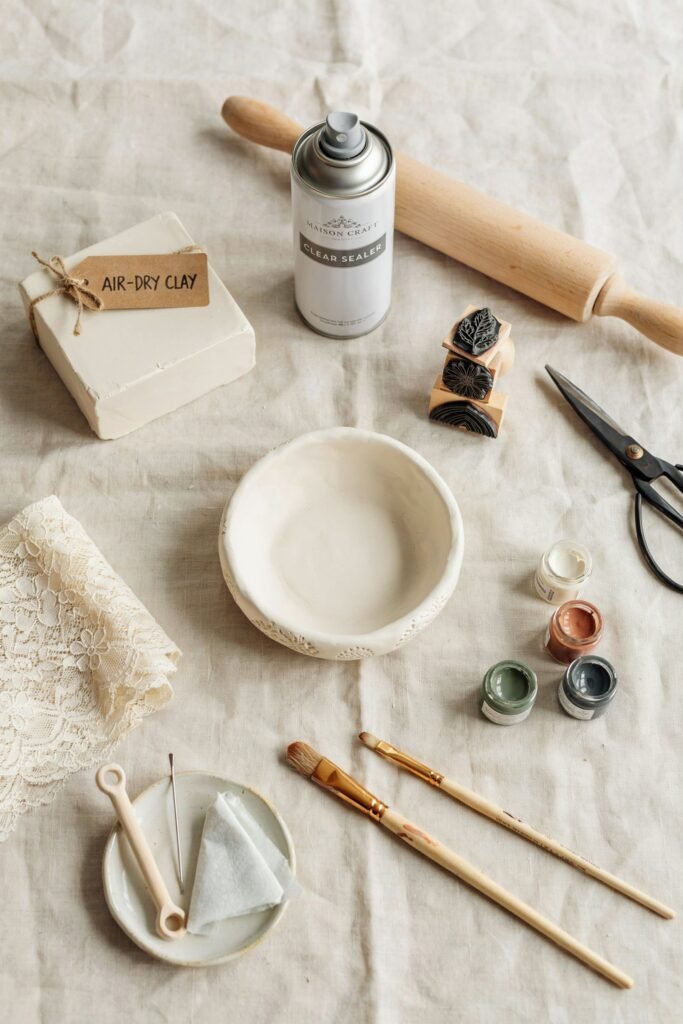
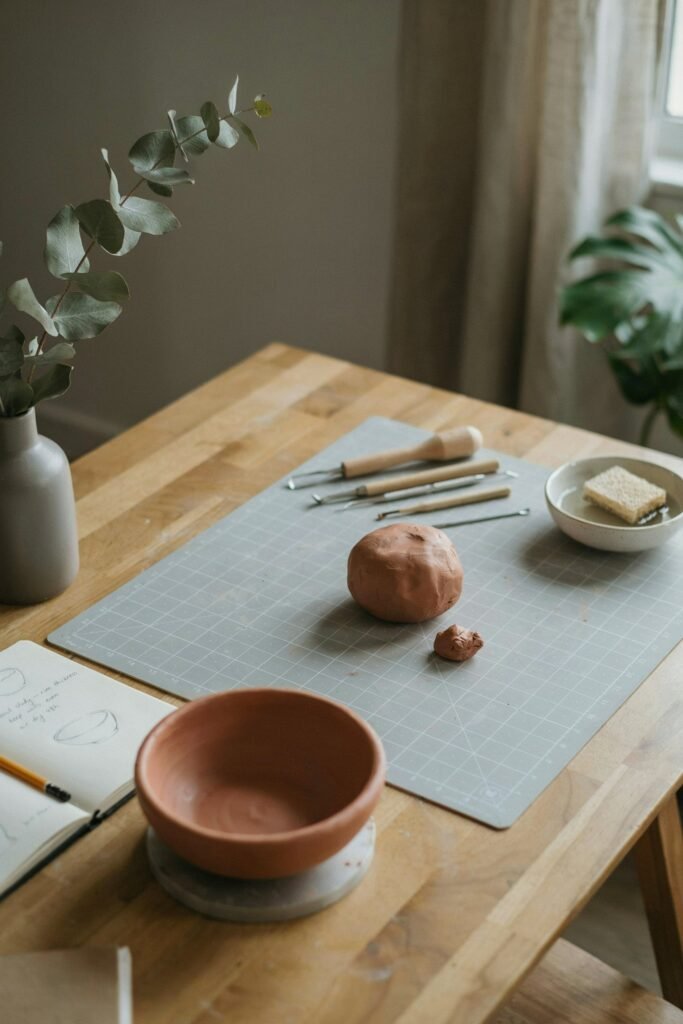
Supplies You Need for DIY Stamped Clay Bowls
Before starting, gather your materials.
Essential Supplies
- Air-dry clay
- Rolling pin
- Bowl mold
- Craft knife
- Sandpaper
- Texture stamps
- Lace or doilies
- Acrylic paint
- Paintbrushes
- Clay sealer
- Wax paper
- Water bowl
- Sponge
Optional Decorative Supplies
- Gold leaf
- Metallic paint
- Dried flowers
- Alphabet stamps
- Rubber stamps
- Leaf cuttings
- Shells
- Fabric textures
How to Make DIY Stamped Clay Bowls Step-by-Step
Step 1: Prepare Your Workspace
Cover your table with wax paper or a silicone craft mat. Clay can stick to surfaces, so protecting your workspace makes cleanup easier.
Keep water nearby to smooth cracks and edges while working.
Step 2: Knead the Clay
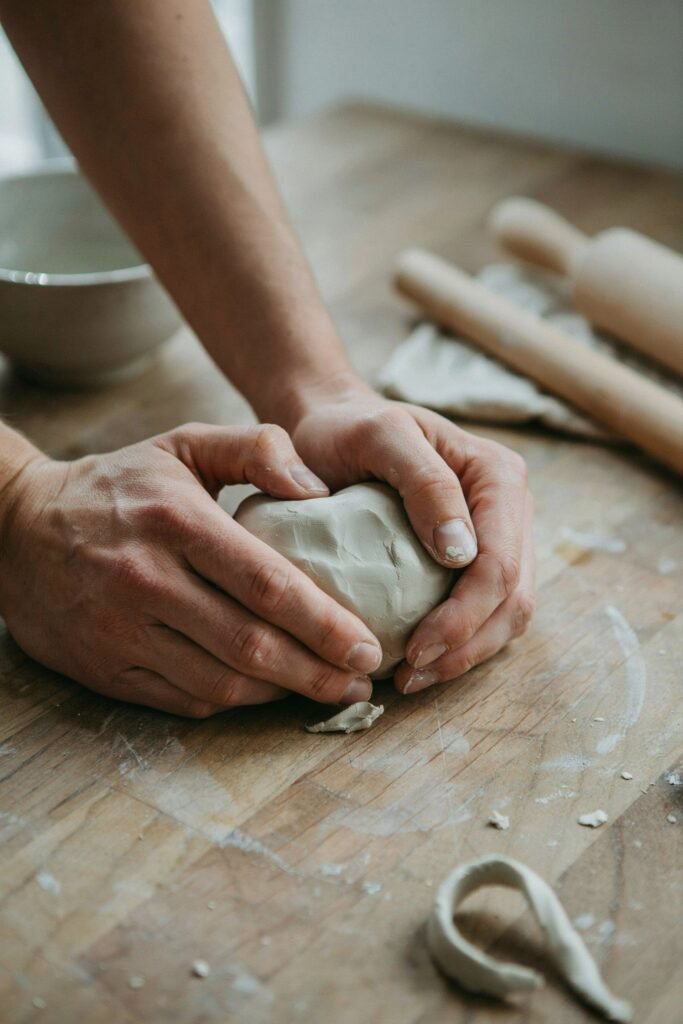
Take a piece of clay and knead it thoroughly for several minutes.
This helps:
- Remove air bubbles
- Improve flexibility
- Prevent cracking
- Create a smoother finish
Soft, evenly conditioned clay is easier to roll and stamp.
Step 3: Roll Out the Clay
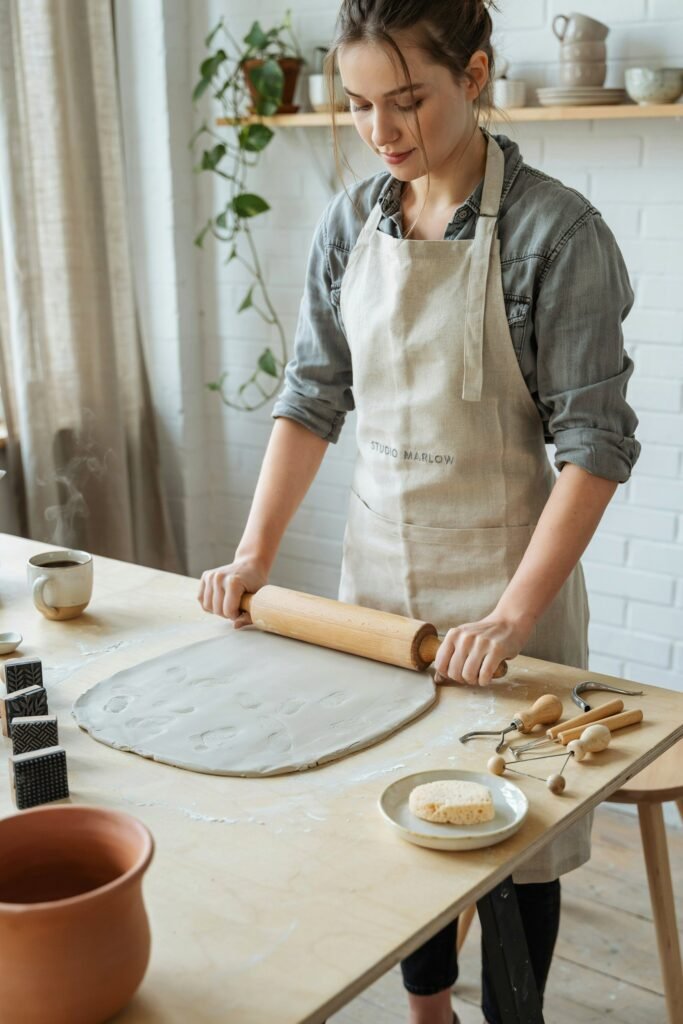
Use a rolling pin to flatten the clay.
Aim for:
- About 1/4 inch thickness
- Even thickness throughout
- Smooth surface without cracks
If the clay becomes too sticky, lightly dust your surface with cornstarch.
Step 4: Add Your Stamped Design
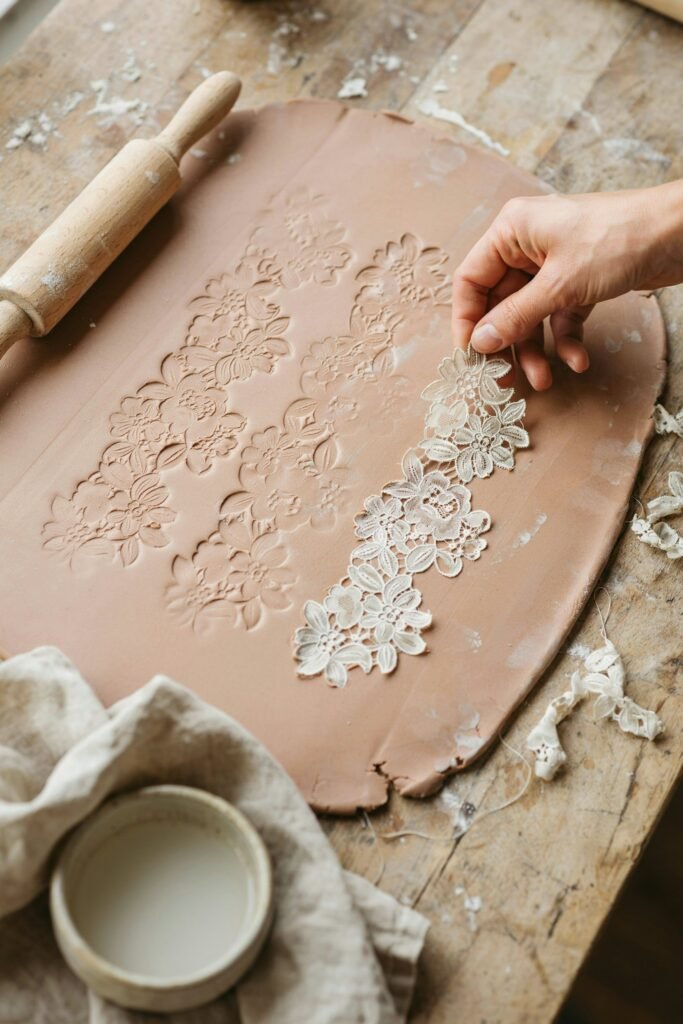
This is the fun creative step.
Press your chosen texture firmly into the clay surface.
You can use:
- Lace
- Fabric
- Leaves
- Rubber stamps
- Wooden stamps
- Crochet doilies
- Floral textures
- Geometric patterns
Press evenly so the design transfers clearly without tearing the clay.
Carefully lift the texture away.
Step 5: Cut the Bowl Shape
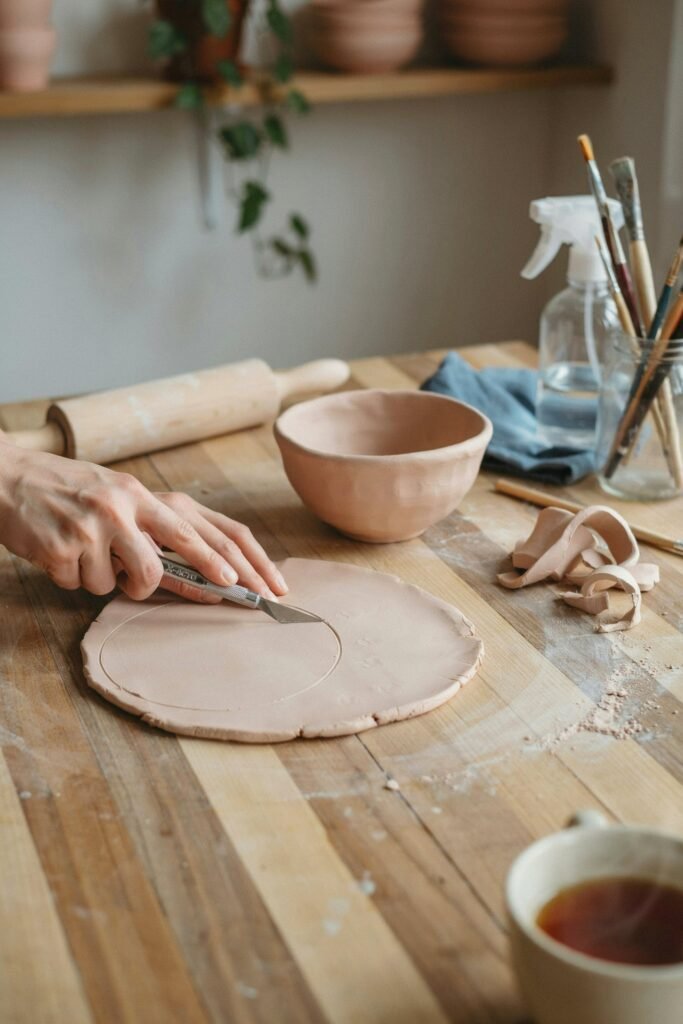
Use a bowl, plate, or circular cutter as a guide.
Cut around the edges using:
- Craft knife
- Clay cutter
- Cookie cutter
You can create:
- Round bowls
- Oval dishes
- Heart-shaped bowls
- Organic freeform shapes
Step 6: Shape the Bowl
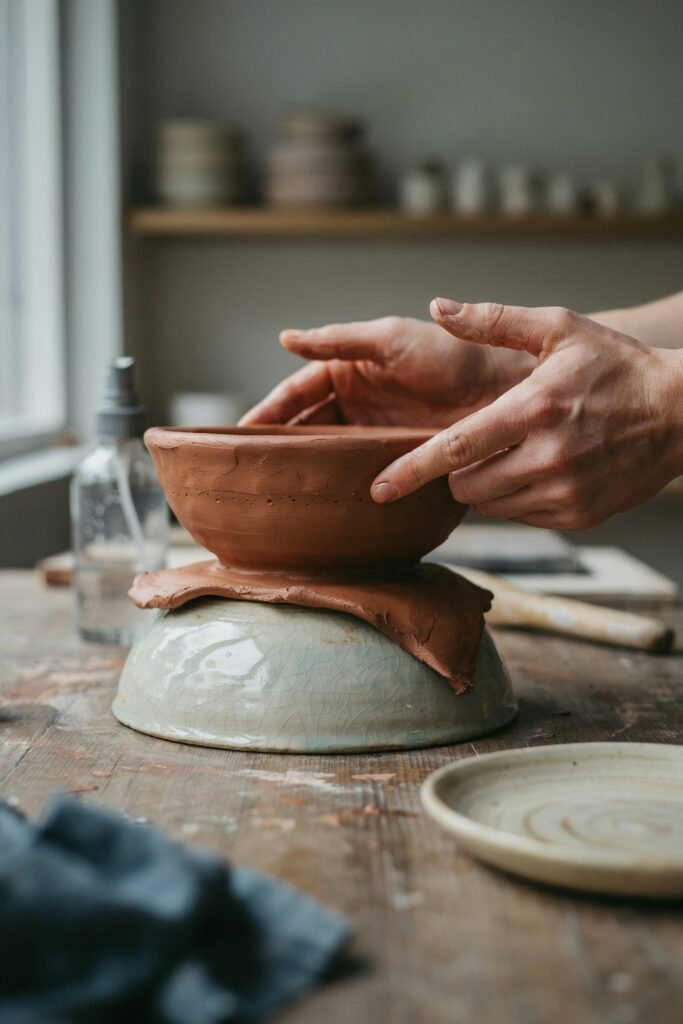
Place the clay circle inside or over an upside-down bowl mold.
Gently press it into shape.
Smooth the edges using:
- Damp fingers
- Wet sponge
- Silicone clay tools
Avoid forcing the clay too aggressively, which can cause cracks.
Step 7: Let the Clay Dry Completely
Allow the bowl to dry slowly at room temperature.
Drying times vary:
- Small bowls: 24–48 hours
- Larger bowls: 48–72 hours
Turn the bowl occasionally so all sides dry evenly.
Avoid direct sunlight or heaters because rapid drying may cause cracking.
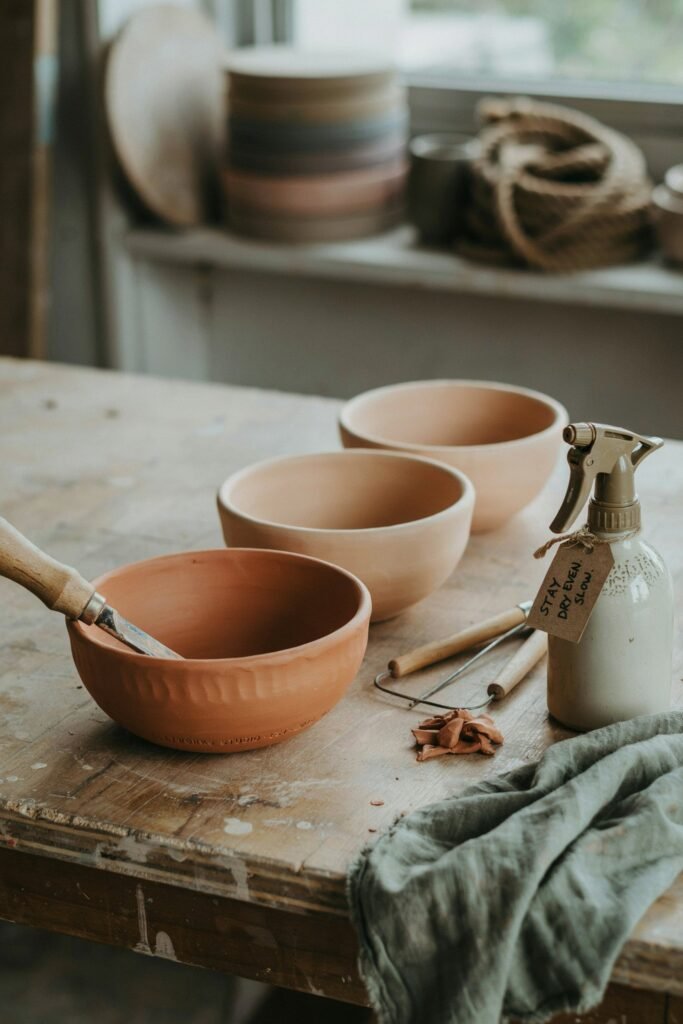
Step 8: Sand Rough Edges
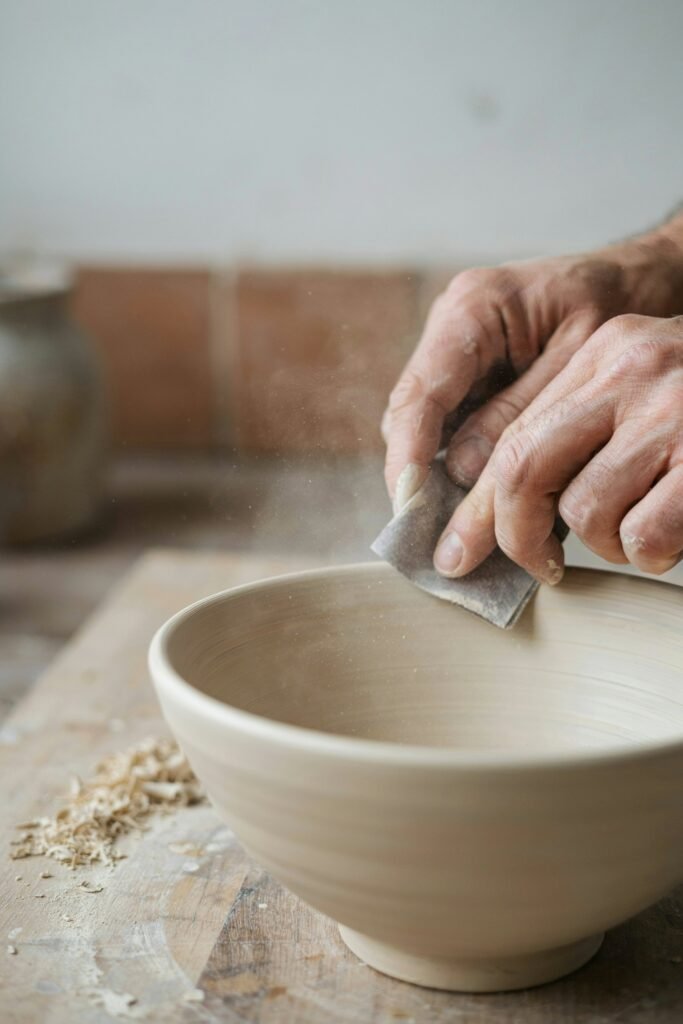
Once fully dry, lightly sand the bowl.
This helps:
- Smooth sharp edges
- Refine the shape
- Prepare for painting
- Create a professional finish
Use fine-grit sandpaper for best results.
Step 9: Paint and Decorate
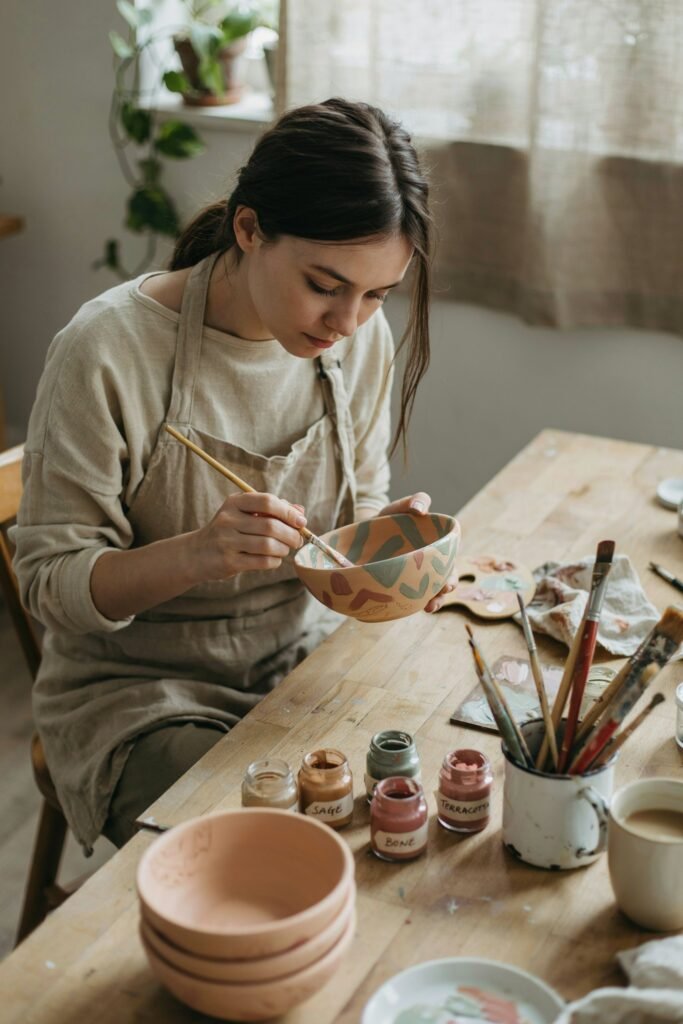
Now you can personalize your bowl.
Popular paint ideas include:
- Neutral beige tones
- White matte finishes
- Terracotta colors
- Black modern designs
- Gold detailing
- Boho rainbow patterns
- Minimalist line art
Use thin layers of paint for a smoother appearance.
Step 10: Seal the Bowl
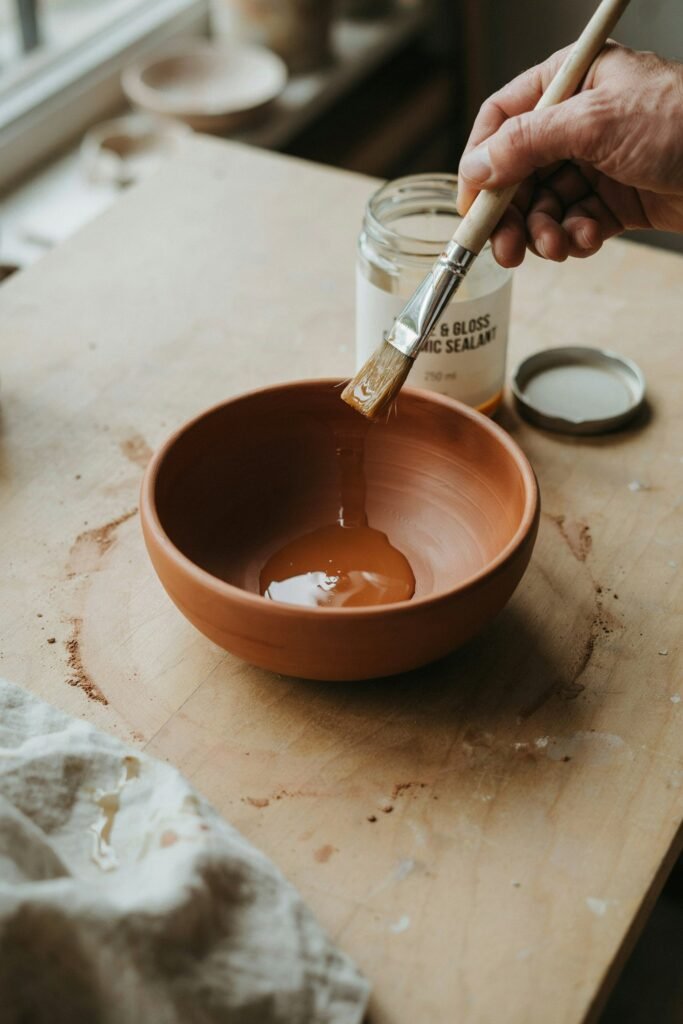
Sealing protects your finished project.
Use:
- Matte sealer
- Gloss varnish
- Waterproof sealant
This improves:
- Durability
- Water resistance
- Longevity
- Professional appearance
Allow the sealant to dry completely before use.
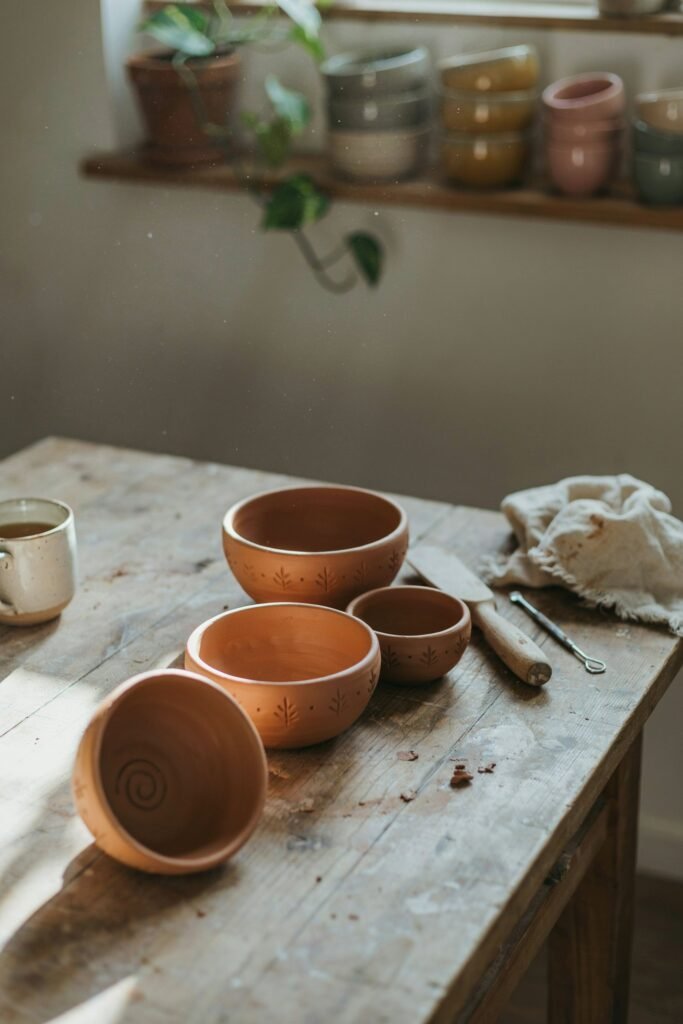
DIY Stamped Clay Bowl Ideas With Instructions
1. Botanical Leaf Stamped Clay Bowl
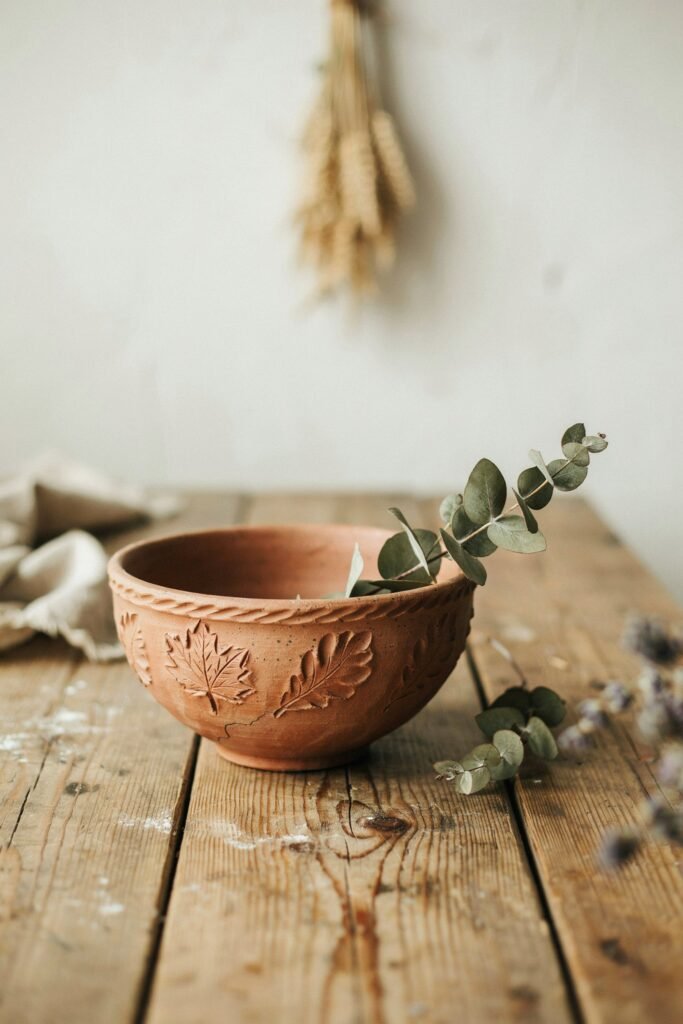
Nature-inspired bowls are elegant and timeless.
How to Make It
Supplies:
- Fresh leaves
- Air-dry clay
- Rolling pin
- Acrylic paint
Instructions:
- Roll out the clay evenly.
- Press fresh leaves firmly into the surface.
- Carefully remove the leaves.
- Cut a circular bowl shape.
- Mold over a bowl form.
- Let dry completely.
- Paint lightly with earthy colors.
- Seal with matte varnish.
Best Style:
- Rustic décor
- Cottagecore interiors
- Nature-inspired homes
2. Lace Stamped Vintage Clay Bowl
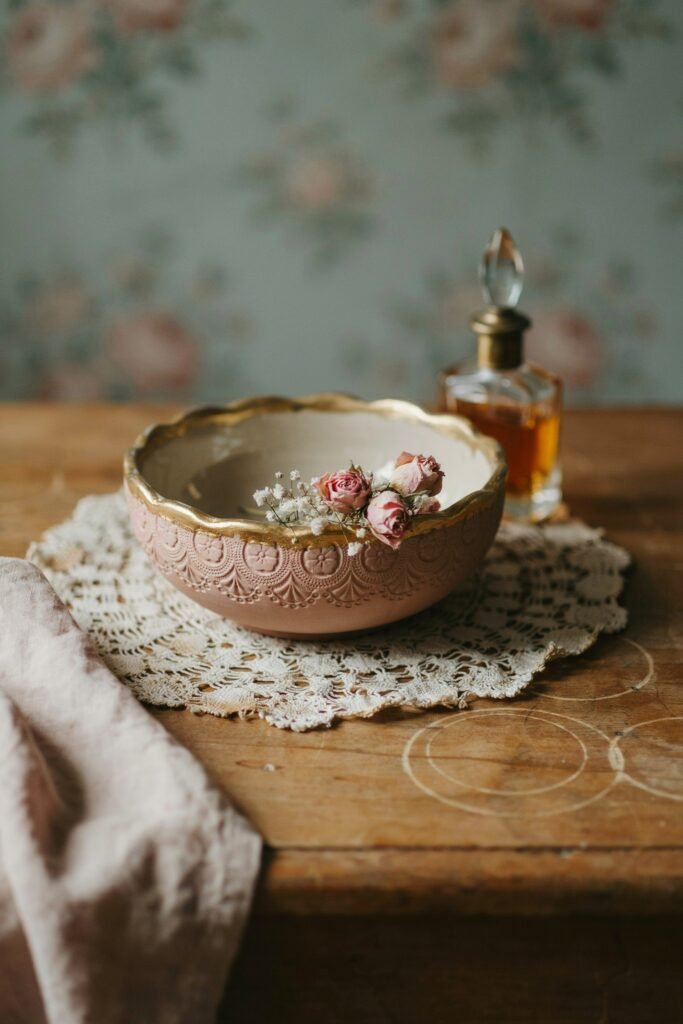
Lace patterns create beautiful antique-style textures.
How to Make It
Supplies:
- Lace fabric
- White clay
- Metallic paint
Instructions:
- Lay lace fabric over rolled clay.
- Press with rolling pin firmly.
- Remove lace carefully.
- Cut desired shape.
- Shape into bowl.
- Dry thoroughly.
- Highlight raised areas using metallic paint.
- Seal with gloss finish.
Best Style:
- Vintage décor
- Feminine bedrooms
- Jewelry trays
3. Personalized Name Stamped Bowl
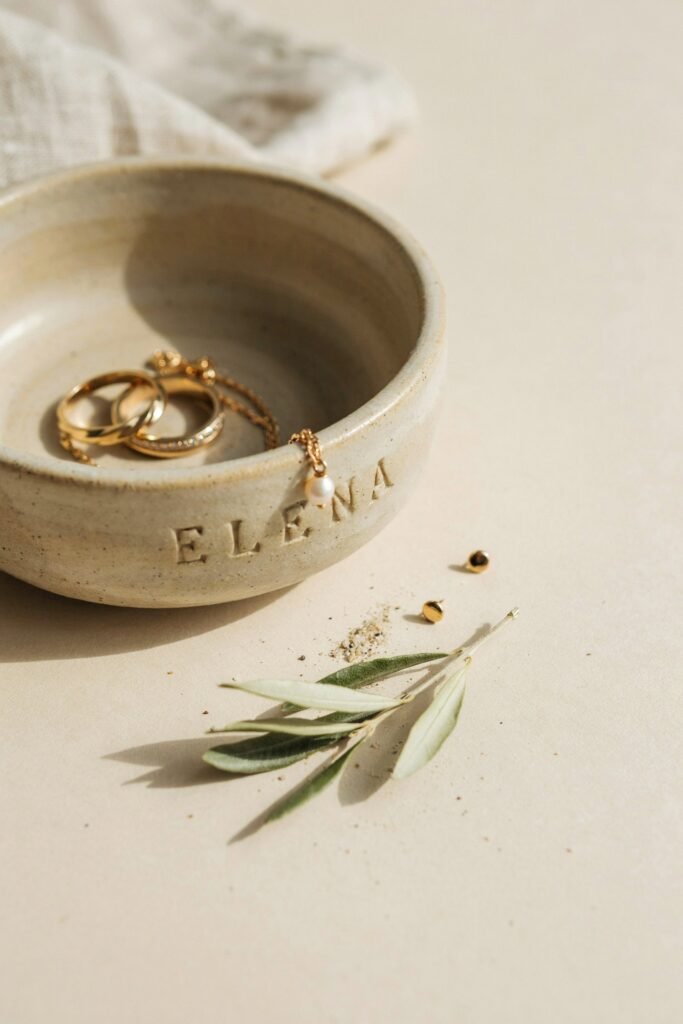
These make excellent handmade gifts.
How to Make It
Supplies:
- Letter stamps
- Clay
- Acrylic paint
Instructions:
- Roll clay flat.
- Stamp names or words into the surface.
- Add decorative border textures.
- Cut and shape bowl.
- Dry fully.
- Paint carefully inside stamped letters.
- Seal for durability.
Great Gift Ideas:
- Wedding gifts
- Bridesmaid gifts
- Mother’s Day presents
- Birthday gifts
4. Minimalist Modern Clay Bowl
Minimalist bowls are highly popular in modern home décor.
How to Make It
Supplies:
- Smooth stamps
- Neutral paint colors
- Matte sealer
Instructions:
- Roll clay smoothly.
- Add subtle geometric stamps.
- Cut simple circular shape.
- Form shallow bowl.
- Allow to dry.
- Paint with soft neutral tones.
- Seal with matte finish.
Best Colors:
- Beige
- White
- Black
- Taupe
- Terracotta
5. Boho Pattern Stamped Bowl
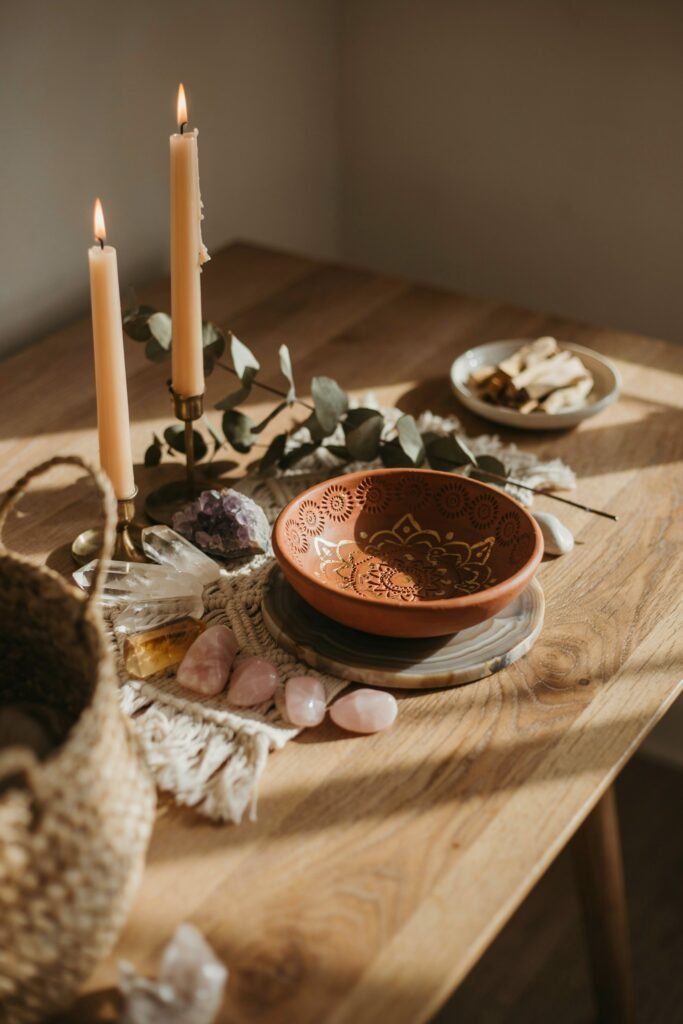
Boho bowls add warmth and personality.
How to Make It
Supplies:
- Mandala stamps
- Gold paint
- Textured rollers
Instructions:
- Roll clay evenly.
- Stamp boho-inspired patterns.
- Shape into relaxed organic form.
- Dry completely.
- Paint using earthy shades.
- Add gold accents.
- Seal thoroughly.
Perfect For:
- Shelf styling
- Crystal holders
- Entryway décor
6. Shell Texture Coastal Bowl
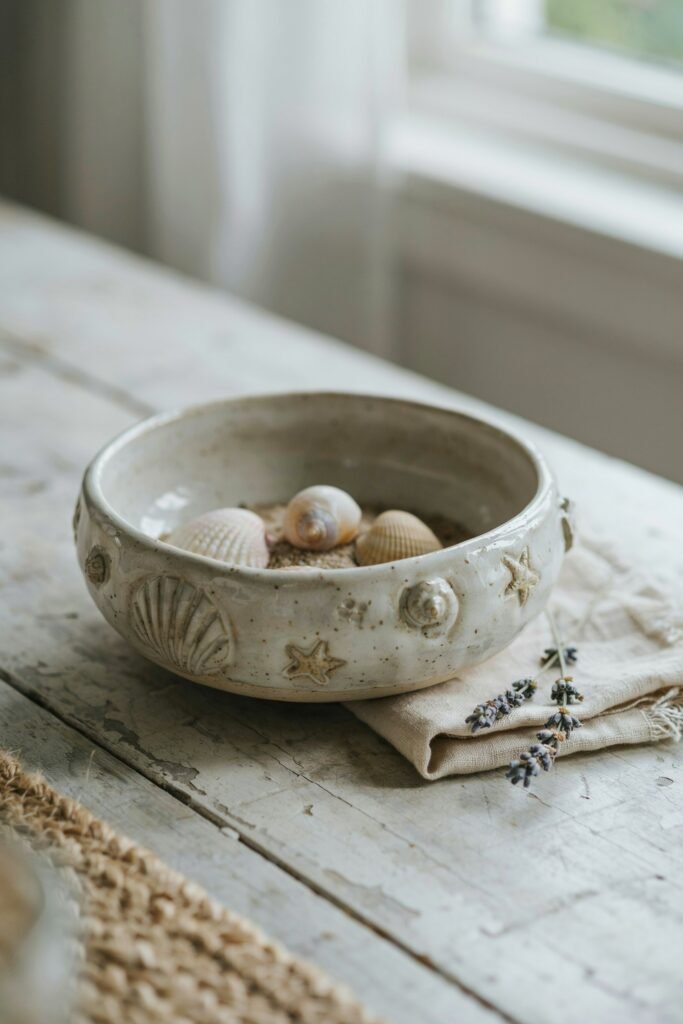
Coastal-themed bowls are perfect for beach décor lovers.
How to Make It
Supplies:
- Seashells
- Sand texture
- White paint
Instructions:
- Press shells into rolled clay.
- Create layered ocean textures.
- Cut bowl shape.
- Mold gently.
- Dry naturally.
- Paint with coastal tones.
- Seal with satin finish.
Great For:
- Beach houses
- Summer décor
- Bathroom styling
7. Floral Stamped Clay Bowl
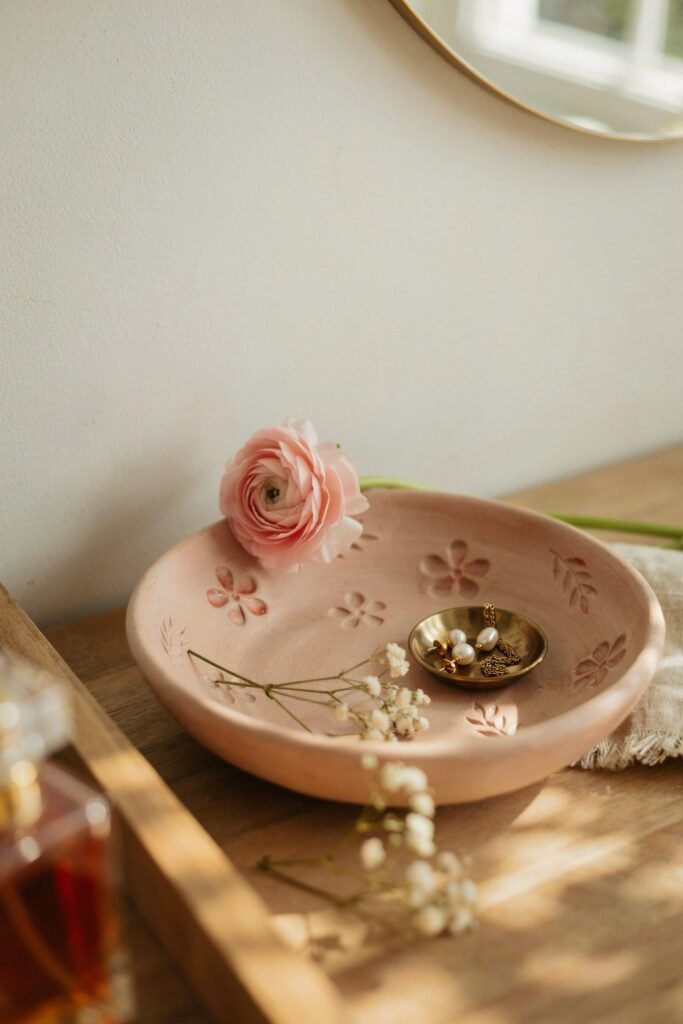
Floral bowls feel soft, elegant, and decorative.
How to Make It
Supplies:
- Floral stamps
- Pink or cream paint
- Fine brushes
Instructions:
- Roll clay smoothly.
- Stamp floral patterns evenly.
- Cut into bowl shape.
- Shape carefully over mold.
- Dry fully.
- Paint delicate floral details.
- Seal with clear varnish.
Ideal For:
- Vanity tables
- Makeup storage
- Romantic décor
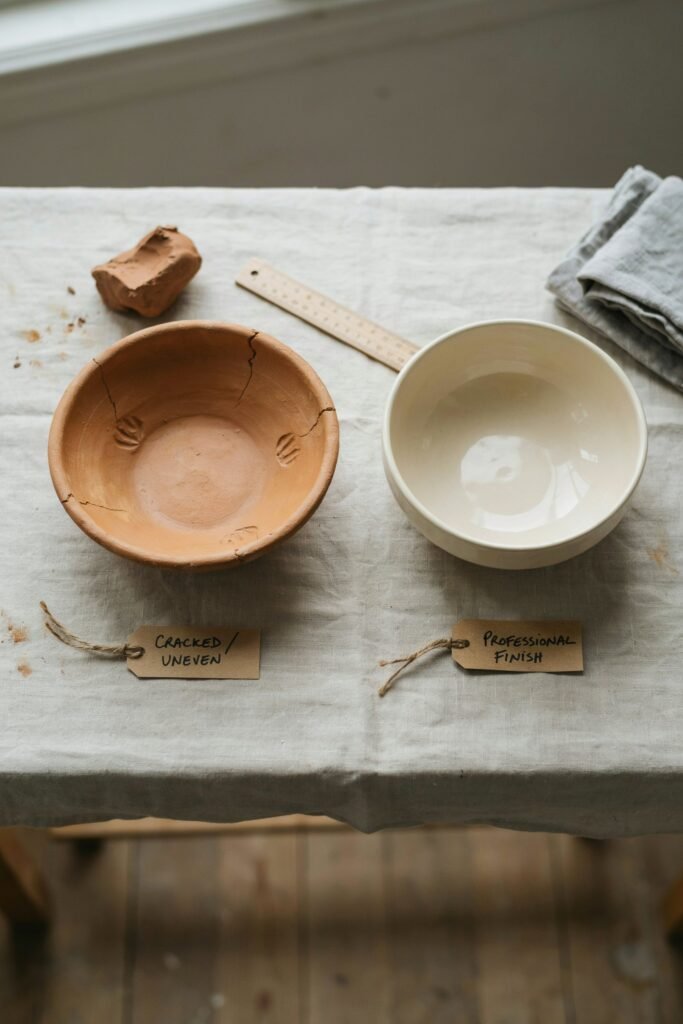
Tips for Preventing Cracks in Clay Bowls
Clay cracking is one of the most common beginner issues.
Prevent Cracking By:
- Kneading clay thoroughly
- Avoiding overly thin clay
- Drying slowly
- Keeping thickness even
- Using water to smooth edges
- Turning bowls while drying
- Avoiding direct heat
Patience is essential for smooth results.
Best Paint Colors for Clay Bowls
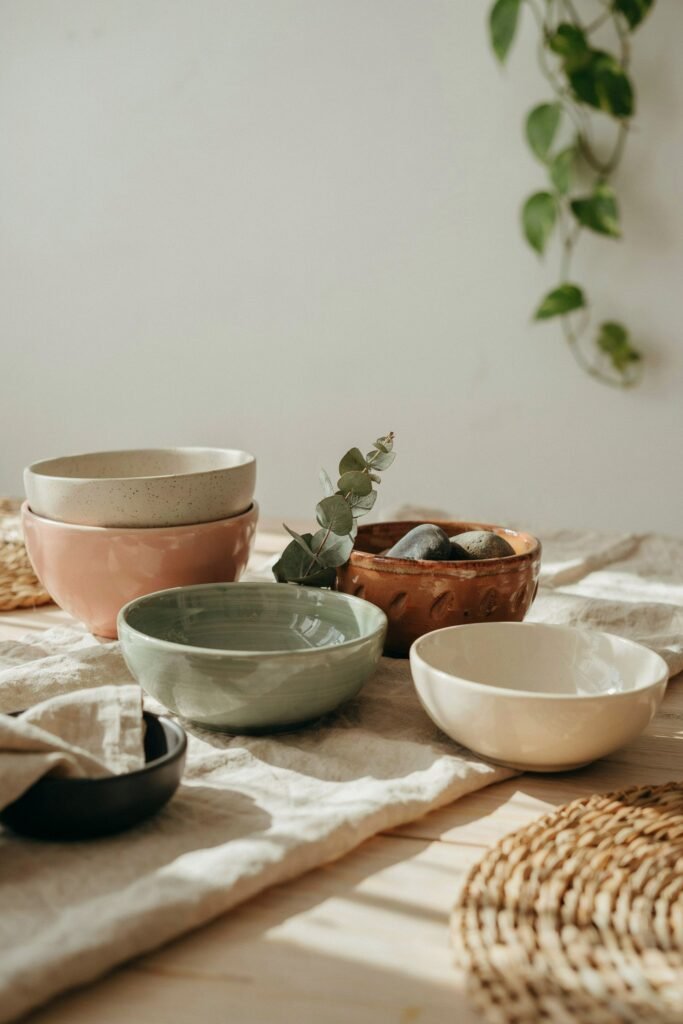
Trending paint colors include:
- Warm white
- Sage green
- Terracotta
- Dusty rose
- Matte black
- Sand beige
- Olive green
- Burnt orange
- Cream
- Gold accents
Neutral colors often perform best for modern home décor styles.
How to Seal Air-Dry Clay Properly
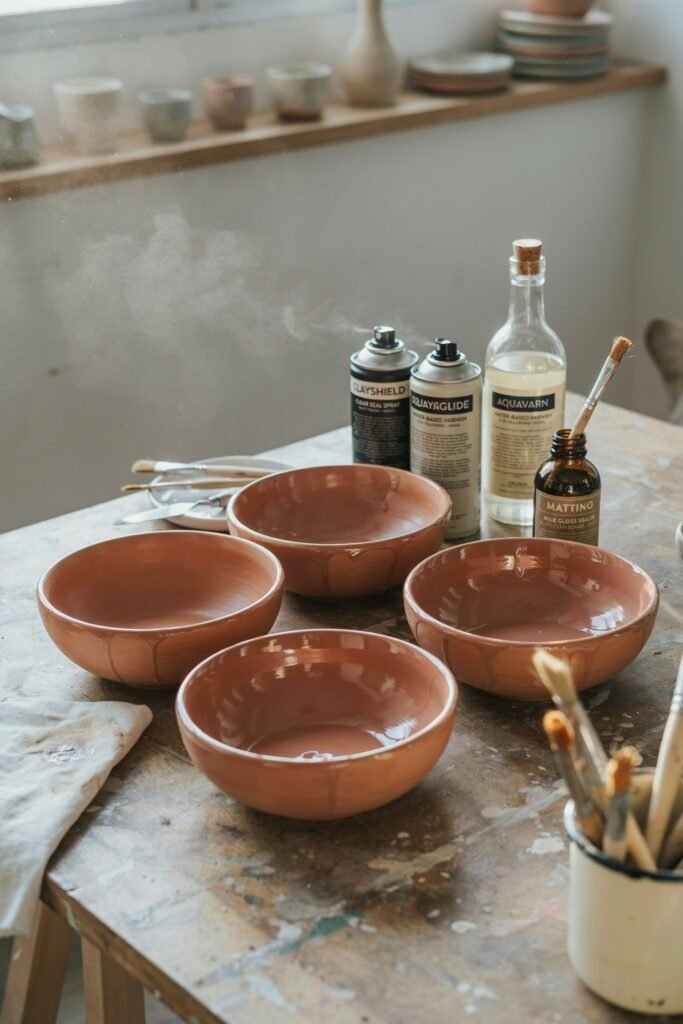
Air-dry clay can absorb moisture if left unsealed.
Best Sealers:
- Mod Podge
- Acrylic spray sealant
- Polycrylic
- Matte varnish
- Gloss varnish
Apply 2–3 thin coats for best protection.
Common Mistakes to Avoid
1. Rolling Clay Too Thin
Thin clay cracks easily.
2. Drying Too Fast
Heat can warp or crack bowls.
3. Overworking Wet Clay
Too much handling weakens the structure.
4. Skipping Sealer
Unsealed bowls absorb moisture and stain easily.
5. Uneven Thickness
Uneven bowls dry improperly and may crack.
Creative Ways to Use DIY Clay Bowls
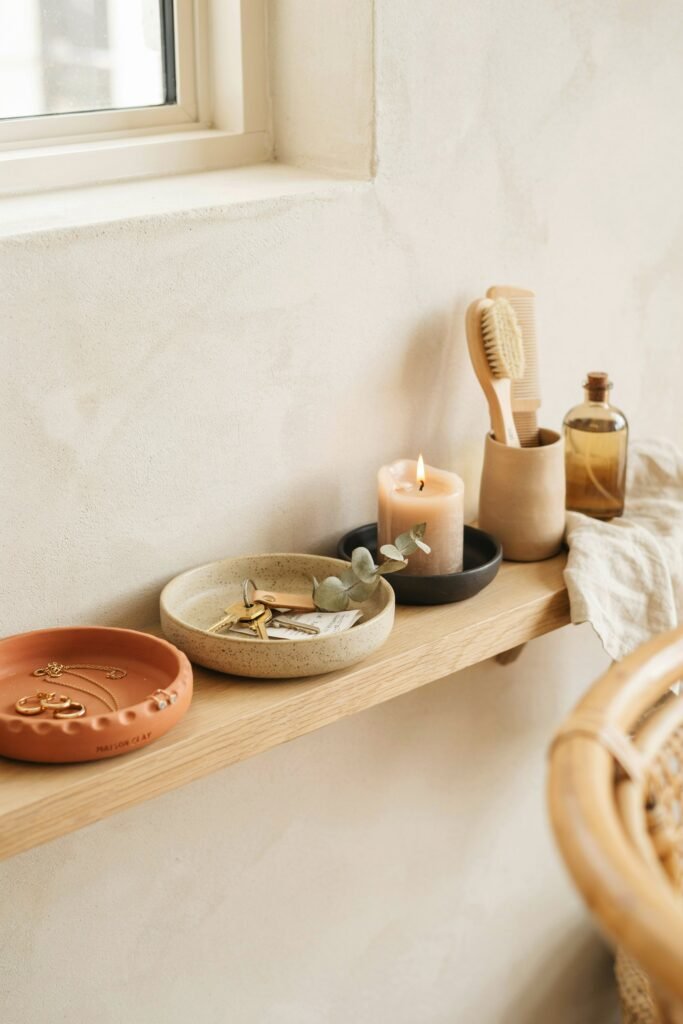
You can use stamped clay bowls for:
- Ring holders
- Jewelry trays
- Key dishes
- Soap holders
- Candle bases
- Crystal bowls
- Coin trays
- Vanity organizers
- Decorative shelf styling
- Holiday gifts
They are practical while also adding handmade charm to any room.
Can You Sell Handmade Clay Bowls?
Yes. Handmade clay bowls are popular on:
- Etsy
- Craft fairs
- Facebook Marketplace
- Handmade shops
- Local boutiques
Popular selling features include:
- Personalized names
- Neutral aesthetics
- Minimalist designs
- Boho textures
- Gift packaging
Photography Tips for Clay Bowl Bloggers and Sellers
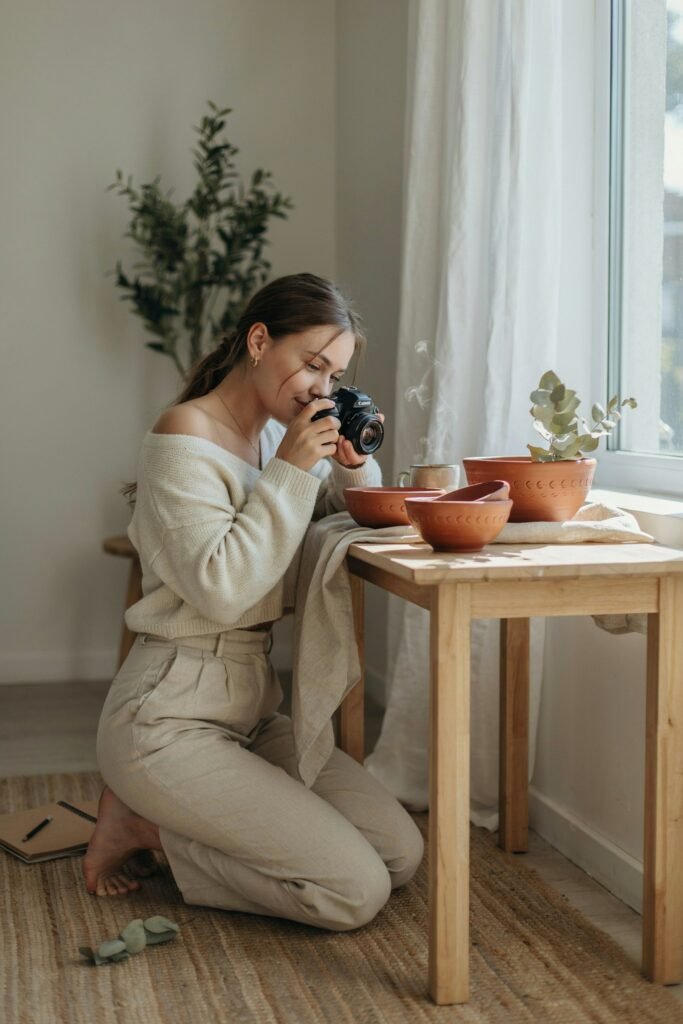
High-quality images improve:
- Pinterest clicks
- Etsy sales
- Blog engagement
- Social media shares
Best Photography Tips:
- Use natural lighting
- Photograph near windows
- Use neutral backgrounds
- Include lifestyle styling
- Add jewelry or décor props
- Shoot multiple angles
Clean aesthetic photos help handmade products look more premium.
Frequently Asked Questions
What kind of clay is best for DIY stamped clay bowls?
Air-dry clay is usually the best option for beginners because it is affordable, easy to use, and does not require a kiln or oven. Polymer clay is also a great option for stronger decorative bowls.
How long does air-dry clay take to dry?
Most air-dry clay bowls take between 24 to 72 hours to dry completely depending on the thickness and room temperature.
Why do my clay bowls crack while drying?
Clay bowls often crack because the clay is rolled too thin, dries too quickly, or contains trapped air bubbles. Kneading the clay properly and drying slowly helps prevent cracks.
Can DIY clay bowls hold water?
Most air-dry clay bowls are not fully waterproof unless sealed properly with multiple layers of waterproof sealant.
What can I use to stamp patterns into clay?
You can use lace, leaves, rubber stamps, textured fabric, shells, crochet doilies, wooden stamps, or even household objects to create unique patterns.
Do I need a pottery wheel to make clay bowls?
No. DIY stamped clay bowls can easily be made by hand using simple household tools and a bowl mold.
How do you seal air-dry clay bowls?
Use acrylic sealant, matte varnish, gloss varnish, or Mod Podge to protect and strengthen the bowl after painting.
Can I paint clay bowls?
Yes. Acrylic paint works very well on air-dry clay and allows you to create minimalist, boho, vintage, or colorful designs.
Are stamped clay bowls good for gifts?
Yes. Handmade clay bowls make thoughtful gifts for birthdays, weddings, Mother’s Day, bridesmaids, holidays, and housewarmings.
Can you sell handmade clay bowls?
Absolutely. Many people successfully sell handmade clay bowls on Etsy, at craft fairs, and through social media shops.
Final Thoughts
DIY stamped clay bowls are one of the easiest and most rewarding handmade crafts you can create at home.
They are affordable, customizable, beginner-friendly, and perfect for gifts, home décor, or even small handmade businesses.
With just a few supplies and some creativity, you can design beautiful textured bowls that look elegant and professionally made.
Whether you love minimalist décor, boho styling, vintage aesthetics, or botanical textures, there is a stamped clay bowl idea for every style and personality.
Take your time, experiment with textures, and enjoy the creative process. Handmade crafts become even more meaningful when they reflect your own artistic touch.