
Air dry clay is one of my favorite craft materials because it makes it easy to create beautiful handmade pieces without needing special equipment or a kiln.
I enjoy making everything from decorative bowls and ornaments to small home decor projects, and one lesson that quickly became clear is that the work is never truly finished until it has been sealed properly.
A good sealer does much more than add a nice finish.
It helps protect the surface from dust, fingerprints, moisture, and everyday wear while keeping painted colors looking fresh and vibrant.
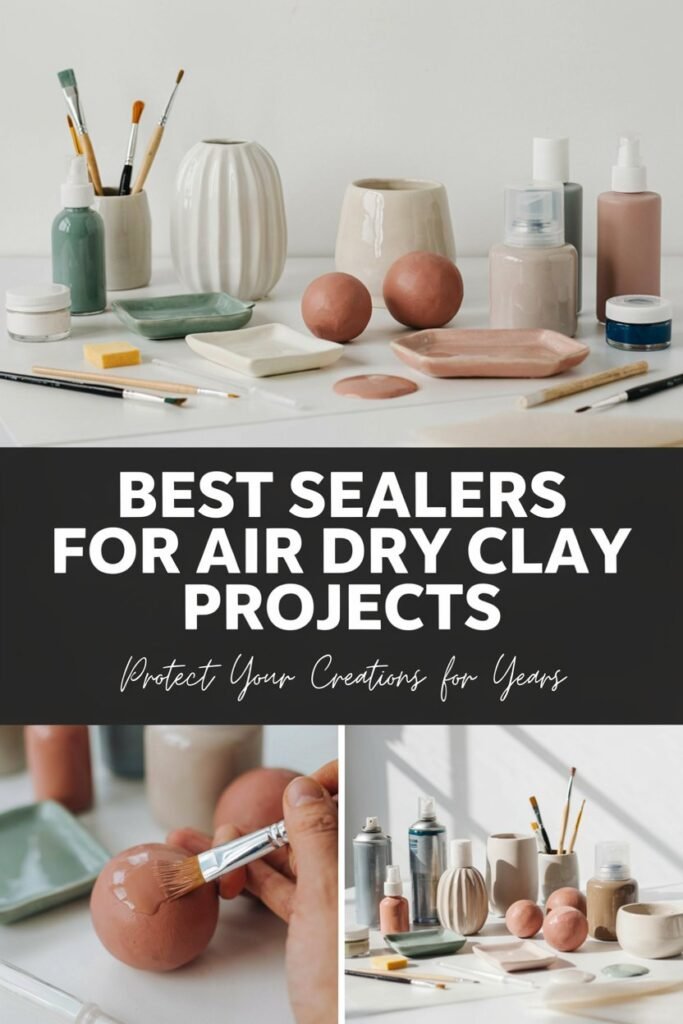
I have tested different sealers on my own projects over time, and I have seen how the right choice can make a simple clay creation last much longer and look professionally finished.
I have also learned that not every sealer works the same way.
Some leave a beautiful matte finish, while others create a glossy shine or offer stronger protection for pieces that are handled often.
In this guide, I am sharing what has worked best for me, what I have learned through trial and error, and how you can choose the right sealer to protect your own air dry clay projects with confidence.
Why Air Dry Clay Needs a Sealer
One of the biggest surprises I had when I started working with air dry clay was discovering how porous it remains even after it has fully dried.
Although the clay feels hard and solid, it can still absorb moisture from the air and become more vulnerable to stains, scratches, and everyday wear.
Leaving a project unsealed may not cause immediate problems, but over time the surface can lose its smooth appearance, painted details may begin to fade, and the piece can become more difficult to clean.
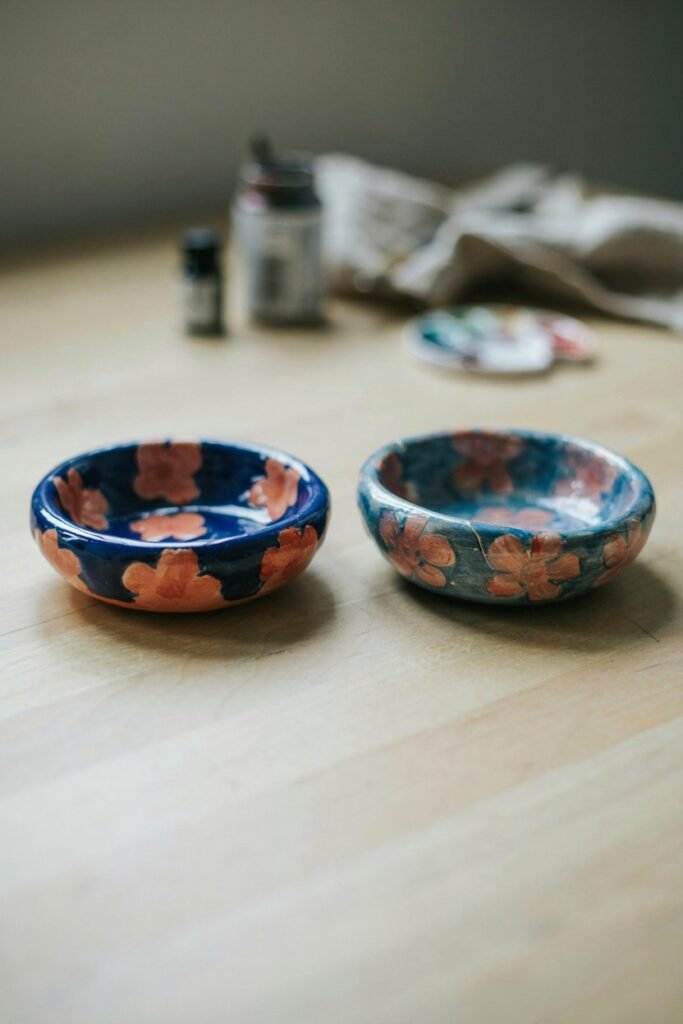
I noticed this after displaying a few handmade trinket dishes on a shelf near a window.
Even though they were only used for small jewelry items, they slowly collected dust that was difficult to remove without affecting the paint.
Once I began sealing my finished projects, cleaning became much easier, and the colors stayed much brighter for much longer.
A quality sealer provides several important benefits.
- Creates a protective barrier against dust and dirt
- Helps reduce moisture absorption
- Protects painted designs from scratches
- Makes colors appear richer and more vibrant
- Gives the project a polished and finished appearance
- Extends the life of handmade creations
While a sealer cannot make standard air dry clay completely waterproof, it does provide valuable protection that helps preserve your hard work.
If you spend hours shaping, sanding, and painting a project, taking a few extra minutes to seal it is well worth the effort.
Can You Leave Air Dry Clay Unsealed
Technically, yes. Some air dry clay projects can be left unsealed, but whether that is a good idea depends on how the finished piece will be used.
For example, simple decorative sculptures that sit on a shelf and are rarely touched can often remain unsealed without major issues, especially if they stay indoors in a dry environment.
Practice pieces and temporary crafts also do not always need additional protection.
However, I almost always seal projects that will be handled regularly or displayed for long periods.
Through experience, I have found that these pieces simply hold up much better over time.
I strongly recommend sealing items such as:
- Jewelry dishes
- Decorative bowls
- Ornaments
- Picture frames
- Wall decor
- Handmade gifts
- Seasonal decorations
- Clay name tags
- Plant markers used indoors
If a project has been painted with acrylic paint, sealing becomes even more important.
The sealer helps lock in the paint and reduces the chances of scratches or fading after repeated handling.
What Makes a Good Air Dry Clay Sealer
After trying several different products, I realized that choosing a sealer is about much more than whether it creates a glossy or matte finish.
The best sealers combine durability with ease of use while keeping the natural beauty of the clay intact.
These are the qualities I now look for before using any sealer on a finished project.
Dries Clear
Nothing is more disappointing than spending hours painting a clay project only to have the finish dry cloudy or slightly yellow.
I always choose products that are designed to dry crystal clear so the original colors remain exactly as intended.
Provides Moisture Protection
Air dry clay is sensitive to moisture, so I prefer sealers that help reduce water absorption.
This is especially useful for decorative trays, ornaments, and home decor that may occasionally be exposed to humidity.
Resists Scratches
Some pieces are handled much more than others.
Jewelry dishes, key trays, and decorative containers benefit from a tougher protective coating that resists light scratches and everyday use.
Easy to Apply
A good sealer should spread evenly without leaving obvious brush marks or bubbles.
I appreciate products that level themselves as they dry because they make it easier to achieve a smooth professional finish.
Non Yellowing Formula
Projects are meant to be enjoyed for years, so I avoid sealers that may discolor with age. Modern water based formulas generally stay much clearer over time.
Available in Different Finishes
Different projects deserve different looks.
I enjoy using matte finishes for rustic or minimalist pieces, satin finishes for everyday home decor, and glossy finishes when I want bright colors to stand out.
Finding a sealer with these qualities has helped me create clay projects that not only look better but also stay beautiful long after they are finished.
Types of Sealers for Air Dry Clay
After making many different air dry clay projects, I realized there is no single sealer that works perfectly for everything.
The best choice depends on what you have made, whether it has been painted, how often it will be handled, and the type of finish you want.
I have experimented with several kinds of sealers, and each one has strengths that make it better for certain projects than others.
Acrylic Spray Sealer
An acrylic spray sealer is one of the easiest options to use because it applies an even coat without leaving brush marks.
I like using it on ornaments, decorative wall pieces, and textured sculptures where getting into small details with a brush would be difficult.
The biggest advantage is how quickly it covers large surfaces.
It also dries relatively fast, making it a good choice when working on several projects at once.
What I like
- Smooth and even finish
- No visible brush strokes
- Great for detailed textures
- Quick application
- Available in matte, satin, and gloss finishes
Things to keep in mind
- Best applied outdoors or in a well ventilated area
- Thin coats produce better results than one heavy coat
- Overspray can settle on nearby surfaces if the workspace is not protected
For decorative pieces that are not handled every day, this is one of the sealers I reach for most often because it is simple to use and consistently gives clean results.
Brush On Acrylic Sealer
A brush on acrylic sealer is probably the one I use most often because it gives me complete control over where the product goes.
When I make jewelry dishes, small bowls, or personalized gifts, I like taking my time and carefully covering every surface.
I also find brush on sealers useful when working with children or crafting indoors because there is no spray mist to worry about.
What I like
- Easy to control
- Minimal product waste
- Excellent for small projects
- Available in different finishes
- Easy to apply multiple coats
Things to keep in mind
- Use a soft quality brush
- Apply thin coats
- Allow each coat to dry fully before adding another
One thing I learned through experience is that rushing this process usually creates visible brush strokes.
Taking a little extra time between coats makes a huge difference in the final appearance.
Mod Podge
Mod Podge is often recommended for beginners, and I understand why.
It is affordable, easy to find, and simple to apply.
I have used it on several decorative projects that stay indoors, and it performs well when used correctly.
I think Mod Podge works best for crafts that are displayed rather than handled constantly.
What I like
- Beginner friendly
- Budget friendly
- Easy to find
- Available in matte and gloss
- Doubles as a glue and sealer
Things to keep in mind
- Not as durable as stronger sealers
- Can remain slightly tacky in humid environments
- Not ideal for projects exposed to moisture
For ornaments, wall art, and seasonal decorations, I have had good results with Mod Podge, but for trays or frequently handled items, I usually choose something more durable.
Water Based Polyurethane
When I want extra durability, water based polyurethane is usually my first choice.
It creates a tougher protective layer while still drying clear and resisting yellowing over time.
I especially like using it on decorative trays, ring dishes, and home decor pieces that people actually use instead of simply displaying.
What I like
- Excellent durability
- Strong scratch resistance
- Clear finish
- Low odor compared to oil based products
- Long lasting protection
Things to keep in mind
- Slightly longer drying time
- Requires several thin coats
- Full curing takes longer than surface drying
Whenever I spend several hours making a gift, I almost always finish it with water based polyurethane because I know it will stand up better to everyday use.
Epoxy Resin
Epoxy resin is different from traditional sealers because it creates a thick glass like coating over the surface.
I do not use it for every project, but when I want a premium finish, it is difficult to beat.
It works especially well for decorative trays, coasters, jewelry, and display pieces where a high shine adds to the overall design.
What I like
- Extremely durable
- Beautiful glossy finish
- Excellent moisture resistance
- Professional appearance
- Enhances painted colors
Things to keep in mind
- More expensive
- Requires careful measuring and mixing
- Takes longer to cure
- Dust free workspace is important
Because resin takes more preparation, I usually save it for special projects rather than everyday crafts.
Best Sealers for Air Dry Clay Projects
After experimenting with different products, these are the sealers I would confidently recommend based on performance, ease of use, and the types of projects they work best for.
1. Aleene’s Acrylic Sealer Spray
Best for decorative crafts and ornaments
Finish options
- Matte
- Gloss
Why I like it
This spray goes on evenly, dries quickly, and gives painted clay projects a clean professional finish without adding noticeable thickness.
I often use it when I want to protect painted ornaments before storing them away for the season.
Best for
- Holiday ornaments
- Wall decorations
- Sculptures
- Painted clay art
2. Mod Podge Clear Acrylic Sealer
Best for beginner projects
Finish options
- Matte
- Satin
- Gloss
Why I like it
This is an easy product to recommend for anyone just getting started.
It provides reliable protection for decorative projects while being simple enough for beginners to use confidently.
Best for
- Decorative signs
- Home decor
- Craft projects
- Painted ornaments
3. Minwax Polycrylic Protective Finish
Best for long lasting protection
Finish options
- Matte
- Satin
- Gloss
Why I like it
Whenever I know a project will be handled regularly, this is one of the products I trust most.
It dries crystal clear and provides excellent scratch resistance without changing paint colors.
Best for
- Trinket trays
- Jewelry dishes
- Decorative bowls
- Handmade gifts
4. DecoArt Triple Thick Gloss Glaze
Best for a glossy finish
Finish
- High gloss
Why I like it
Sometimes a project needs extra shine without the complexity of mixing resin.
This glaze creates a rich glossy surface that makes painted colors appear deeper and brighter.
Best for
- Decorative tiles
- Small sculptures
- Painted display pieces
- Colorful home decor
5. Varathane Water Based Polyurethane
Best for heavy use items
Finish options
- Matte
- Satin
- Gloss
Why I like it
This has become one of my favorite choices for projects that need reliable protection.
The finish feels durable, dries clear, and holds up well over time.
Best for
- Decorative trays
- Catch all dishes
- Key holders
- Frequently handled decorations
Matte, Satin, or Gloss
One question I see quite often is which finish looks best.
After trying all three, I have learned that there is no right or wrong answer. It simply depends on the style you want.
| Finish | Best For | My Thoughts |
|---|---|---|
| Matte | Rustic decor, natural clay look, minimalist designs | My personal favorite for neutral home decor because it keeps the handmade appearance. |
| Satin | Everyday decorations, gifts, painted projects | A great balance between protection and subtle shine. |
| Gloss | Bright colorful projects, jewelry, decorative trays | Makes colors stand out and creates a polished professional finish. |
For most of my own projects, I usually choose a matte or satin finish because I like the natural appearance of air dry clay.
When I want something to feel more elegant or eye catching, I switch to a gloss finish because it really makes painted details pop.
How to Seal Air Dry Clay Correctly
Even the best sealer will not give great results if it is applied too soon or too heavily.
I have learned that patience is just as important as choosing the right product.
Taking a little extra time during the finishing stage has helped me create projects that stay looking beautiful long after they are complete.
Step 1: Let the Clay Dry Completely
This is the step I never rush anymore. Air dry clay may feel hard on the outside, but moisture can still be trapped inside.
Sealing the surface too early can lock in that moisture, which may lead to cracks or an uneven finish later.
I usually leave my projects to dry for at least 24 to 72 hours, depending on their size and thickness.
Larger pieces often need even longer. Waiting a little extra time is always better than sealing too soon.
Step 2: Smooth the Surface
Once the clay has fully dried, I lightly sand any rough edges or fingerprints using fine grit sandpaper.
This simple step makes a huge difference because the sealer highlights the surface underneath.
If the clay feels rough before sealing, it will usually still look rough afterward.
After sanding, I wipe away all the dust with a soft microfiber cloth or a dry paintbrush.
Step 3: Apply Thin Coats
One mistake I made early on was trying to finish everything with one thick coat.
It seemed faster, but the results were disappointing.
Thick layers took longer to dry, sometimes looked cloudy, and occasionally left visible streaks.
Now I always apply several thin coats instead.
Thin layers dry more evenly and create a smoother, stronger finish.
If I am using a brush on sealer, I use long, gentle strokes and avoid going back over areas that have already started drying.
Step 4: Allow Each Coat to Dry
Drying times vary depending on the product, but I never rush this step.
I wait until each coat is completely dry before applying the next one.
Most decorative projects only need two or three thin coats, while trays and frequently handled pieces often benefit from an extra layer of protection.
Step 5: Let the Sealer Cure
Dry and fully cured are not always the same thing.
Even after the surface feels dry, many sealers continue hardening for another day or two.
Whenever possible, I leave finished projects alone for at least 24 hours before displaying them or giving them as gifts.
For stronger finishes like polyurethane or epoxy resin, I usually wait even longer according to the manufacturer’s instructions.
Common Mistakes to Avoid
I have made plenty of mistakes while learning to work with air dry clay, and those experiences taught me just as much as my successful projects.
Avoiding these common problems will save you time and help your finished pieces look much more professional.
Sealing Before the Clay Has Fully Dried
This is probably the biggest mistake beginners make. Even if the outside feels dry, moisture inside the clay can still cause problems after sealing.
Applying Thick Coats
Heavy coats are more likely to drip, streak, or dry unevenly. Thin layers always produce a smoother finish.
Forgetting to Remove Dust
Sanding dust becomes trapped under the sealer if it is not cleaned away first.
I always wipe every project carefully before applying the first coat.
Using the Wrong Finish
A high gloss finish looks beautiful on colorful decorative pieces, but it may not suit rustic or natural clay designs.
Choosing the finish based on the style of the project creates a much better result.
Skipping Extra Coats
One thin coat provides only limited protection. I have found that two or three coats usually give a much stronger and longer lasting finish.
Rushing the Drying Process
Trying to speed things up with heat or handling the project too soon can leave fingerprints or damage the finish. Patience almost always produces the best results.
Frequently Asked Questions
What is the best sealer for air dry clay?
For most decorative projects, I recommend a quality acrylic sealer because it is easy to apply, dries clear, and protects painted surfaces well.
For projects that will be handled often, a water based polyurethane provides stronger long term protection.
Can air dry clay become waterproof?
No. Standard air dry clay is naturally porous, and no sealer can make it completely waterproof.
A good sealer helps resist moisture, but I still avoid leaving finished pieces in standing water or using them outdoors for long periods.
Can I use Mod Podge as a sealer?
Yes. Mod Podge works well for many indoor decorative projects.
It is easy to use and gives painted clay a protective finish, although it is not as durable as polyurethane for frequently handled items.
How many coats of sealer should I apply?
I usually apply two to three thin coats for decorative projects. Items that receive regular use often benefit from three or four coats for added durability.
Can I paint after sealing?
Yes, but I prefer completing all painting before sealing. Applying the sealer last helps protect both the paint and the clay underneath.
Does sealer prevent cracks?
A sealer helps protect the finished surface, but it cannot repair or completely prevent cracks caused by improper drying or uneven clay thickness.
Allowing projects to dry slowly and evenly is still the best way to reduce cracking.
My Personal Tips for Better Results
After working on many different air dry clay projects, I have developed a few habits that consistently improve the final result.
I always test a new sealer on a small leftover piece of clay before using it on a finished project.
This lets me see how the finish will look and whether it changes the paint color.
I also keep a separate set of soft brushes that I only use for applying sealers.
Clean brushes leave a smoother finish and reduce the chance of streaks.
When working on several projects, I seal them assembly line style by applying one thin coat to each piece before going back for the second coat.
This saves time while giving each layer enough time to dry.
Perhaps the biggest lesson I have learned is that preparation matters just as much as the sealer itself.
A clean, smooth surface and a little patience almost always lead to better looking results.
Final Thoughts
Choosing the best sealer for your air dry clay projects does not have to be complicated.
The right product depends on how your finished piece will be used and the look you want to achieve.
Decorative sculptures and ornaments often only need a reliable acrylic sealer, while trays, jewelry dishes, and other frequently handled items benefit from the added durability of a water based polyurethane or a resin finish.
Through my own projects, I have found that taking the time to prepare the surface, apply several thin coats, and allow the sealer to cure properly makes a noticeable difference.
Those extra steps help preserve the details you worked so hard to create and keep your handmade pieces looking their best for years.
No matter which sealer you choose, remember that the goal is not just to protect your project but to give it a finish that complements your design.
A little patience during the final stage can turn a simple clay craft into a piece that looks polished, lasts longer, and is something you will be proud to display or give as a thoughtful handmade gift.