DIY Maple Leaf Clay Jewelry Dish: An Easy Fall Craft for Your Home
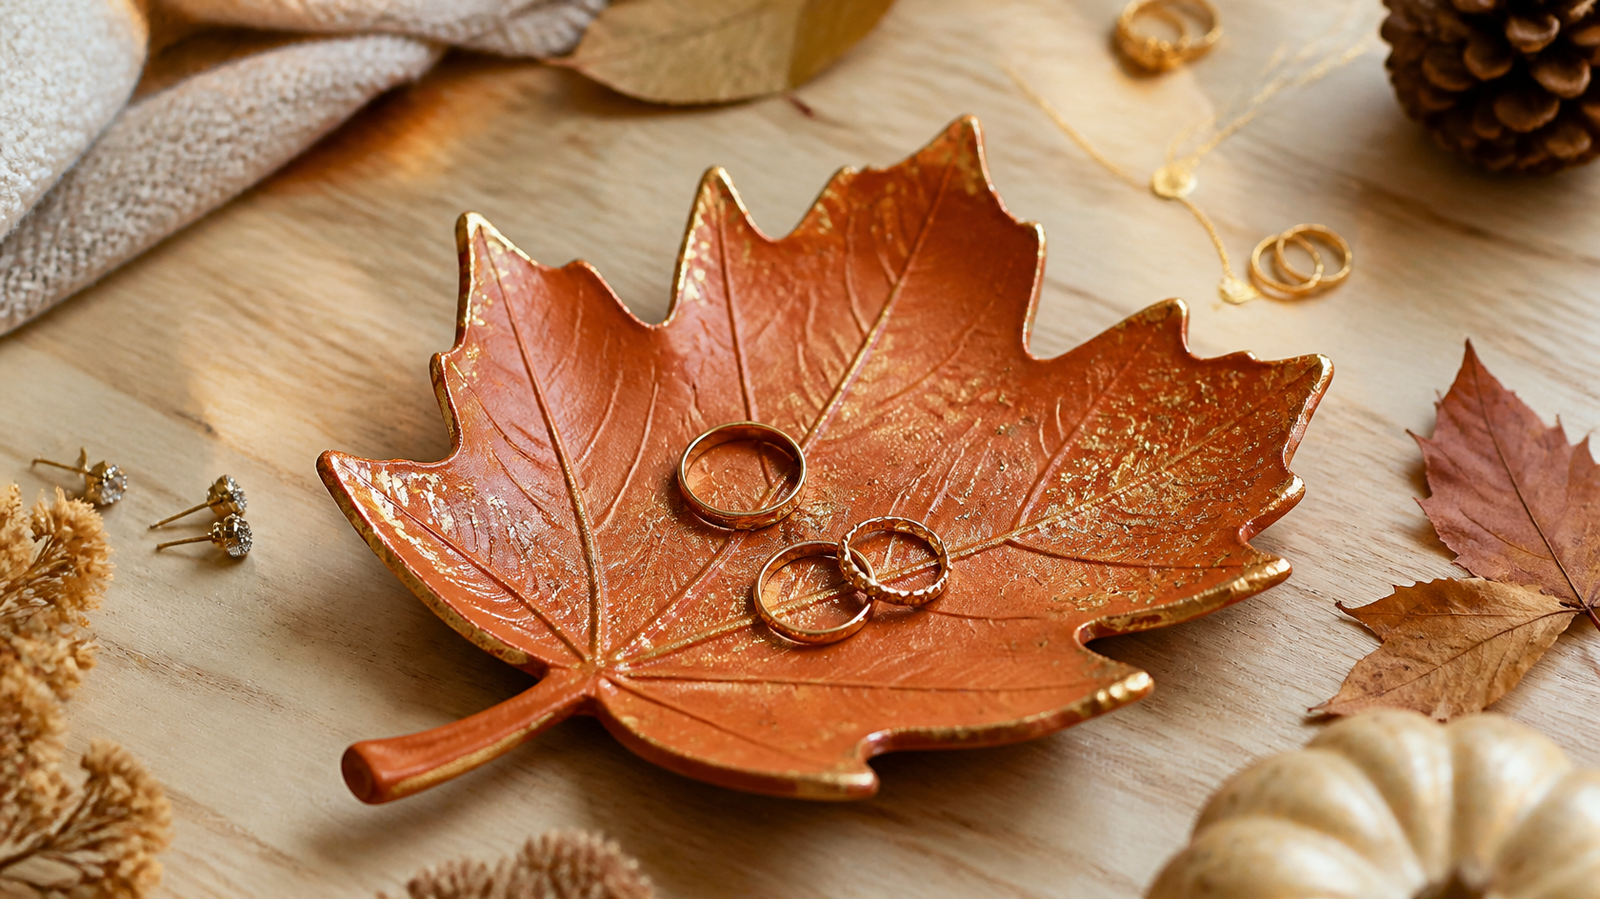
There is something special about bringing the colors and shapes of autumn into your home, especially when you can turn simple craft materials into something beautiful and useful.
A maple leaf jewelry dish is one of those projects that looks like it took a lot of effort but is surprisingly easy to make, even if you have never worked with clay before.
I love DIY projects that are both decorative and practical. Instead of making something that ends up sitting on a shelf collecting dust, this little clay dish gives you a lovely place to keep your rings, earrings, bracelets, and other small accessories.
It also makes a thoughtful handmade gift for birthdays, fall celebrations, or anyone who enjoys nature-inspired home decor.
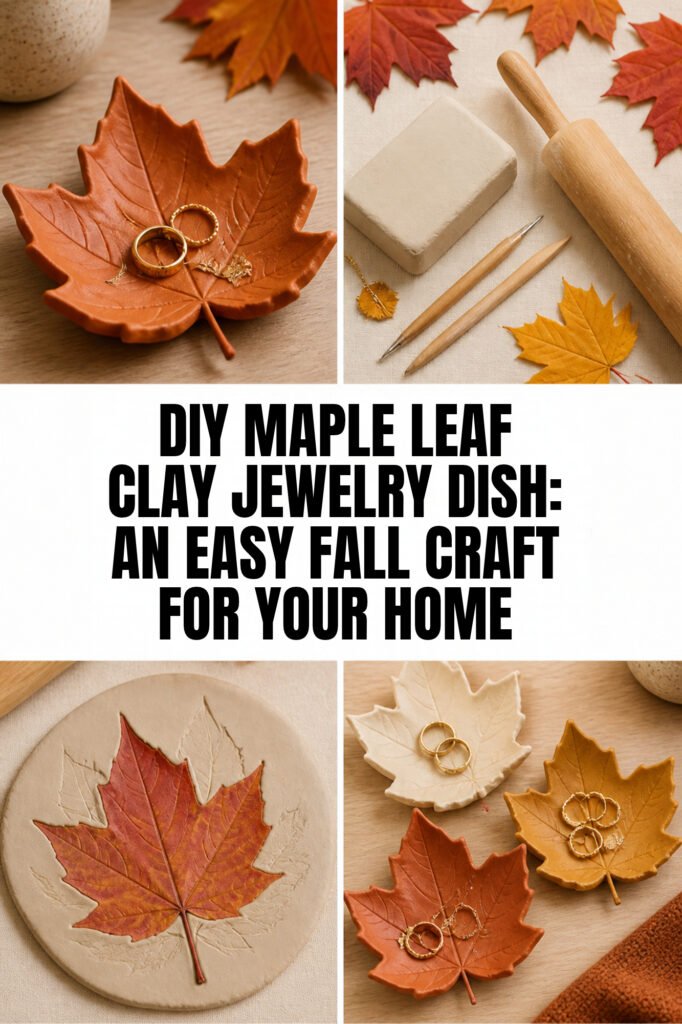
The best part is that you don’t need a pottery wheel, a kiln, or expensive equipment. With air-dry clay, a real maple leaf, and a few basic supplies, you can create a beautiful dish with natural leaf veins and an organic shape.
In this guide, I’ll walk you through how to make a DIY maple leaf clay jewelry dish, from choosing the right clay to shaping, drying, painting, and sealing your finished piece. I’ll also share practical tips to help you avoid cracks and get a smooth, attractive result.
1. Why Make a DIY Maple Leaf Clay Jewelry Dish?

A handmade maple leaf dish is more than just a pretty fall decoration. It is a small functional accessory that can make an ordinary dresser, bedside table, or vanity feel more personal.
The natural shape of a maple leaf gives the dish an interesting outline, while the veins create a detailed pattern that makes each piece look slightly different.
Here are a few reasons I think this is such a lovely project:
- Beginner-friendly: You don’t need previous pottery or sculpting experience.
- Affordable: Air-dry clay and a few basic supplies are enough to get started.
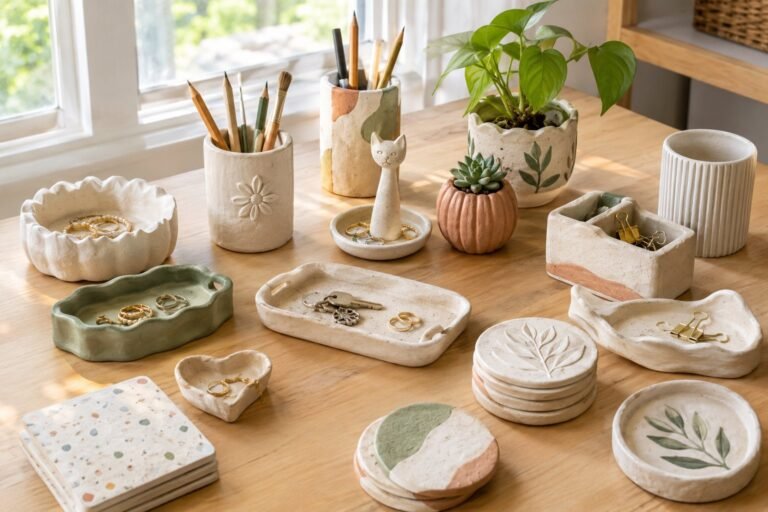
- Practical: The finished dish can hold rings, earrings, necklaces, and other small items.
- Customizable: You can paint it in traditional autumn colors or choose a simple neutral finish.
- Gift-worthy: A handmade jewelry dish makes a thoughtful present for friends and family.
- Decorative: It works beautifully with fall decorations, rustic interiors, and nature-inspired styling.
You can also make several dishes in different sizes and colors to create a matching set. I especially like the idea of using a few smaller maple leaves for delicate ring dishes and larger leaves for holding bracelets and necklaces.
2. Materials and Supplies You Will Need

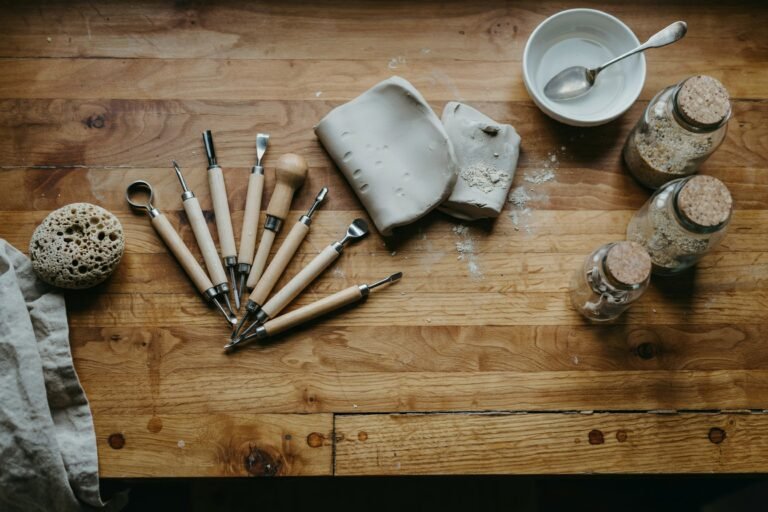
Before starting, gather everything you need and prepare a clean, flat work surface. Working with clay is much easier when your tools are within reach, especially when you’re trying to transfer the leaf impression without stretching or damaging the shape.
You don’t need specialized pottery equipment. Most of these supplies are inexpensive and easy to find at craft stores.
Essential Supplies
- Air-dry clay: Choose a smooth, easy-to-shape clay suitable for small decorative projects.
- Fresh maple leaf: Select a healthy leaf with clearly visible veins and an attractive outline.
- Rolling pin: A small craft rolling pin works well, but a clean household rolling pin can also be used.
- Craft knife: Useful for trimming the clay around the leaf.
- Parchment paper: Helps prevent the clay from sticking to your work surface.
- Small bowl: Used to support the clay while it dries into a curved dish shape.
- Fine-grit sandpaper: Helps smooth rough edges after the clay has dried.
- Acrylic paint: Optional, for adding color and decorative details.
- Clear acrylic sealer: Helps protect the finished decorative surface.
You may also want a soft paintbrush, a little water for smoothing the clay, and a damp cloth for cleaning your hands and tools.
Choosing the Right Maple Leaf
The leaf is one of the most important parts of this project because its outline and vein pattern will become the main design of your jewelry dish.
Look for a maple leaf that is:
- Large enough to create a useful dish.
- Fresh and flexible rather than brittle.
- Free from holes, tears, and damaged edges.
- Detailed enough to leave a clear impression in the clay.
- Relatively flat so it sits evenly on the clay surface.
If you cannot find a real maple leaf, you can use a sturdy artificial leaf with clearly defined veins. However, a natural leaf usually gives the project a more organic finish.
3. Prepare Your Work Surface and Clay

Once you have gathered your supplies, prepare your workspace before opening the clay.
Place a sheet of parchment paper on a flat table or countertop. This gives you a smooth surface to roll the clay and makes it easier to lift your finished leaf shape without pulling or stretching it.
Take a portion of air-dry clay and knead it gently with your hands. This helps soften the material and makes it easier to work with.
If the clay feels too stiff, follow the manufacturer’s instructions for conditioning it. Avoid adding too much water because overly wet clay can become sticky and difficult to shape.
Work the clay until it feels smooth and pliable.
How Thick Should the Clay Be?
For a small jewelry dish, aim for an even thickness of approximately 5 to 7 millimeters.
If the clay is too thin, the dish may become fragile or crack as it dries. If it is too thick, it will take longer to dry and may become unnecessarily heavy.
Try to keep the center and edges relatively even. A consistent thickness helps the dish dry more uniformly and reduces the risk of uneven shrinkage.
4. Roll Out the Clay Into a Flat Sheet

Place your kneaded clay on the prepared parchment paper.
Use a rolling pin to flatten it into a sheet large enough to fit your maple leaf.
Roll gently from the center outward, turning the clay occasionally to maintain an even thickness.
Avoid pressing too hard around the edges because this can stretch the clay and create thin areas.
If the clay starts sticking to the rolling pin, gently lift it and adjust the parchment paper rather than adding too much water.
Once you have a smooth, even sheet, check that it is large enough to accommodate the entire leaf with a little extra space around the edges.
You are now ready to create the maple leaf impression.
5. Press the Maple Leaf Into the Clay
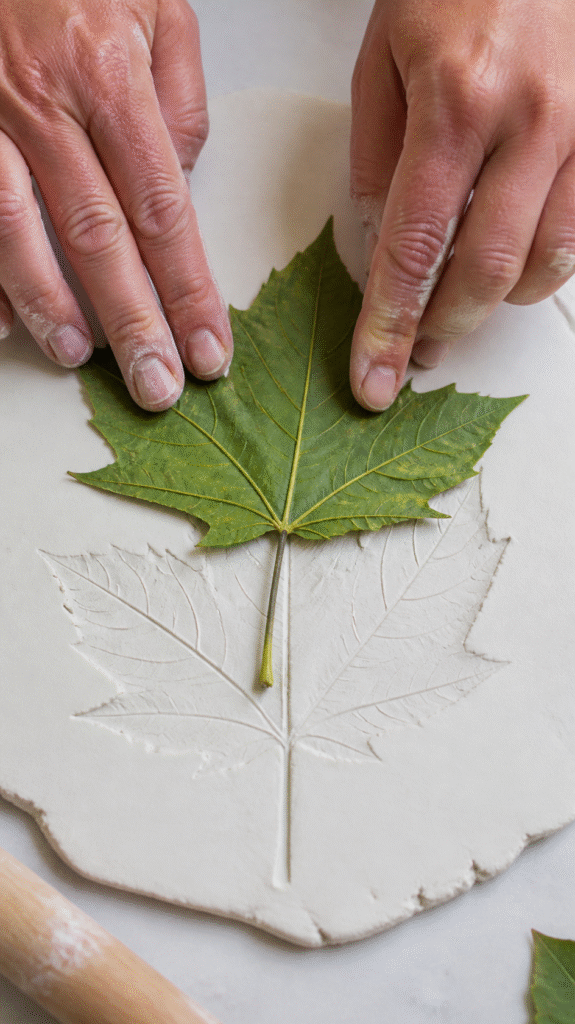
This is the part that gives the jewelry dish its recognizable maple leaf appearance.
Place your selected maple leaf on top of the flattened clay with the veined side facing down. The raised veins should make contact with the clay so they leave a detailed impression.
Gently press across the leaf using your fingertips.
Pay particular attention to the center vein and the smaller branches because these details create the natural pattern of the finished dish.
You don’t need to press aggressively. Too much pressure can flatten the clay unevenly or stretch the leaf out of shape.
Once the leaf has made a clear impression, carefully lift it from one edge.
Take a moment to inspect the pattern. You should be able to see the main veins and the overall outline.
If some details are faint, you can carefully press those areas again using the leaf as a guide.
6. Cut Out the Maple Leaf Shape
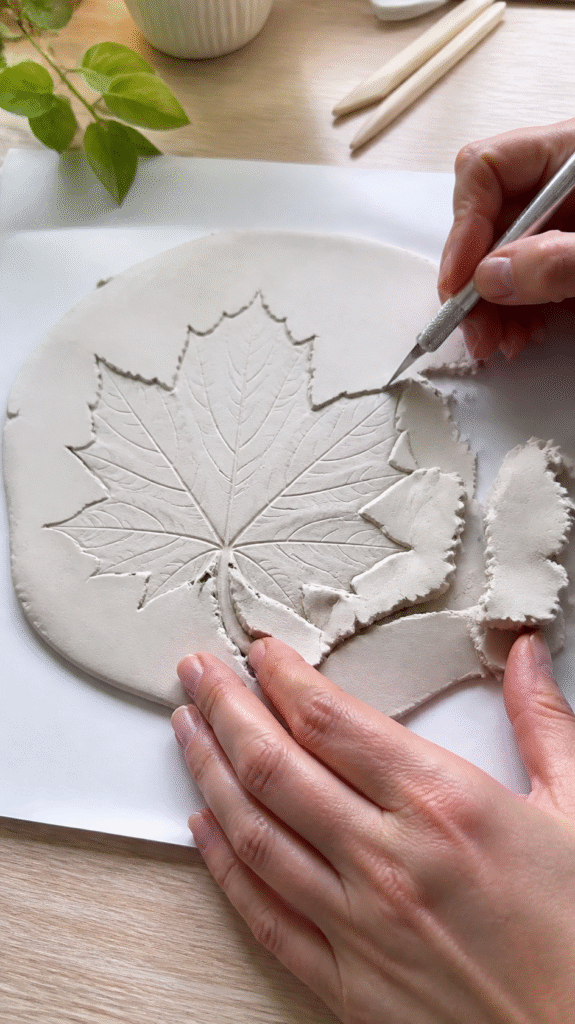
After removing the natural leaf, use the impression as your guide.
Take a craft knife and carefully cut around the outside of the maple leaf pattern.
Work slowly around each point and curved section. Maple leaves have several distinctive lobes, so rushing this step can make the final dish look uneven.
Remove the excess clay from around the shape.
You can gently smooth the edges using a fingertip or a small amount of water, depending on the clay manufacturer’s instructions.
Pay attention to the pointed tips of the leaf. These areas can become fragile if they are too thin or sharply cut.
If necessary, soften the points slightly while keeping the recognizable maple leaf outline.
At this stage, you should have a flat clay maple leaf with visible vein impressions, ready to be shaped into a small dish.
7. Shape the Clay Into a Jewelry Dish
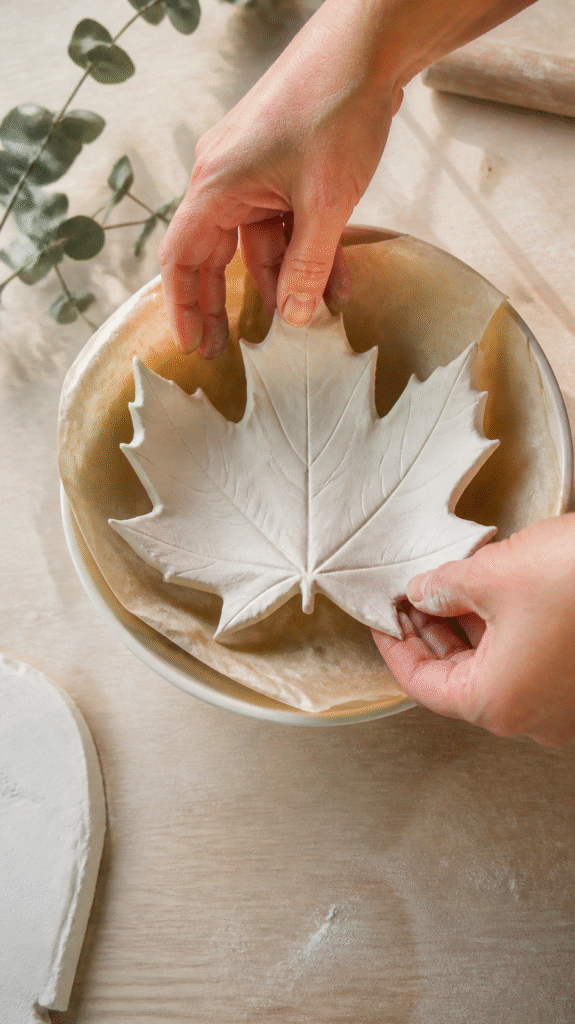
A flat maple leaf looks attractive, but adding a gentle curve turns it into a functional jewelry dish.
Find a small bowl that is slightly smaller than your clay leaf. The bowl will act as a support while the clay dries.
Line the inside of the bowl with parchment paper or plastic wrap if the clay manufacturer’s instructions recommend using a barrier.
Carefully lift your clay leaf and place it inside the bowl with the detailed impression facing upward.
Gently press the center down so the leaf follows the curve of the bowl.
Allow the outer edges and points to rise naturally.
Don’t force the clay into a deep shape. A shallow curve is usually enough to keep small jewelry pieces from sliding off.
Adjust the leaf points carefully so they look balanced and attractive.
Take a step back and check the shape from different angles. If one side is much higher than the other, make small adjustments while the clay is still flexible.
The goal is a natural-looking leaf dish rather than a perfectly symmetrical bowl.
8. Let the Clay Dish Dry Completely
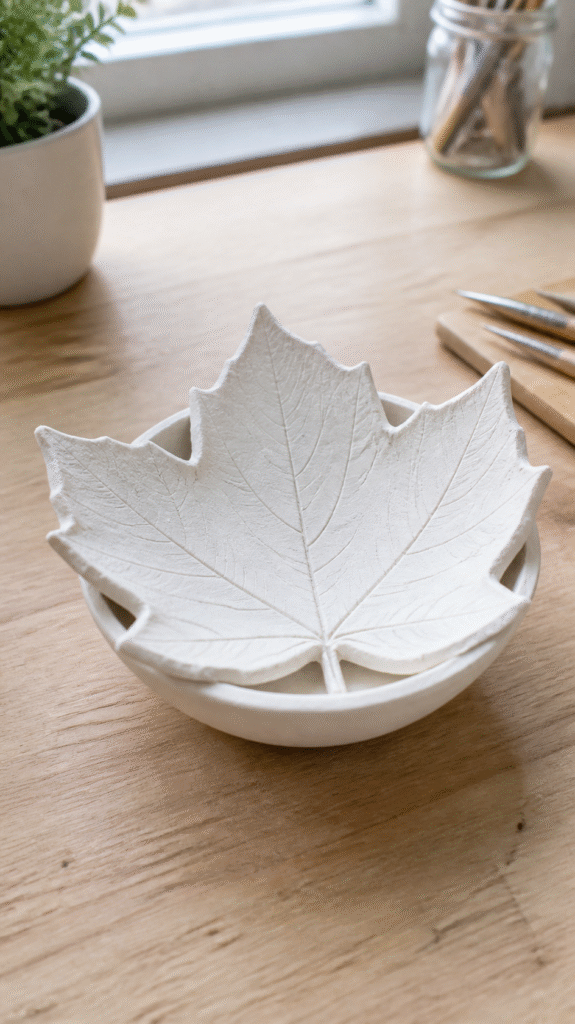
Once you’ve shaped your maple leaf into a shallow dish, the next step is allowing it to dry properly.
This part requires patience because air-dry clay needs enough time to harden throughout. Moving the dish too soon or trying to speed up the process with excessive heat can cause cracks, warping, or uneven drying.
Leave the clay supported inside the small bowl while it begins to firm up. This helps it maintain its curved shape instead of flattening as it dries.
Follow the drying time recommended by your clay manufacturer. Depending on the brand, thickness, humidity, and room temperature, drying can take anywhere from a day to several days.
Tips for Drying Without Cracks
- Keep the dish in a dry, well-ventilated area.
- Avoid placing it directly under strong sunlight.
- Don’t use a hair dryer or heater to force it to dry quickly.
- Allow the clay to dry gradually and evenly.
- Avoid handling the pointed edges while they are still soft.
- Turn or reposition the dish only when the clay is firm enough to handle safely.
If the clay begins to dry unevenly, the edges may harden before the center. This can increase the chance of cracking.
I would rather give this project an extra day to dry than rush it and end up damaging the shape.
Once the clay feels completely hard and dry, carefully remove it from the supporting bowl.
9. Smooth the Edges With Sandpaper

After the dish has dried, inspect the edges and surface.
You may notice a few rough spots, tiny bumps, or uneven areas. This is normal with handmade clay projects, especially when you’re working with an organic shape like a maple leaf.
Use fine-grit sandpaper to smooth the edges gently.
Pay attention to the pointed tips and the curved sections between the leaf lobes. These areas can sometimes feel rough after cutting.
You can also lightly sand the underside if it has small imperfections.
How to Get a Smooth Finish
- Make sure the clay is completely dry.
- Use fine-grit sandpaper rather than coarse sandpaper.
- Sand gently instead of applying too much pressure.
- Remove loose dust with a soft, dry cloth.
- Inspect the surface before painting.
Avoid sanding too aggressively because the leaf details are part of what makes this dish attractive.
If you want a natural handmade appearance, you don’t need to make every edge perfectly smooth. A few subtle variations can give the finished piece more character.
Use appropriate dust protection when sanding, and clean the work area afterward.
10. Paint Your Maple Leaf Jewelry Dish
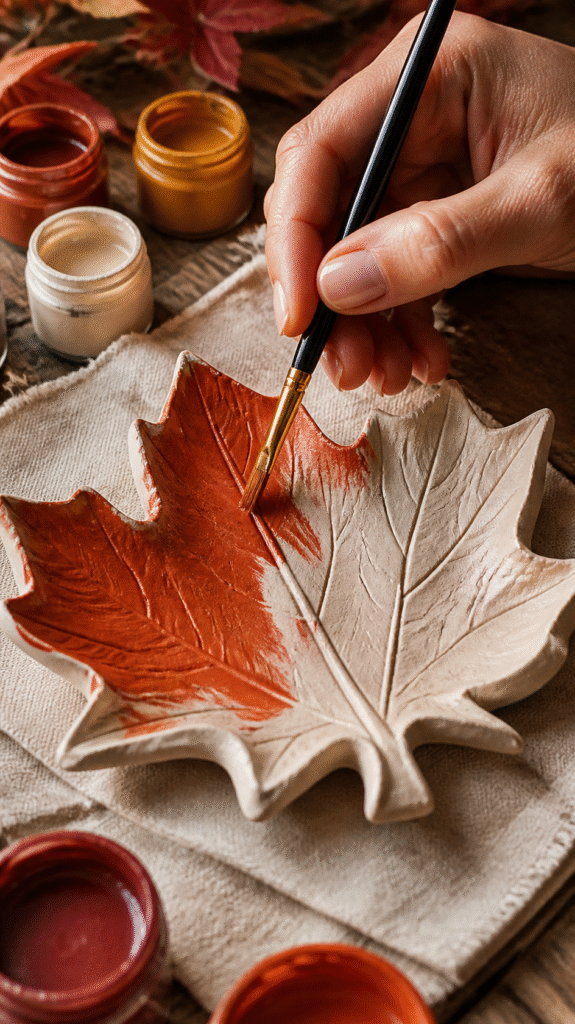
Now comes one of my favorite parts of the project: adding color.
A plain white clay dish already looks beautiful, especially if you prefer minimalist home decor. However, painting it gives you an opportunity to bring out the natural maple leaf pattern and match the dish to your existing decorations.
For this project, acrylic paint is a practical choice because it comes in many colors and is easy to apply with a small brush.
Before painting, make sure the clay is completely dry and free from sanding dust.
Beautiful Color Ideas for Your Maple Leaf Dish
Traditional Autumn Orange
Use burnt orange, rust, or terracotta shades to create a warm fall-inspired look. You can apply a deeper shade around the veins to make the leaf pattern more noticeable.
Golden Yellow
A soft golden yellow or mustard finish gives the dish a beautiful autumn appearance. It works especially well with cream and natural wood decor.
Deep Burgundy
Burgundy, wine red, and muted brown shades create a richer look. These colors are lovely if you want your dish to feel a little more elegant.
Cream and Beige
For a simple, neutral finish, choose warm white, ivory, or beige. This lets the natural leaf impression remain the main feature.
Metallic Gold
A little metallic gold paint can highlight the raised edges or leaf veins. Use it sparingly so the dish doesn’t look overly decorated.
How to Paint the Dish
- Apply a thin first coat of acrylic paint.
- Allow it to dry according to the paint manufacturer’s instructions.
- Add another thin coat if the color needs more coverage.
- Use a smaller brush to highlight the veins.
- Let the paint dry completely before sealing.
I would avoid applying thick layers of paint because they can cover the delicate vein impressions.
11. Add Decorative Details to Make It Unique
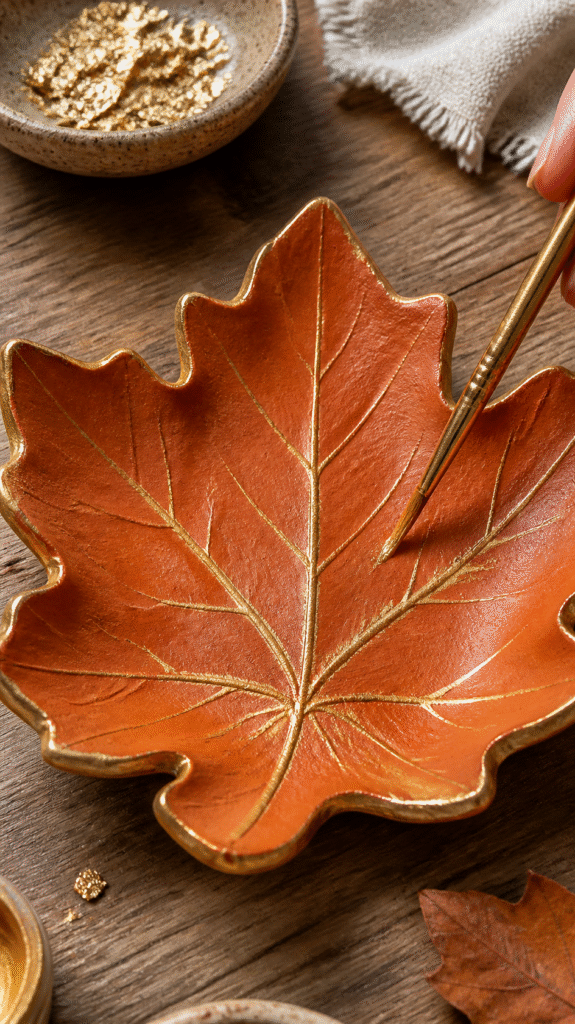
You don’t have to stop at a single paint color. Small decorative details can make your maple leaf jewelry dish look more personal and polished.
The trick is to keep the decoration simple enough that the natural leaf shape remains the focus.
Here are a few ideas worth trying.
Add Gold Leaf Details
Apply small touches of metallic gold paint along the outer edges or selected veins.
This creates a subtle decorative effect that looks lovely on orange, cream, and burgundy dishes.
Create a Two-Tone Finish
Paint the center of the leaf one color and use a slightly darker shade around the edges.
For example, a combination of burnt orange and deep brown creates a warm autumn appearance.
Highlight the Leaf Veins
Use a fine paintbrush to trace some of the natural vein impressions with a contrasting color.
You don’t need to highlight every line. A few carefully painted details can be enough.
Try a Natural Stone Look
Use a soft beige or cream base with small brown or terracotta accents to create a subtle stone-inspired appearance.
This style works particularly well with rustic and minimalist home decor.
Keep It Simple With a Matte Finish
If you prefer understated decorations, use one solid color and a matte sealer. The natural leaf impression will provide enough detail without additional decoration.
12. Seal Your Finished Clay Jewelry Dish

Once the paint has dried, you can apply a suitable clear sealer to protect the decorative surface.
Air-dry clay is generally porous, so an appropriate sealant can help reduce moisture absorption and protect the painted finish from everyday handling.
Choose a clear acrylic sealer that is compatible with your clay and paint. You can usually find matte, satin, and glossy finishes.
Which Finish Should You Choose?
- Matte: Gives the dish a soft, natural appearance.
- Satin: Provides a gentle sheen without looking too shiny.
- Glossy: Creates a polished, reflective finish.
Apply the sealer according to the product instructions. Thin, even coats are generally better than one thick application.
Allow each coat to dry properly before adding another.
One important thing to remember is that sealing does not make an ordinary air-dry clay dish waterproof, food-safe, or suitable for washing. Keep your finished jewelry dish dry and use it for decorative storage only.
13. How to Use and Display Your Maple Leaf Jewelry Dish
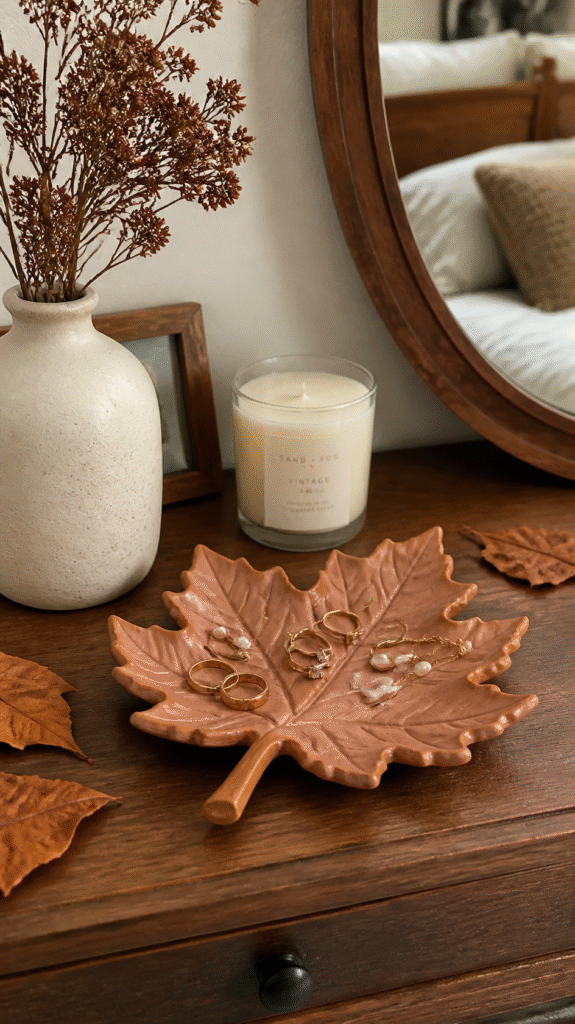
Once everything is dry and finished, your maple leaf jewelry dish is ready to use.
Although it is a small craft project, it can be surprisingly useful around the house.
On Your Bedroom Dresser
Place it beside your mirror or on top of your dresser to hold rings, earrings, and small everyday accessories.
It’s a convenient place to put jewelry when you remove it at the end of the day.
On Your Bedside Table
A small maple leaf dish can hold your favorite ring, earrings, or other little items you want to keep within reach.
On Your Bathroom Vanity
Use it to organize small accessories on a dry vanity surface, away from splashes and standing water.
As Part of Your Fall Decorations
You can also display the dish on a coffee table, entryway console, or decorative shelf.
Pair it with small pumpkins, dried leaves, candles, and natural wooden accessories for a seasonal arrangement.
As a Handmade Gift
A maple leaf jewelry dish makes a lovely handmade gift for someone who enjoys crafts or autumn decorations.
You can place it in a small gift box with tissue paper and add a few inexpensive accessories to make the presentation feel more special.
Just remember to mention that it is decorative and should not be used to hold food or water.
14. More DIY Maple Leaf Clay Jewelry Dish Ideas to Try
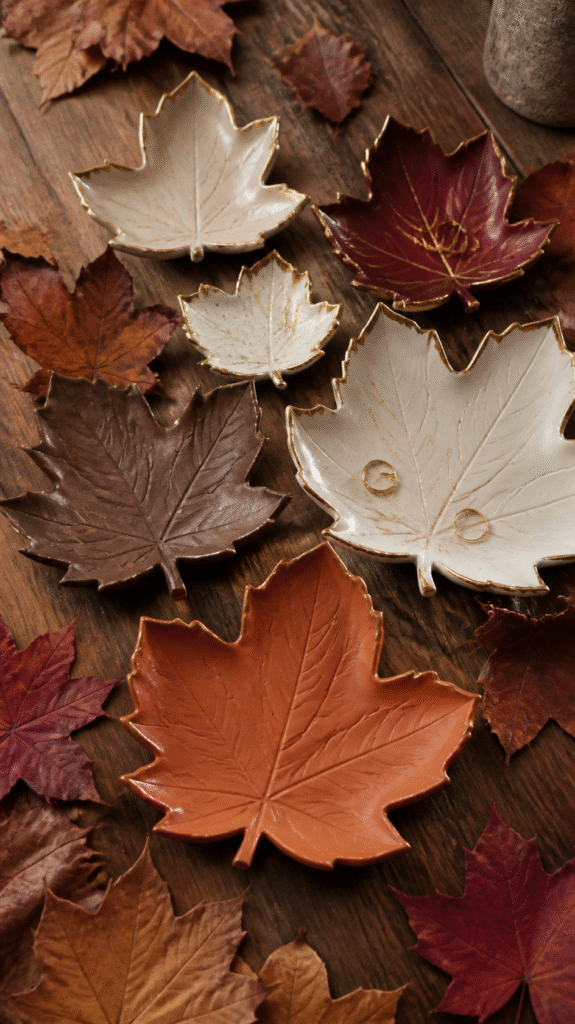
After making your first dish, you may want to experiment with different sizes, colors, and finishes.
The basic technique is easy to adapt, and you can create several versions using different leaves.
Here are a few ideas to inspire your next project.
Mini Maple Leaf Ring Dishes
Use smaller maple leaves to create tiny dishes that are perfect for holding rings and small earrings.
These also make thoughtful handmade gifts for friends.
White and Gold Leaf Dish
Paint the entire dish warm white, then add delicate gold details along the leaf veins.
The combination looks elegant without being too complicated.
Rustic Terracotta Dish
Use a muted terracotta or burnt orange finish to create a warm, earthy decoration.
This style works beautifully with wooden furniture and natural autumn decor.
Dark Brown Autumn Dish
A deep chocolate brown or walnut-inspired finish gives the dish a rustic appearance.
You can add a little gold along the edges for contrast.
Matching Leaf Dish Set
Make three dishes in different sizes using the same color palette.
You could use one for rings, another for earrings, and a larger one for bracelets.
A matching set also looks lovely when displayed together on a dresser.
15. Common Mistakes to Avoid When Making a Clay Jewelry Dish
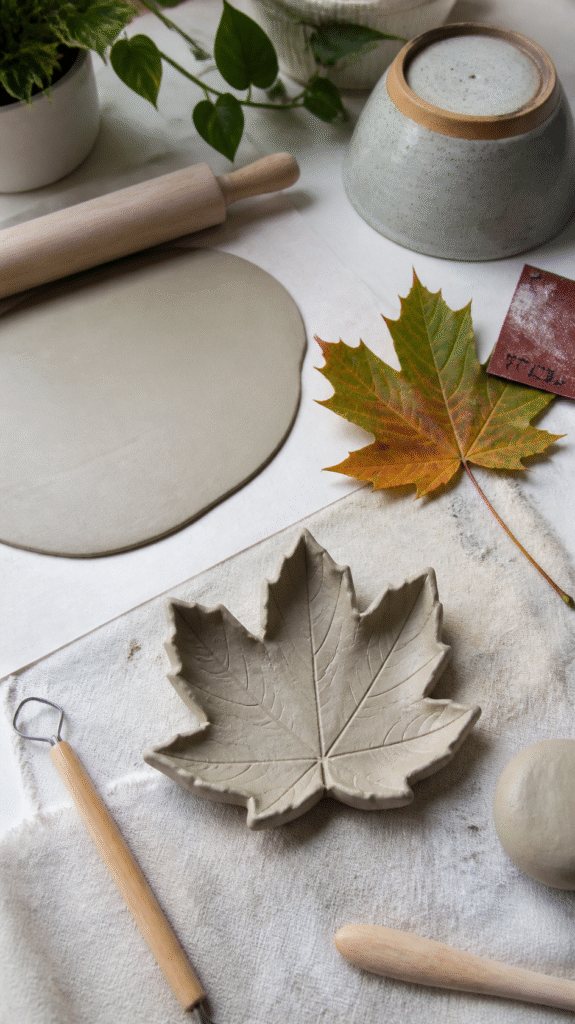
Even though this is a beginner-friendly project, a few small mistakes can affect the final result.
Here are some things I would watch out for.
Rolling the clay too thin
Thin clay can become fragile and may crack while drying. Aim for an even thickness of around 5 to 7 millimeters.
Using a damaged maple leaf
A torn or brittle leaf may not leave a clean impression. Choose a fresh leaf with clearly defined veins.
Pressing too hard
Excessive pressure can distort the clay and make the leaf details uneven. Press gently and check the impression before removing the leaf.
Making the dish too deep
A very deep curve can stretch the clay and make the leaf points difficult to support. A shallow shape is usually more attractive and practical.
Rushing the drying process
Air-dry clay needs time to harden naturally. Using excessive heat or handling it too early can cause cracks and warping.
Painting before the clay is dry
Trapped moisture can affect the finish. Always allow the clay to dry completely before applying paint.
Applying too much sealer
Thick layers can leave an uneven finish and hide some of the leaf details. Follow the sealer instructions and apply thin coats.
Frequently Asked Questions About DIY Maple Leaf Clay Jewelry Dishes
What Type of Clay Is Best for a Maple Leaf Jewelry Dish?
Air-dry clay is a convenient choice for this beginner-friendly project because it doesn’t require a pottery kiln. Choose a smooth clay that is suitable for small decorative crafts and follow its preparation and drying instructions.
Can I Use a Real Maple Leaf to Make the Impression?
Yes. A fresh maple leaf with visible veins works beautifully. Place it with the veined side facing down against the clay and press gently to transfer the natural pattern.
How Long Does an Air-Dry Clay Jewelry Dish Take to Dry?
Drying time depends on the clay brand, thickness, humidity, and room temperature. It may take one to several days. Follow the manufacturer’s instructions and make sure the entire piece is dry before painting.
Why Did My Clay Jewelry Dish Crack?
Cracks can develop when the clay dries too quickly, has uneven thickness, or is stretched while being shaped. Using an even clay sheet and allowing it to dry gradually can help reduce cracking.
Can I Use Polymer Clay Instead of Air-Dry Clay?
Yes, polymer clay can also be used to make a maple leaf jewelry dish, but it requires a different process. Polymer clay must be cured according to the manufacturer’s baking instructions rather than left to air-dry.
Do I Need a Kiln to Make This Jewelry Dish?
No. Air-dry clay does not require a kiln. You simply shape it and allow it to dry naturally according to the product instructions.
Can I Make a Maple Leaf Jewelry Dish Without a Real Leaf?
Yes. You can use an artificial leaf with visible veins, a leaf-shaped texture tool, or a small sculpting tool to create the pattern by hand.
Is an Air-Dry Clay Jewelry Dish Waterproof?
Not necessarily. A suitable sealer can offer some surface protection, but it does not make ordinary air-dry clay fully waterproof. Keep the dish dry and avoid soaking or washing it.
Can I Use the Dish for Food?
No. Unless the clay, paint, and finishing products are specifically certified for food contact, use the dish for decorative storage only. It is best suited for jewelry and small accessories.
What Can I Put Inside a Maple Leaf Jewelry Dish?
You can use it to hold rings, earrings, bracelets, small necklaces, hair clips, and other lightweight accessories. Avoid placing heavy items on delicate pointed edges.
Final Thoughts
Making a DIY maple leaf clay jewelry dish is a simple way to turn an ordinary piece of air-dry clay into something beautiful and useful.
I especially like this project because it doesn’t require expensive supplies or advanced crafting skills. With a fresh maple leaf, a little clay, and some patience, you can create a decorative piece that feels personal and handmade.
You can keep the finish natural, add warm autumn colors, or experiment with gold details to make it more elegant. Once you understand the basic technique, it’s easy to create different sizes and styles for your home or as thoughtful handmade gifts.
The most important thing is to take your time, especially when shaping and drying the clay. A little patience makes a big difference in how your finished dish looks.
If you’ve been looking for an easy fall craft that is both decorative and practical, this maple leaf jewelry dish is a lovely project to try.