
Air dry clay is one of my favorite materials to work with because it is affordable, easy to shape, and doesn’t require a kiln.
I have used it for everything from decorative trays and ornaments to small home decor pieces and handmade gifts.
While creating with clay is relaxing, I quickly realized that painting it the wrong way could undo all the hard work.
I have had projects develop tiny cracks, uneven paint, and peeling finishes simply because I rushed the process or skipped an important step.
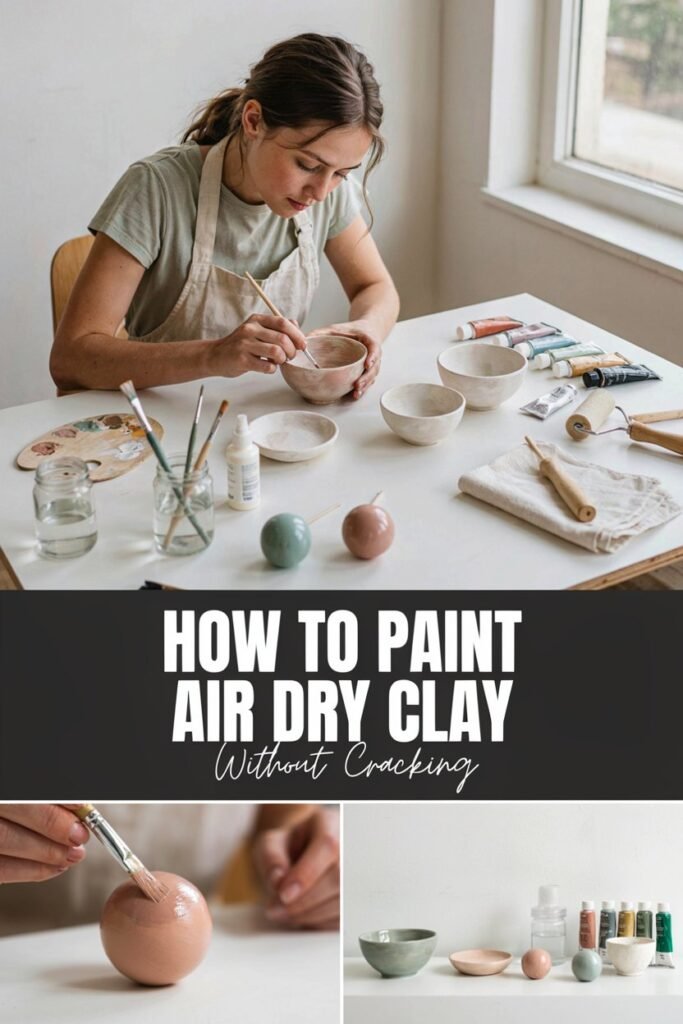
Those mistakes taught me that getting a beautiful finish has less to do with artistic skill and more to do with proper preparation.
Once I learned how to let the clay dry completely, prepare the surface, and apply paint in thin layers, the results improved dramatically.
Now my finished pieces look smoother, last much longer, and have a more professional appearance.
In this guide, I am sharing the same methods I personally use every time I paint air dry clay so you can avoid common mistakes and enjoy a durable, crack free finish that you will be proud to display or give as a gift.
Why Air Dry Clay Cracks During Painting
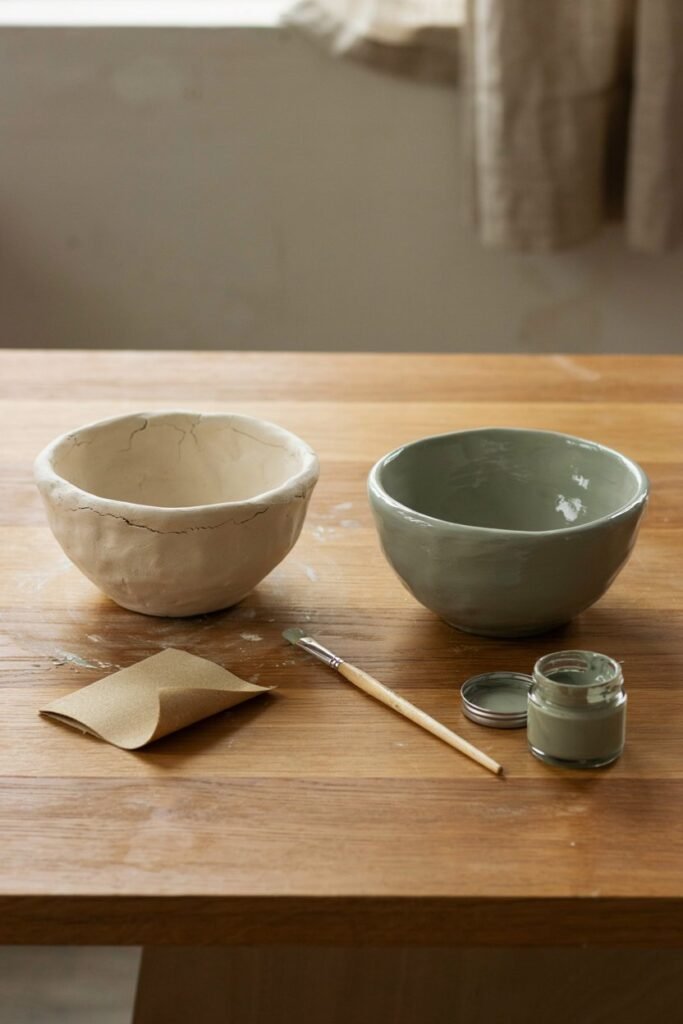
One of the biggest misconceptions about air dry clay is that paint is what causes the cracks.
In reality, the paint usually reveals problems that already existed.
Most cracks happen because the clay still contains moisture, dried unevenly, or was handled before it had enough time to cure completely.
I learned this lesson after painting a small decorative bowl that felt dry on the outside but was still slightly damp inside.
Everything looked perfect until the next day when several fine cracks appeared across the surface.
Since then, I have become much more patient with the drying process, and it has made a huge difference in the quality of my finished projects.
Here are the most common reasons air dry clay cracks during painting.
The Clay Was Not Completely Dry
This is by far the most common cause of cracking.
Although the surface may feel dry after a day or two, thicker pieces often hold moisture inside for much longer.
When that trapped moisture slowly evaporates, the clay naturally shrinks.
If the paint has already formed a hard layer on top, the shrinking clay can create visible cracks.
Whenever I make thicker pieces like bowls or plant pots, I always leave them to dry longer than I think they need.
Waiting an extra day has saved many of my projects.
Uneven Drying
Air dry clay dries best when moisture leaves the piece gradually and evenly.
If one side dries much faster than the other because it is sitting in direct sunlight or near a heater, the clay shrinks at different rates.
This uneven movement puts stress on the surface and often leads to cracking.
I always dry my projects indoors on a flat surface away from direct sunlight.
Every few hours during the first day, I gently turn the piece so every side dries at a similar pace.
Applying Thick Paint Coats
It can be tempting to cover the clay in one heavy coat of paint, especially with lighter colors, but thick paint dries unevenly and may trap moisture underneath.
I have found that several thin coats always create a smoother finish than one heavy layer.
Thin coats dry faster, reduce brush marks, and are much less likely to crack.
Skipping Surface Preparation
Painting directly onto rough clay often leads to uneven coverage and poor paint adhesion.
Before I paint anything, I lightly sand the surface to remove small imperfections and dust.
If the project needs an especially smooth finish, I also apply a thin layer of primer or gesso before painting.
This simple step helps the paint spread more evenly and creates a cleaner final result.
Using Too Much Water
Many beginners thin acrylic paint with a large amount of water.
While a small amount of water is perfectly fine, adding too much allows excess moisture to soak into the clay.
That additional moisture can soften the surface and increase the chance of cracking as the clay dries again.
I prefer using high quality acrylic paint straight from the bottle or with only a tiny amount of water when necessary.
Drying Projects Too Quickly
Fast drying is rarely a good thing with air dry clay.
Leaving projects outside in hot sun or placing them close to a heater may seem like a shortcut, but it often causes the outer layer to dry much faster than the inside.
Whenever I finish sculpting, I simply let the clay dry naturally at room temperature.
It takes longer, but the finished piece is much stronger and develops far fewer cracks.
Supplies You Will Need
Having the right supplies makes painting air dry clay much easier and produces a smoother finish.
Most of these materials are inexpensive, and many can be used for countless future projects.
| Supply | Why I Use It |
|---|---|
| Air dry clay | The base material for your project |
| Acrylic paint | Provides smooth coverage and vibrant color |
| Fine grit sandpaper | Smooths rough edges before painting |
| Soft synthetic paintbrushes | Reduces brush marks and creates even coverage |
| Small foam brush | Useful for large flat surfaces |
| White gesso or acrylic primer | Helps paint stick better and improves color |
| Soft microfiber cloth | Removes sanding dust before painting |
| Paint palette | Makes color mixing easier |
| Water container | Cleans brushes between colors |
| Clear acrylic sealer | Protects the finished paint from moisture and scratches |
Helpful Tip
Keeping separate brushes for primer, paint, and sealer helps prevent streaks and keeps your colors looking clean.
I made the mistake of using the same brush for everything once, and leftover sealer slightly dulled the paint finish.
What Is the Best Paint for Air Dry Clay?
Not every paint performs the same on air dry clay.
After trying several different options, acrylic paint continues to give me the most reliable results.
It dries quickly, covers well, and comes in an endless variety of colors and finishes.
Here is how the most common paints compare.
Acrylic Paint
This is my first choice for almost every project.
It provides excellent coverage, dries fairly quickly, and holds up well once sealed.
Whether I am painting decorative bowls, ornaments, or wall art, acrylic paint consistently produces the smoothest finish.
Best for
- Home decor
- Decorative sculptures
- Trinket dishes
- Handmade gifts
- Holiday ornaments
Tempera Paint
Tempera paint works well for children’s crafts or temporary projects.
It is easy to clean but does not have the durability of acrylic paint.
Without a protective sealer, the finish can wear away fairly quickly.
Gouache
Gouache creates rich colors with a beautiful matte finish.
I occasionally use it for decorative display pieces, but I always seal it afterward because it can reactivate if exposed to moisture.
Watercolor
Watercolor produces soft, delicate effects, but it is not ideal for most air dry clay projects.
Since it contains a large amount of water, it can slightly soften the clay surface and may create uneven color absorption.
Spray Paint
Spray paint works well for larger pieces and provides a smooth finish without visible brush strokes.
When I use spray paint, I always work outdoors or in a well ventilated space and apply several light coats instead of one heavy layer.
How Long Should Air Dry Clay Dry Before Painting?
One of the easiest ways to avoid cracks is simply giving your clay enough time to dry.
I know it can be tempting to start painting as soon as the surface feels dry, especially after spending hours shaping a project, but patience really pays off here.
Early on, I painted a small jewelry dish after about twenty four hours because it looked completely dry.
The paint went on smoothly, but the next morning I noticed tiny cracks near the edges.
The outside had dried, but there was still moisture trapped inside.
Since then, I never judge a project by its surface alone.
The drying time depends on several factors.
- The thickness of the clay
- The size of the project
- The humidity in your home
- The temperature of the room
- The brand of air dry clay
Thin ornaments may dry within one to two days, while thicker bowls, planters, and sculptures often need several days to cure properly.
I would rather wait one extra day than risk ruining a project that took hours to make.
Signs Your Clay Is Ready to Paint
Instead of relying only on the clock, I always check for these signs before painting.
- The entire piece feels dry from every angle.
- The color looks consistent without darker damp spots.
- The clay feels firm and no longer cool to the touch.
- There is no flexibility when applying gentle pressure.
- The weight feels lighter than when it was first shaped.
If I have any doubts, I simply wait another day.
That extra patience has saved many projects from cracking later.
Helpful Tip
Avoid placing air dry clay near heaters, radiators, or direct sunlight to speed up drying.
Slow, even drying creates a much stronger finished piece with fewer cracks.
Sand the Surface Before Painting
Sanding may seem like an optional step, but I rarely skip it anymore.
Even if a project looks smooth, there are usually tiny bumps, fingerprints, or rough edges that become much more noticeable once paint is applied.
A few minutes of sanding creates a much cleaner and more professional finish.
I usually use fine grit sandpaper because it smooths the surface without removing too much material.
While sanding, I pay extra attention to areas such as
- Edges
- Corners
- Bottom surfaces
- Rim of bowls
- Raised decorative details
The goal is not to completely reshape the project but simply remove imperfections.
Once sanding is finished, I wipe the entire piece with a soft microfiber cloth to remove every bit of dust before applying primer or paint.
Dust left behind can prevent paint from sticking evenly and may create small bumps in the finish.
Helpful Tip
Sand gently using small circular motions instead of pressing hard. Heavy sanding can flatten fine details that took time to sculpt.
Should You Prime Air Dry Clay Before Painting?
This is one of the questions I see most often, and my answer is almost always yes.
While you can paint directly onto air dry clay, using a primer makes the process much easier and usually produces a better result.
I started using primer after noticing that raw clay absorbed paint very quickly.
Some areas looked darker while others needed multiple coats before they reached the same color.
After adding primer to my routine, the paint became smoother, brighter, and much easier to control.
Primer creates a barrier between the clay and the paint, reducing absorption and helping colors stay true.
Benefits of Using Primer
Priming offers several advantages.
- Creates a smoother painting surface
- Helps paint stick better
- Reduces the number of paint coats needed
- Makes colors appear brighter
- Helps prevent uneven absorption
- Improves the final finish
Although it adds one extra step, it often saves time because you spend less effort correcting uneven paint later.
Best Primers for Air Dry Clay
White Gesso
This is the primer I use most often.
It dries quickly, lightly fills tiny imperfections, and creates a smooth surface that works well with acrylic paint.
For projects with bright colors, white gesso helps the colors stay vibrant.
Clear Gesso
Clear gesso is useful when I want to preserve the natural color or texture of the clay while still improving paint adhesion.
It creates a slightly textured surface that works well for artistic finishes.
Acrylic Primer
Acrylic primer is another excellent option, especially for larger decorative pieces.
It provides a smooth, durable base and works well under most acrylic paints.
How I Apply Primer
Over time I have found that less is more.
Instead of applying one thick coat, I use two very thin coats.
My process looks like this.
- Brush on a thin, even coat.
- Let it dry completely.
- Lightly sand if needed.
- Remove any dust.
- Apply the second thin coat.
This creates a smooth surface without hiding the small details I worked hard to sculpt.
Helpful Tip
If you notice visible brush strokes after the primer dries, lightly sand the surface with very fine sandpaper before painting.
How to Paint Air Dry Clay Without Cracking
Once the clay is fully dry, sanded, and primed, it is finally time for my favorite part.
Painting.
After experimenting with different techniques, I have found that the simplest approach consistently gives the best results.
Step 1. Start With Thin Coats
One mistake I made early on was trying to achieve full coverage with one thick coat of paint.
It looked fine while wet, but as it dried I noticed uneven texture, longer drying times, and in some cases small surface cracks.
Now I always apply several thin coats.
Thin layers dry evenly, create smoother color, and are much less likely to trap moisture.
Sometimes three thin coats produce a much better finish than one heavy coat.
Step 2. Let Every Coat Dry Completely
Patience matters just as much while painting as it does while drying the clay.
I never paint over damp paint.
Doing so can pull up the previous layer, create streaks, and leave an uneven finish.
Instead, I allow every coat to dry fully before adding the next one.
This creates crisp, even color and reduces brush marks.
Step 3. Paint Detailed Areas First
Whenever I work on pieces with raised patterns, lettering, or textured designs, I always paint those sections before larger flat surfaces.
It is much easier to clean up larger areas afterward than trying to reach tiny spaces without accidentally touching finished paint.
This simple habit has made painting detailed projects much less frustrating.
Step 4. Build Color Gradually
Some colors naturally need more coats than others.
White, yellow, and pastel shades usually require additional layers compared to darker colors.
Rather than adding thicker paint, I simply continue building color gradually.
The finished result looks smoother and more even.
Step 5. Avoid Overworking the Paint
One lesson I learned through experience is that constantly brushing over partially drying paint creates more problems than it solves.
Once I apply a section, I leave it alone until it dries.
Going back too soon often creates streaks, uneven texture, and visible brush marks.
Working in small sections helps me avoid this habit.
Step 6. Allow the Paint to Cure
Even after the final coat feels dry, I avoid sealing or handling the project immediately.
Dry paint and cured paint are not exactly the same.
Whenever possible, I leave painted pieces overnight before sealing them.
This extra waiting time allows the paint to harden properly and produces a much stronger finish.
Helpful Tip
I like to place freshly painted projects on a clean wire rack while they dry.
Air can circulate around the entire piece, helping every side dry more evenly without sticking to the surface underneath.
Best Brush Techniques for a Smooth Finish
The type of brush you use can have just as much impact as the paint itself.
I used to think any paintbrush would work, but after trying different sizes and shapes, I realized that the right brush makes painting much easier and produces a cleaner finish.
I like to keep a small collection of quality synthetic brushes because they hold their shape well, leave fewer brush marks, and are easy to clean after each project.
Flat Brushes
Flat brushes are my choice for covering larger surfaces.
They spread paint evenly and help reduce streaks, especially on trays, coasters, plaques, and other flat pieces.
I always load the brush with a moderate amount of paint rather than soaking the bristles.
Too much paint often leads to drips and uneven coverage.
Round Brushes
Round brushes work well for curved surfaces and smaller areas.
I use them when painting bowls, ornaments, and decorative sculptures because they make it easier to follow the natural shape of the clay.
Detail Brushes
Small detail brushes are essential for lettering, floral designs, and intricate patterns.
I have learned that trying to paint tiny details with a large brush usually creates more cleanup work later.
Using the correct size brush gives me much better control.
Foam Brushes
Foam brushes are helpful when I want a very smooth base coat without visible brush strokes.
I mostly use them for primer, background colors, and sealers rather than detailed painting.
Helpful Tip
Clean your brushes as soon as you finish painting.
Dried acrylic paint is much harder to remove and can ruin the shape of the bristles over time.
How Many Coats of Paint Do You Need?
The number of coats depends on the color, the type of paint, and the finish you want.
Most of my projects need two to three thin coats, but some lighter colors naturally require more.
Here is what I usually expect.
| Paint Color | Typical Number of Coats |
|---|---|
| White | 3 to 4 |
| Yellow | 3 to 4 |
| Pastels | 3 |
| Bright colors | 2 to 3 |
| Dark colors | 2 |
| Metallic paint | 2 to 3 |
Rather than trying to speed things up with thicker paint, I simply build the color slowly.
The finish almost always looks smoother.
Common Painting Mistakes to Avoid
Everyone makes mistakes while learning, and I have certainly made my share.
The good news is that most problems are easy to prevent once you know what causes them.
Painting Before the Clay Is Fully Dry
This is still the biggest cause of cracks.
Always give your project enough time to dry completely before reaching for the paintbrush.
Applying Thick Paint
Heavy coats take longer to dry and often create uneven surfaces.
Thin coats produce better results every time.
Skipping Primer
Although primer is optional, I rarely skip it because it helps paint stick better and creates brighter, more even colors.
Using Too Much Water
Adding too much water weakens the paint and introduces unnecessary moisture to the clay.
If I need slightly thinner paint, I only add a very small amount.
Forgetting to Remove Sanding Dust
Even tiny dust particles can show through the paint.
I always wipe every project with a clean microfiber cloth before painting.
Rushing Between Coats
Waiting can feel slow, but letting each coat dry completely prevents smudges and uneven texture.
Patience almost always leads to a better result.
How to Seal Painted Air Dry Clay
Once the paint has fully cured, sealing the project is the final step.
I never skip this because a good sealer protects the paint from scratches, dust, and everyday handling.
Without a protective finish, painted clay can chip much more easily over time.
The right sealer also enhances the overall appearance of the project.
Matte Sealer
Matte sealer keeps the surface looking natural.
I like using it for rustic home decor, planters, and pieces where I want a soft finish without shine.
Satin Sealer
Satin provides a subtle sheen that is not too glossy and not completely flat.
It is one of my favorite finishes because it gives projects a polished appearance without looking overly reflective.
Gloss Sealer
Gloss sealer creates a bright, shiny finish.
I often use it on decorative dishes, ornaments, and colorful display pieces where I want the colors to stand out.
Spray Sealer
Spray sealers provide even coverage and work especially well for textured projects.
I always apply several light coats rather than one heavy coat to avoid drips.
Brush On Sealer
Brush on sealers offer excellent control, especially for smaller projects.
I use a soft synthetic brush and apply thin, even coats for the smoothest finish.
Helpful Tip
Allow the paint to cure overnight before applying any sealer.
Sealing too soon can trap moisture beneath the finish and affect the final appearance.
Can Painted Air Dry Clay Be Used Outdoors?
This is another question I see quite often.
While a quality sealer offers some protection, standard air dry clay is not designed for long term outdoor exposure.
Rain, humidity, freezing temperatures, and constant sunlight can eventually weaken the clay, even when it has been painted and sealed.
For decorative pieces that stay indoors, air dry clay performs very well and lasts for years when cared for properly.
If I want something that will remain outside permanently, I usually choose a material that is specifically made for outdoor conditions instead.
Creative Painting Ideas for Air Dry Clay
One of the things I enjoy most about working with air dry clay is experimenting with different finishes.
A simple piece can look completely different depending on the colors and techniques you use.
Some of my favorite ideas include
- Neutral home decor with soft beige and white tones
- Modern black and white geometric patterns
- Rustic farmhouse finishes
- Faux terracotta pots
- Marble inspired designs
- Speckled ceramic effects
- Floral hand painted details
- Gold accents for elegant home decor
- Seasonal ornaments
- Personalized name plaques
- Decorative trinket dishes
- Handmade gift tags
- Holiday decorations
I often save photos of color combinations that inspire me so I can try them on future projects.
It is a fun way to keep each creation looking unique.
Frequently Asked Questions
Can you paint air dry clay before it dries?
No. Painting clay before it has fully dried traps moisture inside and greatly increases the chance of cracks forming later.
Do you need to sand air dry clay before painting?
It is not required, but I highly recommend it. Sanding creates a smoother surface, improves paint adhesion, and helps achieve a more professional finish.
What is the best paint for air dry clay?
Acrylic paint is my preferred choice because it provides excellent coverage, dries quickly, and comes in a wide range of colors and finishes.
Should you prime air dry clay?
For most projects, yes. Primer helps paint adhere better, reduces paint absorption, and creates brighter, more even colors.
How long should paint dry before sealing?
I usually let painted pieces cure overnight before applying a sealer. Waiting a little longer helps create a stronger and more durable finish.
Is air dry clay waterproof after painting?
No. Paint and sealer add some protection, but they do not make standard air dry clay completely waterproof.
Can you use Mod Podge as a sealer?
Yes. Mod Podge can work as a protective finish for decorative indoor projects, although I generally prefer a dedicated acrylic sealer for added durability.
Why does my paint peel off air dry clay?
Peeling usually happens because the clay was dusty, not fully dry, or painted without proper surface preparation.
Final Thoughts
Painting air dry clay without cracking is less about finding the perfect paint and more about following the right process from beginning to end.
Taking the time to let the clay dry completely, smoothing the surface, applying primer, building thin layers of paint, and sealing the finished piece all work together to create a finish that looks clean and lasts much longer.
Looking back at my own projects, I can honestly say that the biggest improvements came from slowing down and paying attention to the small details.
Waiting an extra day for the clay to dry, sanding away tiny imperfections, or applying one more thin coat of paint may seem like small steps, but they make a noticeable difference in the final result.
I hope the techniques I have shared help you avoid the mistakes I made and give you the confidence to create painted air dry clay projects that you are proud to display in your home or give as thoughtful handmade gifts.
With a little patience and practice, each project becomes another opportunity to improve your skills and enjoy the creative process.
Quick Tips to Remember
- Allow air dry clay to dry completely before painting.
- Sand the surface for a smoother finish.
- Apply primer for better paint adhesion.
- Use thin coats of acrylic paint instead of one thick layer.
- Let each coat dry fully before adding another.
- Seal the finished project to protect the paint.
- Store finished pieces indoors for the longest lifespan.
- Practice different painting techniques to develop your own creative style.