DIY Air Dry Clay Christmas Tree Bell Ornaments
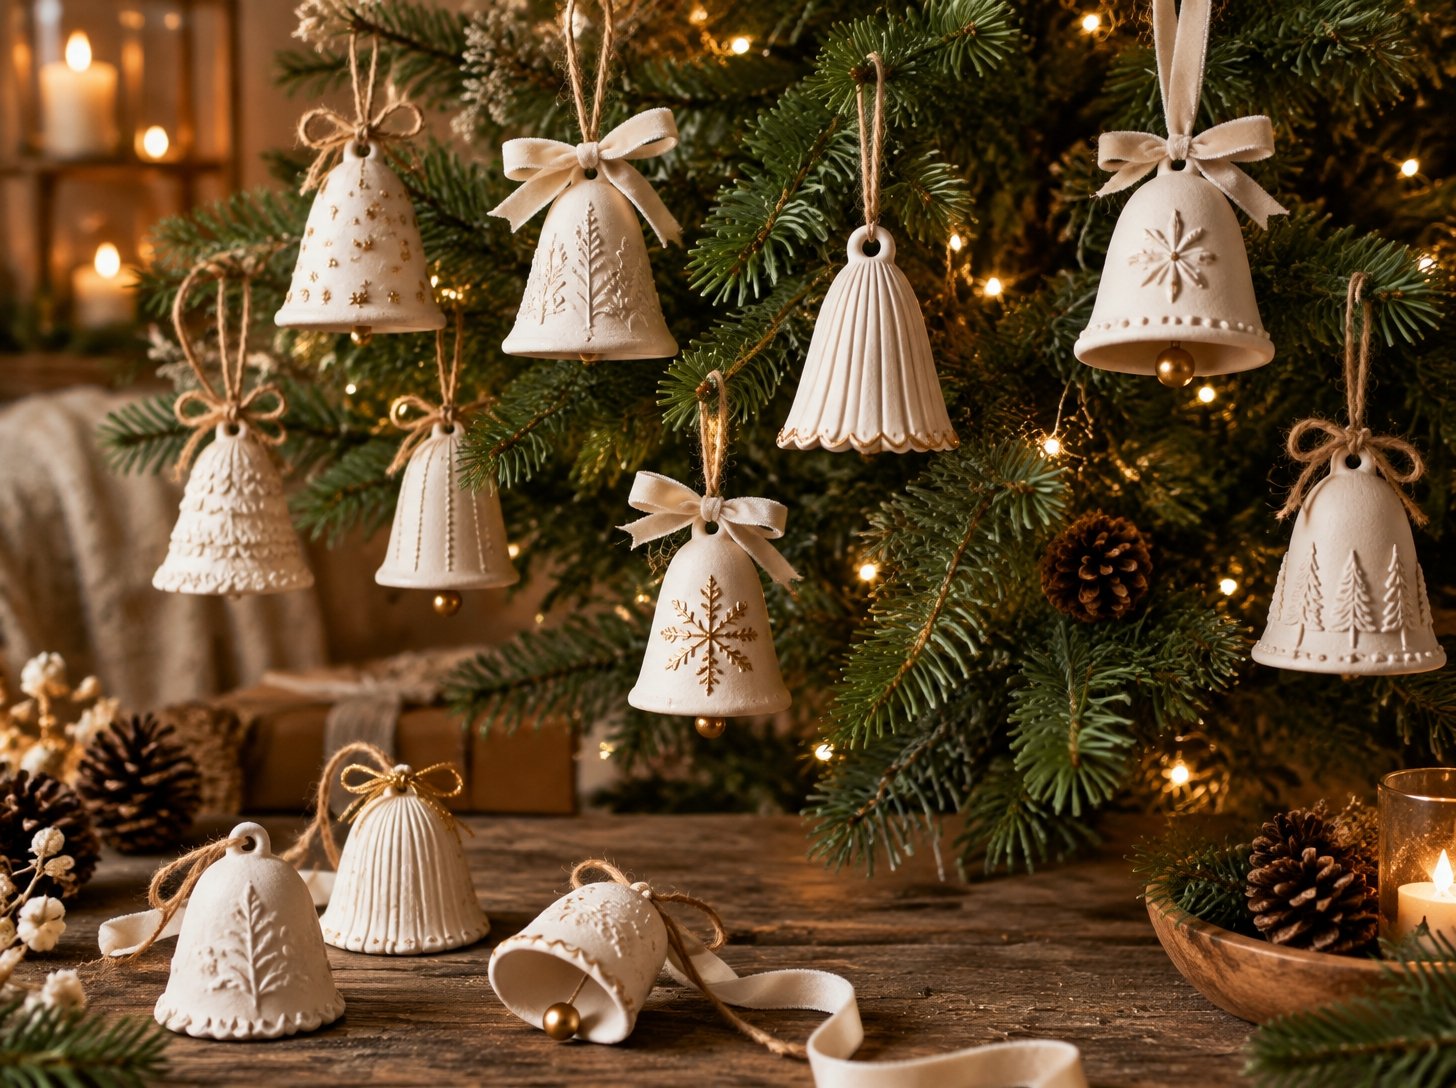
There is something special about handmade Christmas decorations, especially when they bring a little warmth and personality to your holiday home. One of my favorite things about working with air dry clay is how easily a simple piece of clay can become something beautiful with just a few basic tools and a little creativity.
These DIY air dry clay Christmas tree bell ornaments are a lovely project if you want to make decorations that look elegant without spending much money. They have a charming handmade appearance, and you can customize them with different textures, ribbons, paint colors, and finishes to match your Christmas decorating style.

I particularly like this project because you do not need a pottery wheel, kiln, or complicated equipment. Air dry clay is easy to work with at home, making it suitable for beginners and anyone who enjoys simple Christmas crafts. You can create rustic farmhouse-style bells, minimalist white ornaments, or vintage-inspired decorations with delicate details.
In this tutorial, I will walk you through the materials, preparation, shaping, and drying process so you can make your own clay Christmas tree bells. You can hang them on your Christmas tree, use them to decorate a festive garland, or attach them to gift packages for a thoughtful handmade touch.
What Are Air Dry Clay Christmas Tree Bell Ornaments?
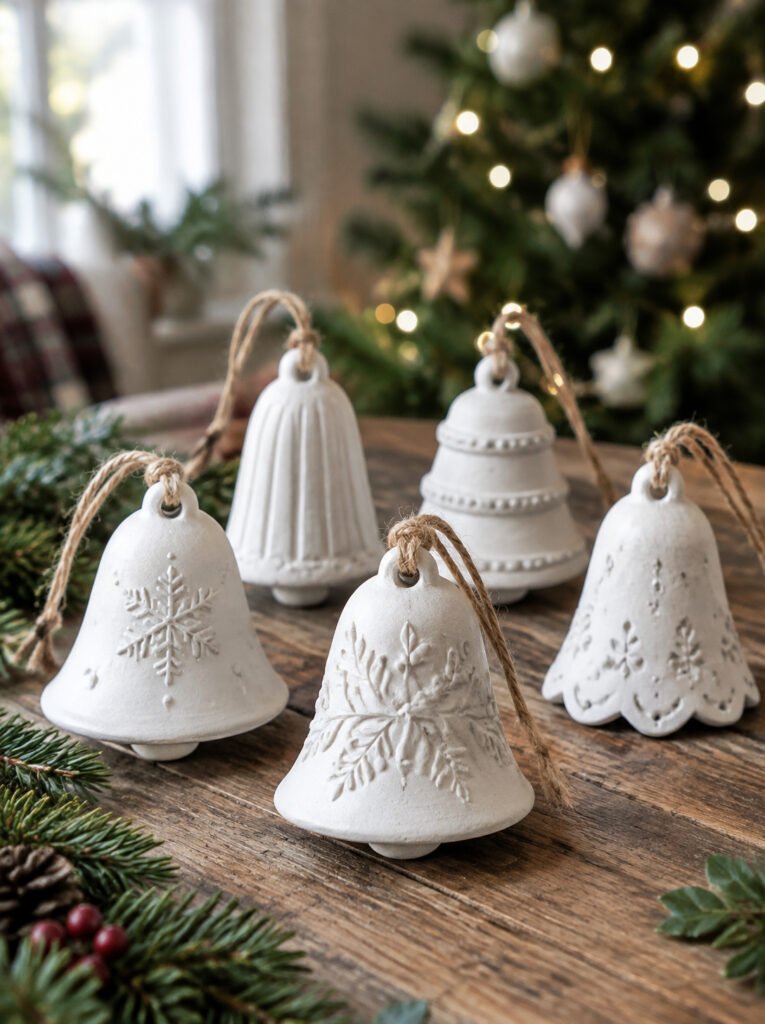
Air dry clay Christmas tree bell ornaments are handmade decorative pieces shaped like small bells and designed to hang on Christmas trees or around the home.
Unlike traditional ceramic ornaments, these decorations do not require kiln firing. The clay hardens naturally as moisture evaporates, making the project convenient for home crafting.
You can leave the ornaments in their natural clay color for a simple rustic look or decorate them with acrylic paint, metallic finishes, ribbons, and other embellishments.
The bell shape is particularly attractive because it works with different Christmas decorating styles, including:
- Rustic farmhouse Christmas decorations.
- Scandinavian-inspired holiday decor.
- Traditional red, green, and gold Christmas themes.
- Minimalist white and neutral decorations.
- Vintage-inspired handmade ornaments.
One important detail is that air dry clay bells are decorative rather than functional musical bells. Their purpose is to add a charming handmade touch to your Christmas decorations.
Materials You Will Need

Before starting, gather your supplies and prepare a clean, flat working surface. Having everything nearby makes the process easier, especially when working with clay that needs to be shaped before it begins drying.
Here is what I recommend:
- Air dry clay: White air dry clay is a great choice because it creates a clean, classic Christmas look and is easy to paint.
- Rolling pin: Helps roll the clay into an even sheet.
- Christmas tree bell template: Use a paper template or a simple bell-shaped cutter to create consistent shapes.
- Craft knife: Useful for trimming uneven edges and refining the bell shape.
- Drinking straw: Helps create a small hanging hole near the top.
- Small paintbrushes: Useful for adding paint and decorative details.
- Acrylic paint: Choose white, cream, gold, silver, green, or other colors that match your Christmas theme.
- Sandpaper: Fine-grit sandpaper helps smooth rough edges after the clay dries.
- Ribbon or twine: Used to hang the finished ornaments.
- Craft sealer: A suitable clear sealer can help protect the finished decoration from dust and light handling.
You may also want a small bowl of water, a soft cloth, and parchment paper to keep your work surface clean.
How to Make DIY Air Dry Clay Christmas Tree Bell Ornaments

The process is straightforward, but taking your time with shaping and drying will help you achieve a cleaner finish.
Step 1: Prepare Your Air Dry Clay
Start by removing a portion of air dry clay from its packaging. Knead it gently with your hands until it becomes smooth and workable.
If the clay feels slightly stiff, follow the manufacturer’s instructions for conditioning it. A small amount of water may help with some clay brands, but avoid adding too much because excess moisture can make the clay sticky and increase drying time.
Keep the unused clay covered in an airtight bag or container while you work. Air dry clay begins losing moisture when exposed to air, and uncovered clay can become difficult to shape.
Before rolling, make sure your working surface is clean and free from dust or debris.
Step 2: Roll Out the Clay
Place the clay on a clean surface covered with parchment paper or another suitable non-stick craft surface.
Use a rolling pin to flatten the clay into an even sheet. Aim for approximately ¼ inch thickness, adjusting slightly depending on the size of your ornaments and the clay manufacturer’s recommendations.
Try to keep the thickness consistent throughout the sheet. If some areas are much thinner than others, the ornaments may dry unevenly or become more fragile.
Avoid rolling the clay too thin because small Christmas ornaments need enough thickness to hold their shape during drying and handling.
Step 3: Cut Out the Bell Shapes
Once the clay is rolled out, place your bell template on top and carefully cut around it using a craft knife.
You can make your own template using cardstock or paper. A traditional bell shape with a wider lower section and a narrower top works beautifully for Christmas decorations.
If you prefer a more uniform appearance, create one template and use it for all your ornaments.
After cutting, gently remove the excess clay around each shape. Smooth the edges using your fingertips or a slightly damp tool.
Try not to pull or stretch the clay while removing the surrounding pieces because this can distort the bell shape.
Step 4: Shape the Bells
This is where your flat clay pieces begin to look like actual Christmas bell ornaments.
Carefully lift each cutout and gently curve it into a bell shape. You can use a small rounded object, such as a clean bottle or a suitable curved mold, to help create the form.
Avoid forcing the clay into a tight curve. Air dry clay can crack if bent too sharply, especially when the piece is thick or beginning to dry.
Gently adjust the lower edges so the ornament has a natural bell-like opening.
Make sure each bell can rest securely on its base while maintaining the shape you want.
Step 5: Create the Hanging Hole
Before the clay dries, make a small hole near the top of each ornament using a drinking straw or another suitable small tool.
The hole should be large enough to accommodate your ribbon or twine but not so close to the edge that the clay becomes weak.
Gently remove the small piece of clay from the hole and smooth the surrounding area.
Check that the opening is clear before setting the ornament aside. It is much easier to make adjustments while the clay is still workable.
Step 6: Add Decorative Details
You can leave your bells smooth and simple, but adding a little texture can make them look even more special.
Try pressing a piece of lace, textured fabric, a small evergreen sprig, or a patterned craft stamp gently against the clay surface.
You can also create small decorative lines around the bottom edge or add a subtle raised pattern using leftover clay.
Keep the details relatively shallow so they do not weaken the ornament or make it difficult to dry evenly.
A simple design idea: Make several bells with different textures but keep them in the same color family. This creates a coordinated handmade collection without making every ornament look identical.
Step 7: Allow the Clay Bells to Dry
Once you have finished shaping and decorating your ornaments, place them carefully on a flat surface covered with parchment paper.
Allow the bells to dry naturally according to the clay manufacturer’s instructions. Drying time will depend on the thickness of the clay, the size of your ornaments, and the humidity in your home.
Avoid placing them directly beside a heater or using intense heat to speed up the process. Rapid drying can cause the clay to shrink unevenly and develop cracks.
If your ornaments are drying on a flat surface, turn them carefully when the exposed side has become firm enough to handle. This helps both sides dry more evenly.
Check the pieces regularly, especially around thicker areas and curved edges. Do not move them too much while they are still soft.
Step 8: Smooth the Edges
After the clay has dried completely, inspect each bell for rough edges, small bumps, or uneven areas.
Use fine-grit sandpaper to gently smooth any imperfections. Work slowly because air dry clay can be fragile, particularly around the hanging hole and lower edges.
Wipe away the dust with a soft, dry cloth before painting.
If you notice a small crack, you may be able to repair it with a little compatible air dry clay or a suitable clay repair product. Allow the repair to dry fully before continuing.
Step 9: Paint Your Christmas Bell Ornaments
Now comes one of my favorite parts because this is where you can give your ornaments their own personality.
Acrylic paint works well for decorating many air dry clay projects. I particularly like neutral shades because they create an elegant handmade appearance, but you can choose any colors that complement your Christmas decorations.
Here are a few ideas:
Classic white bells: Paint the ornaments white or cream for a clean, minimalist Christmas look.
Rustic farmhouse bells: Use beige, warm brown, or muted white paint to create a natural farmhouse appearance.
Gold Christmas bells: Add a metallic gold finish for a little festive sparkle.
Vintage-inspired bells: Choose muted green, antique white, or soft red with lightly distressed details.
Apply thin coats of paint rather than one thick layer. Allow each coat to dry before adding another. This helps preserve the details and gives the ornaments a smoother finish.
Step 10: Apply a Protective Sealer
Once the paint has dried completely, you can apply a suitable clear craft sealer to protect the surface.
Choose a product specifically suitable for your clay and paint. You can use a matte finish if you prefer a natural appearance or a glossy finish for a slightly polished look.
Apply the sealer according to the manufacturer’s directions and allow it to dry fully.
Keep in mind that sealing does not make ordinary air dry clay waterproof or suitable for outdoor exposure. These ornaments are best used indoors and should be kept away from moisture.
Step 11: Add Ribbon or Twine
The final step is adding something to hang your finished ornaments.
Cut a small length of ribbon, twine, or decorative cord and carefully thread it through the hanging hole.
Tie the ends securely to create a loop. You can use different materials depending on the style you want.
- Natural jute twine for rustic farmhouse decorations.
- Thin velvet ribbon for an elegant Christmas look.
- Red satin ribbon for traditional holiday colors.
- Cream cotton cord for minimalist ornaments.
- Gold ribbon for a festive metallic finish.
You can also tie a small decorative bow near the hanging hole. Just make sure the ribbon is not too heavy for the clay.
Your handmade Christmas tree bell ornaments are now ready to display.
Creative Ways to Decorate Your Air Dry Clay Christmas Bells

One of the best things about making your own clay ornaments is that you can experiment with different finishes and designs.
If you are making several bells, I recommend choosing two or three complementary styles rather than decorating every piece differently. This helps the finished collection look coordinated.
Here are some ideas worth trying.
Rustic Farmhouse Clay Bells
Use natural white or beige clay with jute twine and simple textured patterns. You can press a piece of burlap or lace gently into the clay before drying to create a subtle rustic design.
Minimalist White Christmas Bells
Keep the clay in its natural white color or apply a thin coat of cream paint. Add a simple white cotton cord and leave the surface mostly undecorated.
This style works beautifully with neutral Christmas trees and Scandinavian-inspired decorations.
Gold and White Christmas Bells
Paint the bells white and add small gold details around the edges or near the hanging hole. A thin gold ribbon can complete the look without making the ornament feel too busy.
Textured Vintage Christmas Bells
Use lace impressions, small decorative patterns, and muted paint colors to create a vintage-inspired appearance. Lightly sanding selected raised areas after painting can add a gently aged finish.
Personalized Christmas Bell Ornaments
You can also make ornaments for family members by adding initials, a short name, or a small date using suitable clay stamps before the pieces dry.
Personalized ornaments make thoughtful handmade gifts and can become keepsakes for future Christmas celebrations.
Where to Display Your DIY Clay Christmas Bell Ornaments
Once your ornaments are finished, there are several ways to use them around your home.
- Christmas tree: Hang them between branches alongside traditional baubles and wooden decorations.
- Christmas garland: Attach several bells to a garland with ribbon or twine.
- Gift wrapping: Tie a small clay bell to a wrapped present for a handmade finishing touch.
- Christmas wreath: Add a few lightweight bells to an indoor wreath.
- Festive table decoration: Arrange the bells in a small decorative bowl or on a Christmas tray.
- Cabinet handles: Hang smaller ornaments from suitable cabinet handles to add a subtle festive detail.
For heavier ornaments, make sure the tree branch or hanging point can support their weight. Air dry clay is more fragile than ceramic, so avoid placing these decorations where they can easily fall.
Common Mistakes to Avoid When Making Air Dry Clay Christmas Bells
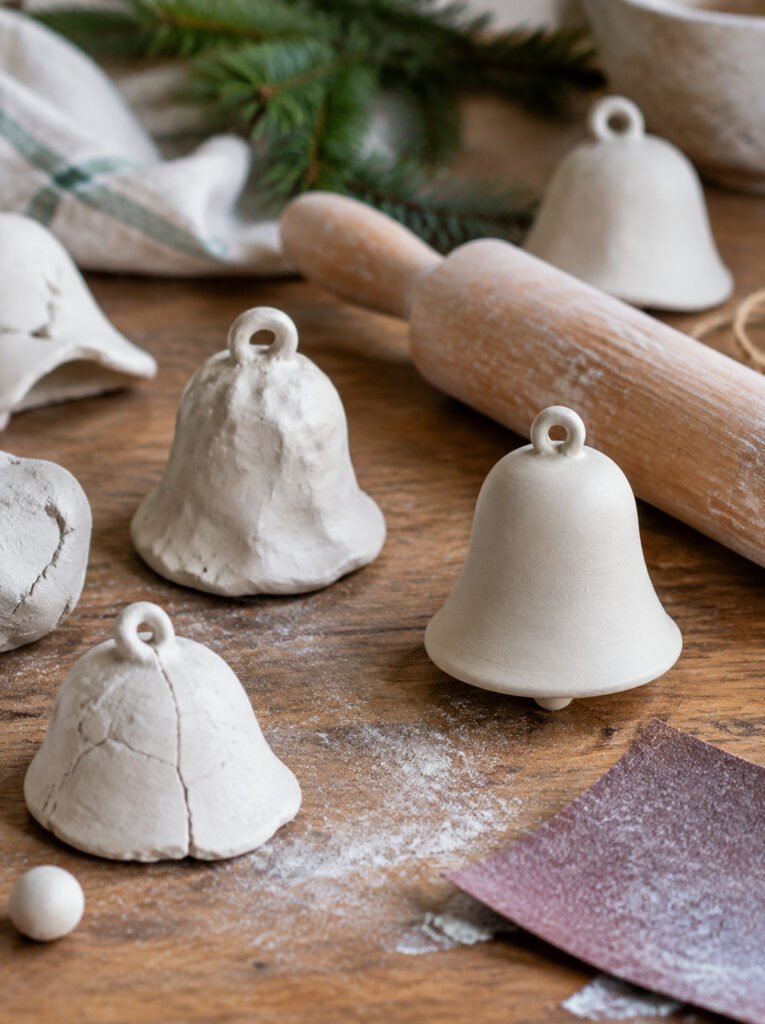
Even though this is a beginner-friendly project, a few small mistakes can affect the final result.
Rolling the clay too thin: Very thin clay can become fragile and may break around the edges. Aim for consistent thickness.
Adding too much water: Excess water can make the clay sticky and increase drying time. Use only what the clay manufacturer recommends.
Making the hanging hole too close to the edge: This can weaken the top of the ornament. Leave enough clay around the opening.
Bending the clay too sharply: Forceful shaping can create cracks. Curve the clay gradually while it is still workable.
Drying the ornaments too quickly: Direct heat can cause uneven drying and cracking. Allow the clay to dry naturally.
Painting before the clay is completely dry: Trapped moisture can affect the finish. Wait until the entire ornament has dried.
Skipping the protective finish: A suitable sealer can help protect the painted surface from everyday handling, although it will not make the ornament waterproof.
Frequently Asked Questions
How long do air dry clay Christmas ornaments take to dry?
Drying time depends on the clay brand, thickness, size, and humidity. Follow the manufacturer’s instructions and make sure the entire ornament is completely dry before sanding, painting, or sealing.
Can I make air dry clay Christmas bells without a mold?
Yes. You can use a paper template, craft knife, and a rounded object to create the bell shape. You do not need a specialized mold for this project.
Can I paint air dry clay ornaments?
Yes. Acrylic paint is a popular option for decorating fully dried air dry clay. Apply thin coats and allow each layer to dry before adding the next.
Do I need to seal air dry clay Christmas ornaments?
Sealing is optional, but a suitable clear craft sealer can help protect the painted surface from dust and light handling. Ordinary air dry clay remains vulnerable to moisture even when sealed.
Can I use these clay bells outdoors?
I recommend keeping them indoors. Air dry clay can absorb moisture and may become damaged when exposed to rain, snow, or damp outdoor conditions.
Can children make these Christmas bell ornaments?
This can be a fun supervised craft for children. Adults should handle sharp cutting tools, and younger children should be supervised when using small decorative materials.
Can I make these ornaments ahead of Christmas?
Absolutely. Making them ahead of time gives the clay plenty of time to dry and allows you to paint, seal, and decorate each piece without rushing.
Final Thoughts
Making DIY air dry clay Christmas tree bell ornaments is a simple way to add something handmade and personal to your holiday decorations. You can keep them neutral and minimalist, give them a rustic farmhouse finish, or experiment with gold details and festive ribbons.
What I particularly like about this project is that you can make a whole collection using just a few basic supplies. You can also customize each bell for different Christmas decorating styles or turn them into thoughtful handmade gifts.
Take your time with shaping and drying, choose colors you love, and do not worry if every ornament looks slightly different. Those little handmade details are part of what makes them special.
With a little clay and creativity, you can make beautiful Christmas decorations that you will look forward to bringing out every holiday season.