
I always find clay projects surprisingly relaxing.
There is something satisfying about taking a simple piece of clay and turning it into decorative stones, labels, ornaments, garden markers, or handmade home décor pieces.
Some of my favorite DIY projects started with inexpensive clay and basic supplies already sitting at home.
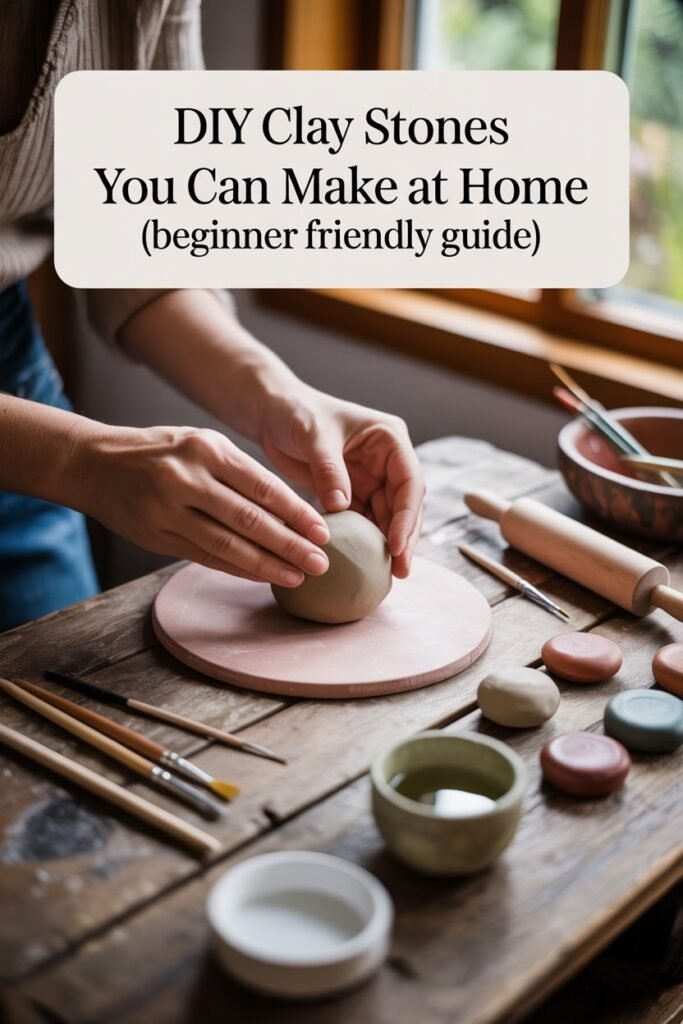
The best part is that you do not need a professional craft room or expensive equipment to make beautiful clay stones.
A few essentials can help beginners create polished results while keeping projects fun and budget friendly.
Before starting your first project, understanding exactly what you need can save time, money, and frustration.
Disclaimer: This post may contain affiliate links, which means I may earn a small commission at no extra cost to you. Always follow product instructions and allow proper drying time when working with clay and sealers for safe, long-lasting results.
Amazon Shopping List: DIY Clay Stones You Will Need
- Air Dry Clay Pack (White or Natural Clay)
- Smooth River Stones for Craft Base Shapes
- Clay Sculpting Tools Kit
- Acrylic Paint Set for Detailing
- Paint Brushes Variety Set
- Clear Gloss Sealer or Varnish Spray
- Silicone Craft Mat for Clean Workspace
Why DIY Clay Stones Are Worth Trying
DIY clay stones are incredibly versatile. They can be used for:
- Garden markers
- Decorative shelf pieces
- Painted quote stones
- Personalized gifts
- Jewelry pieces
- Holiday ornaments
- Kids’ craft projects
- Home décor accents
- Name tags
- Memory keepsakes
Unlike natural stones that can be difficult to shape or paint, clay gives you complete control over size, texture, and design.
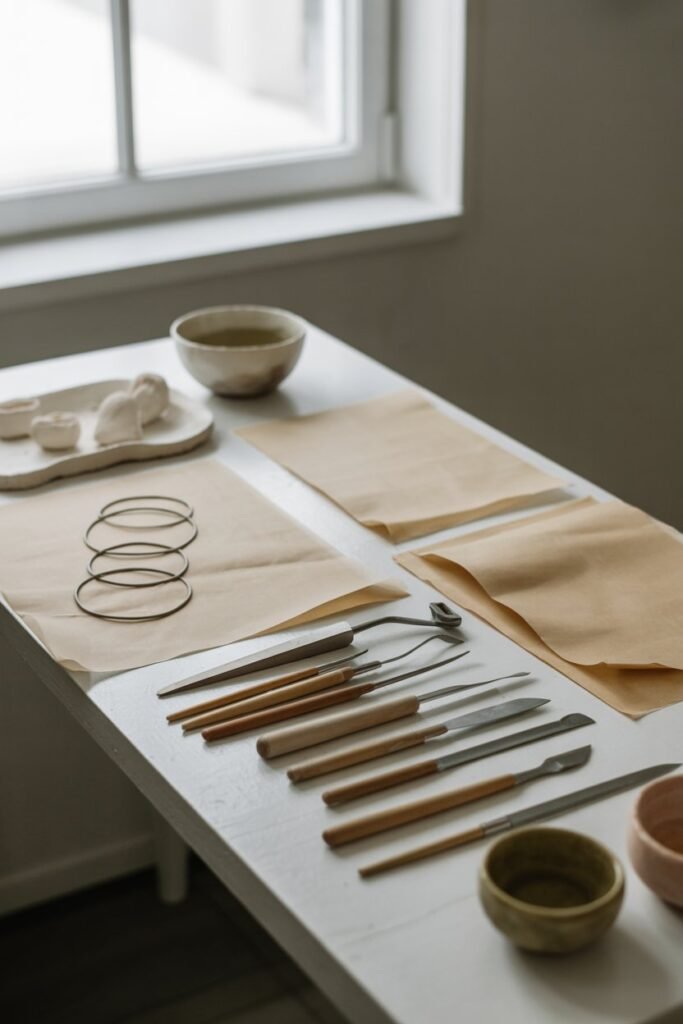
Essential DIY Clay Stones Supplies You Will Need
Before you start shaping anything, having the right supplies makes the whole process smoother and more enjoyable.
These simple tools and materials will help you turn basic clay into clean, creative, and long-lasting stone designs without unnecessary stress or guesswork.
1. Air-Dry Clay – The Easiest Starting Point for DIY Clay Stones
If you are making clay stones for the first time, air-dry clay is usually one of the easiest materials to work with.
I like it because there is no need for special equipment or complicated steps. You simply shape your project and leave it to dry naturally.
Air-dry clay is perfect for creating decorative stones, handmade labels, mini signs, and personalized craft pieces.
It also works well if you enjoy trying different ideas without spending too much money on supplies.
Some reasons beginners love using air-dry clay:
- No baking required
- Easy to shape and mold
- Budget friendly
- Great for family craft projects
- Available in most craft stores
One thing I learned after using air-dry clay multiple times is that keeping the thickness even helps prevent cracking while drying.
Thin sections can dry faster than thick areas and sometimes create small breaks.
2. Polymer Clay – A Durable Option for Long-Lasting Projects
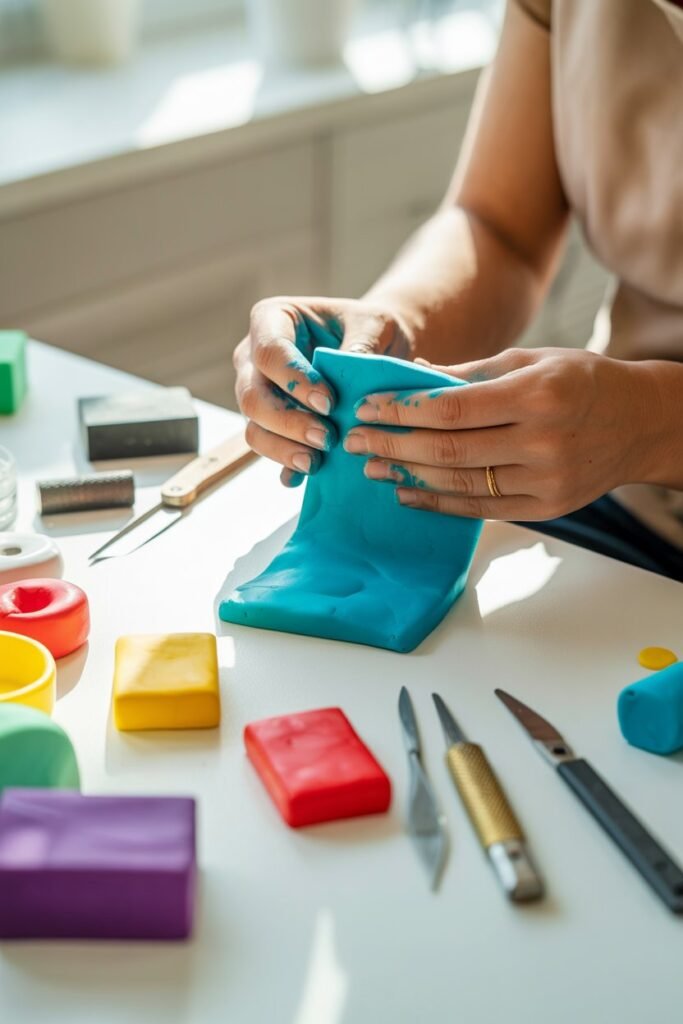
If you want clay stones that feel stronger and more durable, polymer clay can be a great option.
Unlike air-dry clay, this type hardens after baking in a regular household oven. The finished pieces often feel smoother and can hold detailed designs very well.
Polymer clay comes in many colors, which means you can sometimes skip painting altogether and simply work with colored clay pieces.
Polymer clay works especially well for:
- Decorative mini stones
- Jewelry charms
- Small ornaments
- Personalized gifts
- Detailed designs and textures
I also like that polymer clay usually handles tiny details better. If you are creating small patterns, letters, or decorative textures, the finished result can look cleaner and more polished.
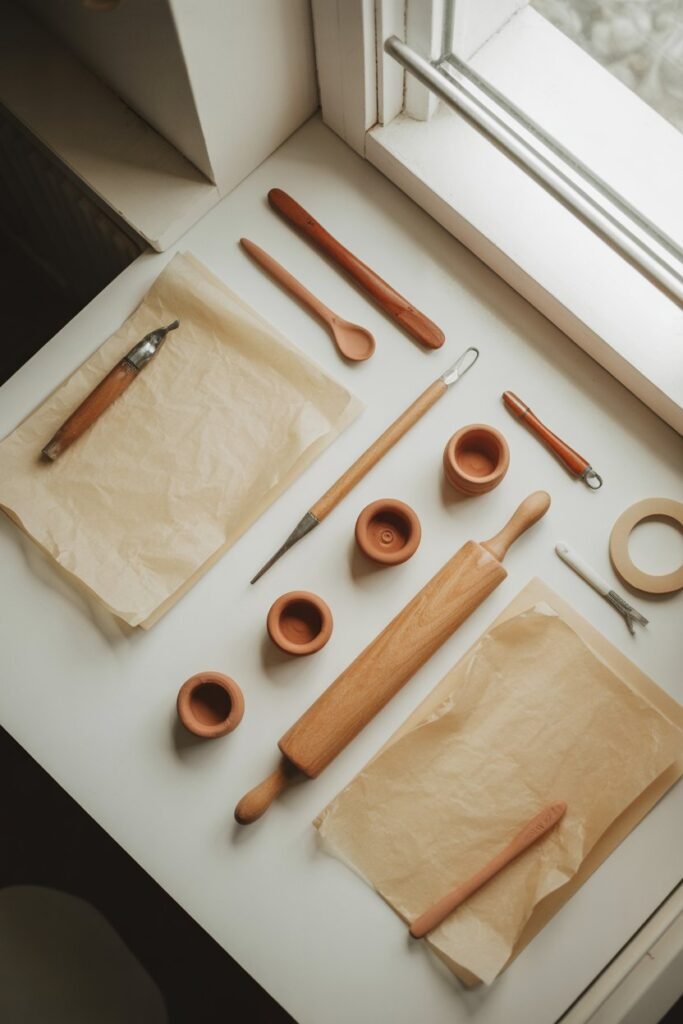
3. Rolling Pin – The Tool That Helps Everything Stay Even
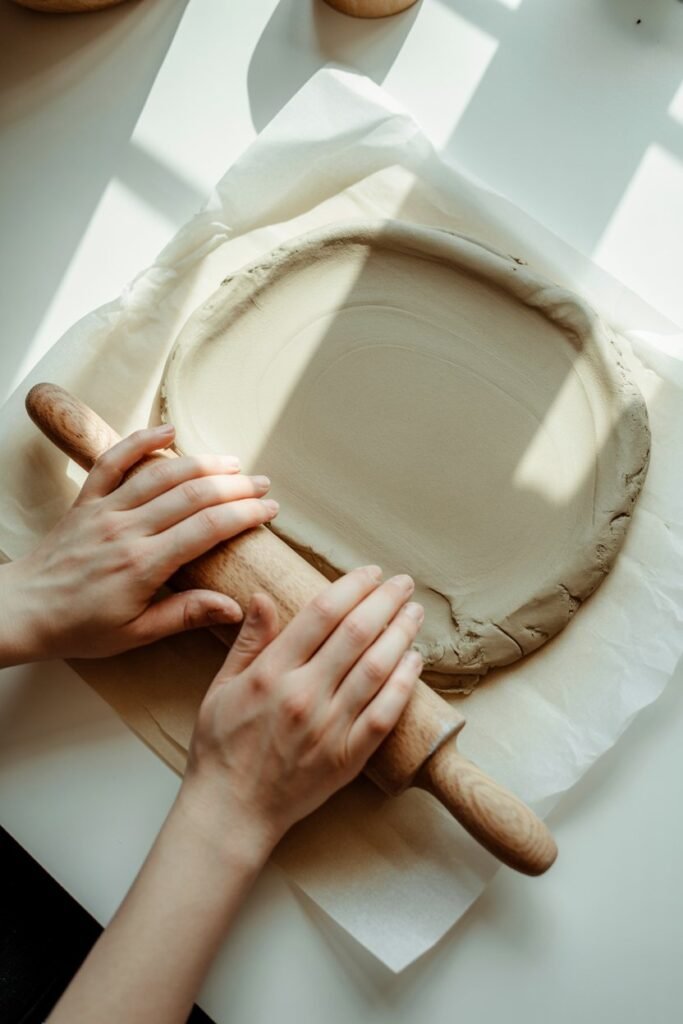
A rolling pin might seem like a small detail, but it can make a big difference when making DIY clay stones.
One of the easiest mistakes beginners make is creating clay pieces with uneven thickness.
Some parts end up too thin while other areas become too thick, which can affect drying and the overall look of the project.
Using a rolling pin helps create a smooth, balanced surface so your clay stones look more polished and hold their shape better.
Benefits of using a rolling pin:
- Creates consistent thickness
- Helps prevent weak spots
- Makes shaping easier
- Improves the finished appearance
- Speeds up preparation time
You do not need expensive crafting equipment either. I have seen people use simple household items like a glass bottle, smooth jar, or even a clean PVC pipe with great results.
4. Clay Cutting Tools – Small Tools That Create Cleaner Designs
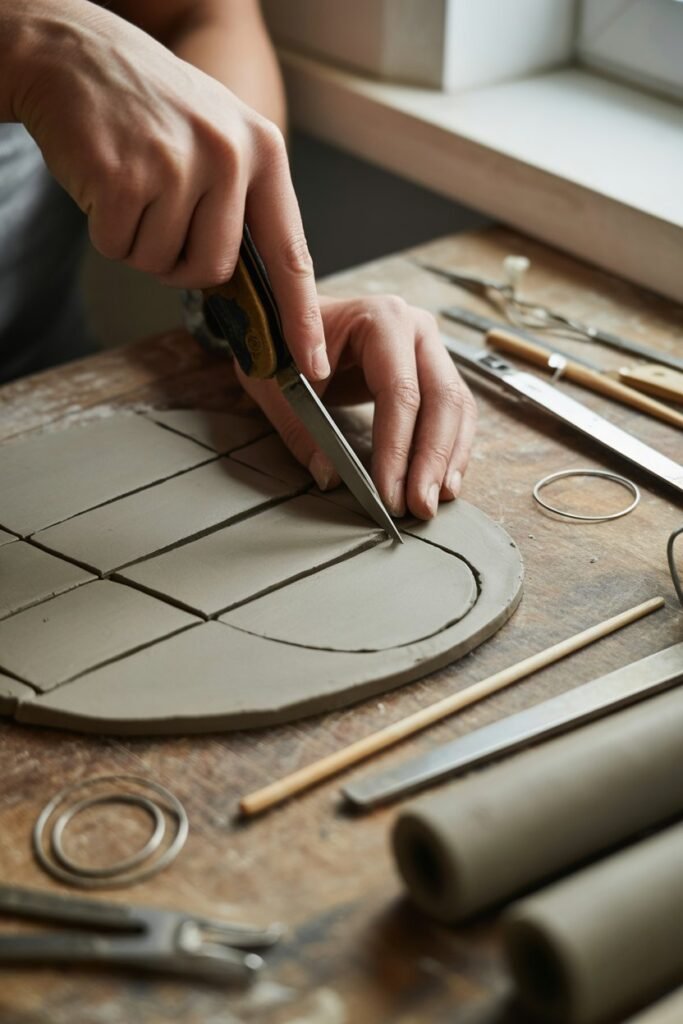
Clay cutting tools may seem optional at first, but they become incredibly helpful once you start adding details to your projects.
Trying to cut shapes with random household objects can sometimes leave rough edges or uneven lines.
Proper clay tools give you cleaner cuts and more control over the final design.
Useful cutting and shaping tools include:
- Plastic clay knives
- Sculpting tools
- Craft blades
- Shaping sticks
- Detail tools
These tools can help with:
- Trimming edges
- Carving designs
- Creating patterns
- Cutting shapes
- Adding small decorative details
One thing I noticed when working on clay projects is that small details often make handmade pieces look more professional.
Even simple tools can help transform basic clay stones into something that looks thoughtfully designed and finished.
5. Silicone Molds – An Easy Way to Create Consistent Shapes
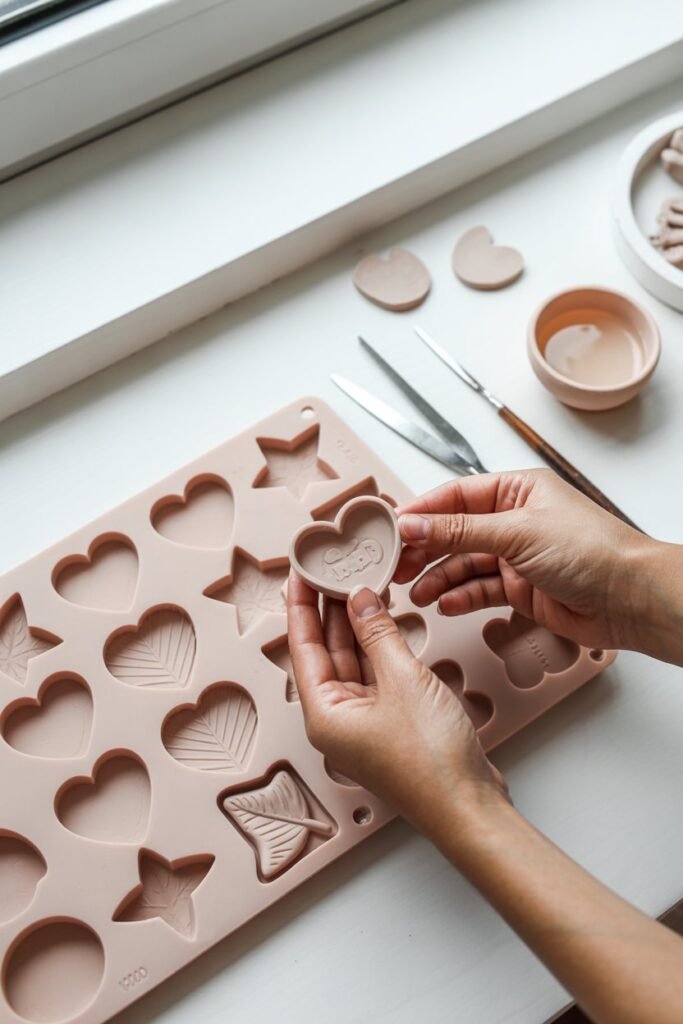
Silicone molds can make DIY clay projects much easier, especially if you want clean and consistent shapes without spending extra time shaping each piece by hand.
They are helpful for beginners because they remove some of the guesswork and help create designs that look neat and balanced.
If you are making multiple clay stones for gifts, decorations, or themed projects, molds can save a lot of time.
Popular mold ideas include:
- Hearts
- Flowers
- Leaves
- Stars
- Pebbles
- Alphabet letters
- Geometric shapes
Silicone molds are also flexible, which makes removing the clay easier without damaging the design.
I like using molds when creating multiple pieces because everything looks more organized and uniform in the final display.
6. Texture Tools – Simple Details That Make Clay Stones Stand Out
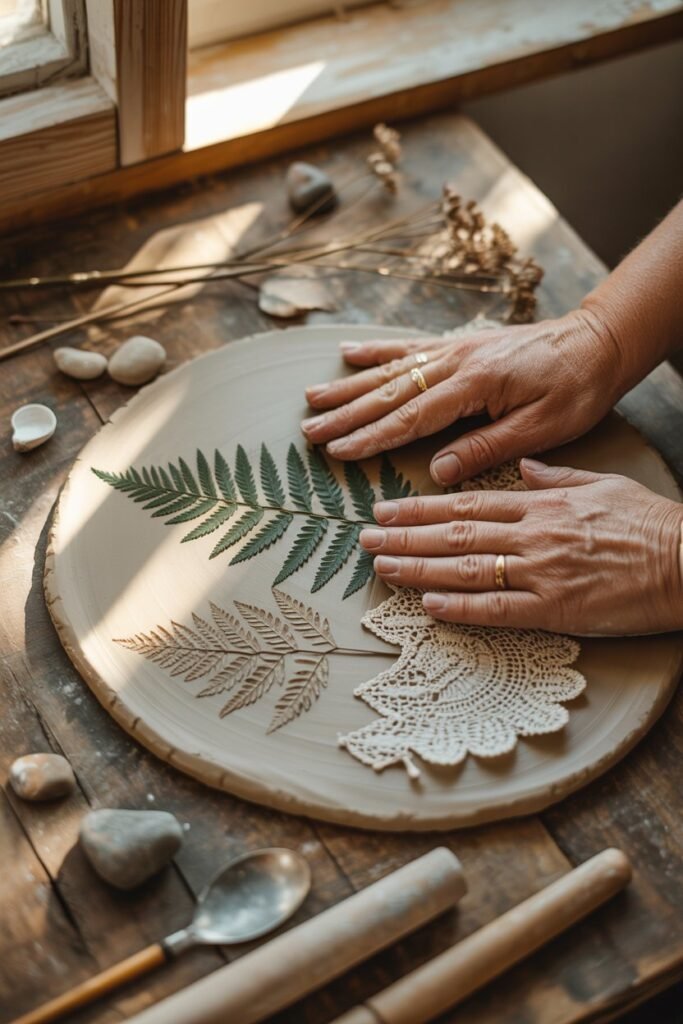
Texture can completely change the look of a clay stone. Even a simple design can look more creative and interesting once patterns and details are added to the surface.
The nice thing about texture tools is that you do not always need to buy anything special. Many everyday items around the house can create beautiful patterns.
Simple texture ideas include:
- Leaves
- Lace fabric
- Forks
- Toothbrushes
- Buttons
- Bubble wrap
- Stamps
Adding texture can give projects a handmade look that feels more unique and personal.
I enjoy experimenting with different objects because sometimes the most unexpected items create the best patterns.
Small details often turn a plain clay piece into something that feels artistic and finished.
7. Water and a Small Bowl – A Simple Supply That Helps Improve Your Finish
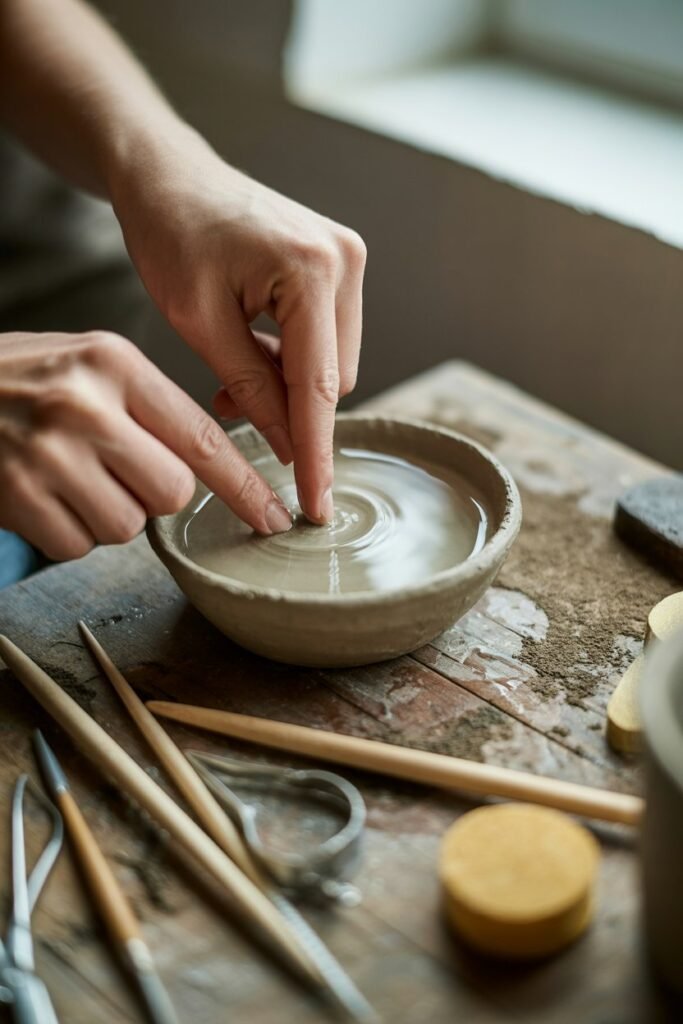
Water may seem like a basic item, but it can be surprisingly useful during clay projects.
A small amount of water can help smooth rough spots, soften tiny cracks, and make shaping easier while working with the clay.
Keeping a small bowl of water nearby allows you to quickly fix little imperfections without stopping your project.
Ways water can help during clay crafting:
- Smooth uneven surfaces
- Blend small cracks
- Soften rough edges
- Help shape detailed areas
- Clean excess clay from fingers or tools
One thing I learned while working with clay is that a little water goes a long way.
Too much moisture can make the clay overly soft or sticky, which sometimes affects the final shape.
Using a lightly damp finger usually gives better control than soaking the clay.
8. Sandpaper – The Secret to Smoother and Cleaner Results
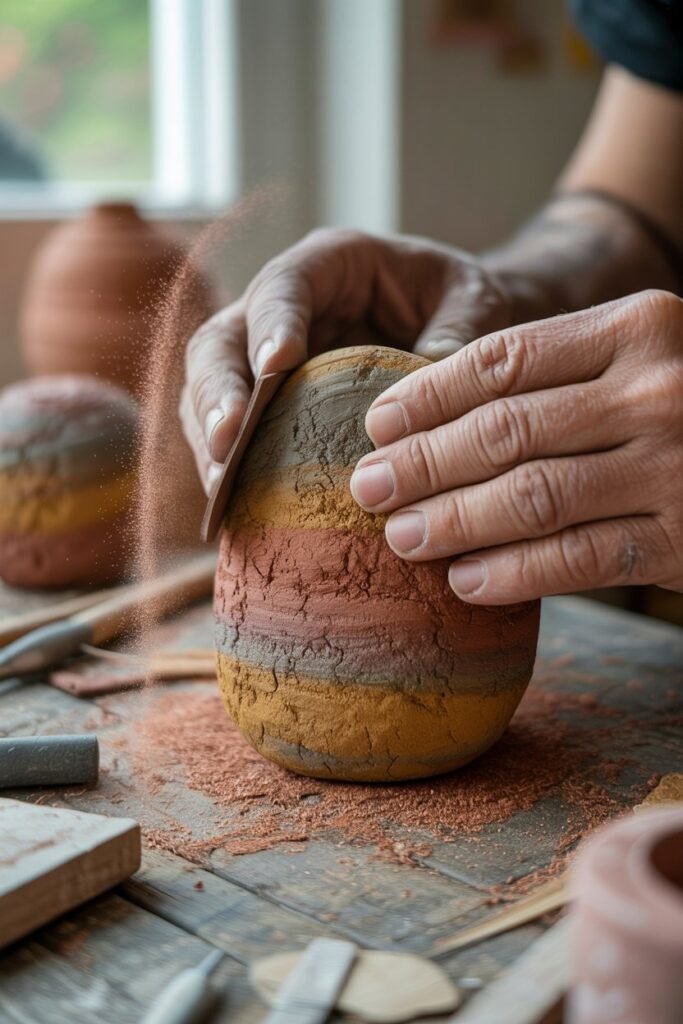
After clay dries, you may notice rough spots, uneven edges, or tiny imperfections that were hard to see earlier.
This is where sandpaper becomes helpful. It is one of those simple supplies that can make handmade projects look much more polished.
Fine-grit sandpaper works best because it smooths the surface without removing too much material.
Sandpaper can help:
- Smooth rough edges
- Remove bumps
- Create cleaner surfaces
- Prepare pieces for painting
- Improve the finished appearance
I noticed that even small amounts of sanding can completely change the final result.
A clay stone that looks slightly rough at first can look much cleaner and more professional after a few minutes of gentle sanding.
Small finishing details often make a bigger difference than people expect.
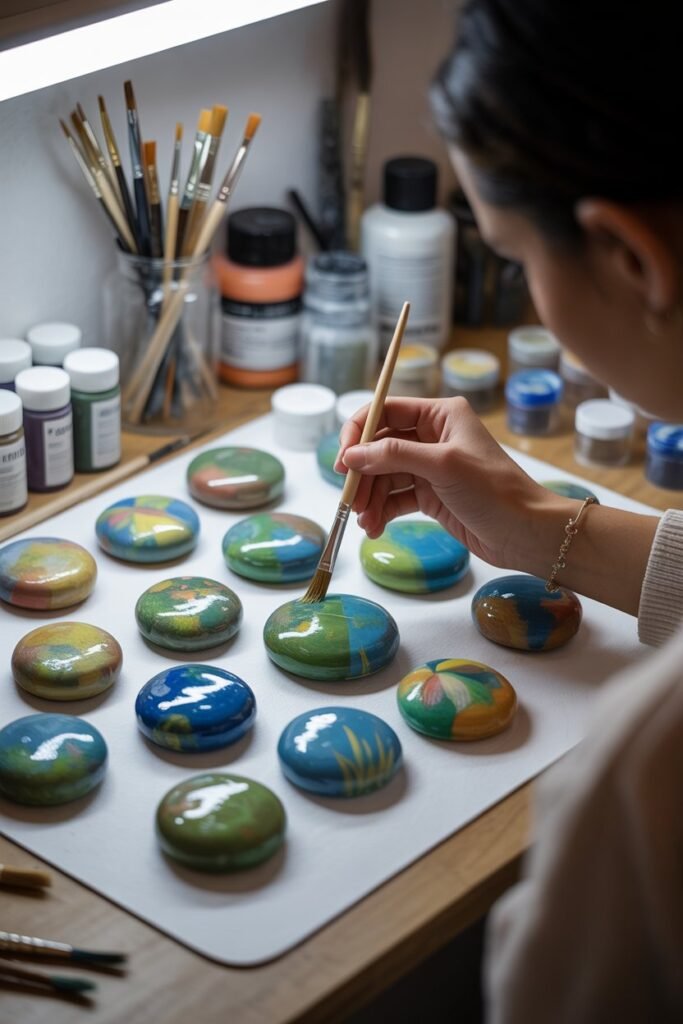
9. Acrylic Paint – Add Color and Personality to Your Clay Stones
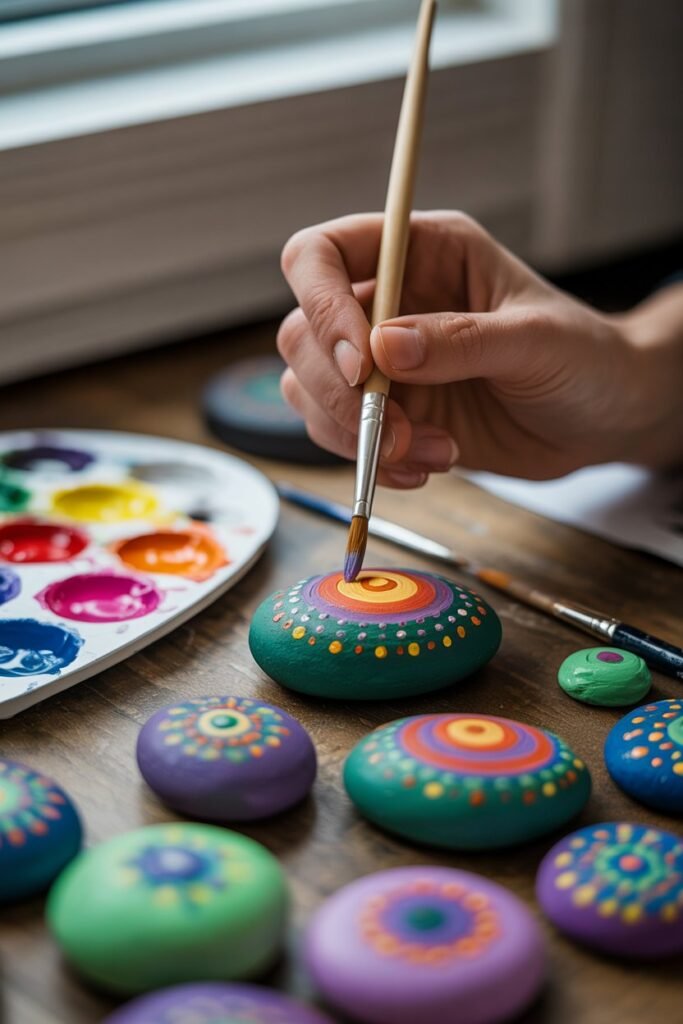
Once your clay stones are fully dry, paint is where the creative part really begins.
Acrylic paint is a popular choice because it is easy to use, dries fairly quickly, and works well on many clay surfaces.
Painting allows you to turn plain clay pieces into colorful decorations that match your personal style or the theme of your project.
Popular paint ideas for clay stones include:
- Soft neutral shades
- Pastel colors
- Earth tones
- Bright colors
- Gold or metallic accents
- Black and white designs
Acrylic paint also works well for adding:
- Quotes
- Names
- Small artwork
- Patterns
- Decorative details
I enjoy this part because every project starts to look unique. Even two clay stones with the same shape can end up looking completely different just by changing the colors or designs.
10. Paint Brushes – Small Details Often Create Better Results
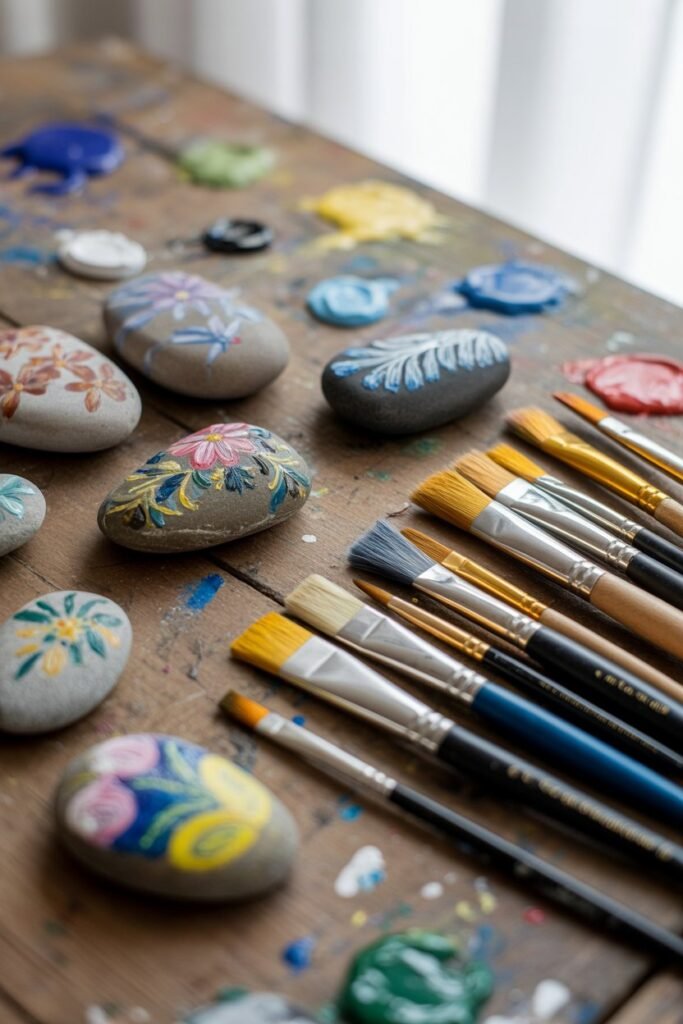
Paint brushes may seem like a basic supply, but having different brush sizes can make decorating much easier.
Larger brushes help cover bigger areas, while smaller brushes make it easier to add detailed designs and cleaner lines.
Using the right brush for the job can save time and improve the final appearance of your project.
Helpful brush types include:
- Flat brushes for larger areas
- Round brushes for general painting
- Fine-tip brushes for details
- Small detail brushes for lettering
Paint brushes can help with:
- Writing names or words
- Adding patterns
- Creating outlines
- Painting tiny decorations
- Blending colors smoothly
One thing I noticed while working on craft projects is that tiny details often stand out the most.
A small brush can make lettering cleaner and decorative patterns more precise, helping handmade clay stones look more finished and thoughtfully designed.
11. Protective Sealer – Help Your Clay Stones Last Longer
After spending time shaping, painting, and decorating your clay stones, protecting the finished piece is an important final step.
A protective sealer can help preserve the appearance of your project and reduce wear over time.
Many people skip this step when starting out, but sealing can make a noticeable difference, especially if the clay stones will be handled often or displayed in areas where dust and moisture are present.
Benefits of using a sealer:
- Helps protect painted surfaces
- Reduces fading over time
- Adds durability
- Creates a cleaner finish
- Helps prevent scratches and small damage
Common finish options include:
- Matte finish for a soft natural look
- Gloss finish for shine
- Satin finish for something between both
I learned that a finished project can sometimes look completely different after sealing. Colors may appear richer, and the entire piece often looks more polished.
12. Parchment Paper or a Non-Stick Surface – Keep Your Workspace Clean and Easy to Manage
Having a proper work surface can make clay crafting much easier.
Clay placed directly on tables or rough surfaces can sometimes stick, collect dust, or become difficult to remove without changing the shape.
Using a non-stick surface helps create a cleaner workspace and makes moving projects easier while working.
Good surface options include:
- Parchment paper
- Silicone craft mats
- Wax paper
- Plastic craft boards
- Non-stick mats
Benefits of using a work surface:
- Helps prevent sticking
- Makes cleanup easier
- Protects furniture and tables
- Keeps clay cleaner
- Makes projects easier to move
I always find that simple preparation saves time later. Setting up a clean work area before starting often means fewer messes and fewer interruptions while working on a project.
Sometimes small things like your workspace setup make the entire crafting process feel easier.
Helpful Section Before Starting Your First Clay Project
Before making your first clay stone, remember something many beginners discover after a few projects:
Perfect results rarely happen immediately.
My first clay pieces looked uneven and some developed tiny cracks while drying. Once I started keeping the clay thickness consistent and using less water, the finished projects looked much cleaner.
Small adjustments often make a huge difference.
Step-by-Step Basic Process for DIY Clay Stones
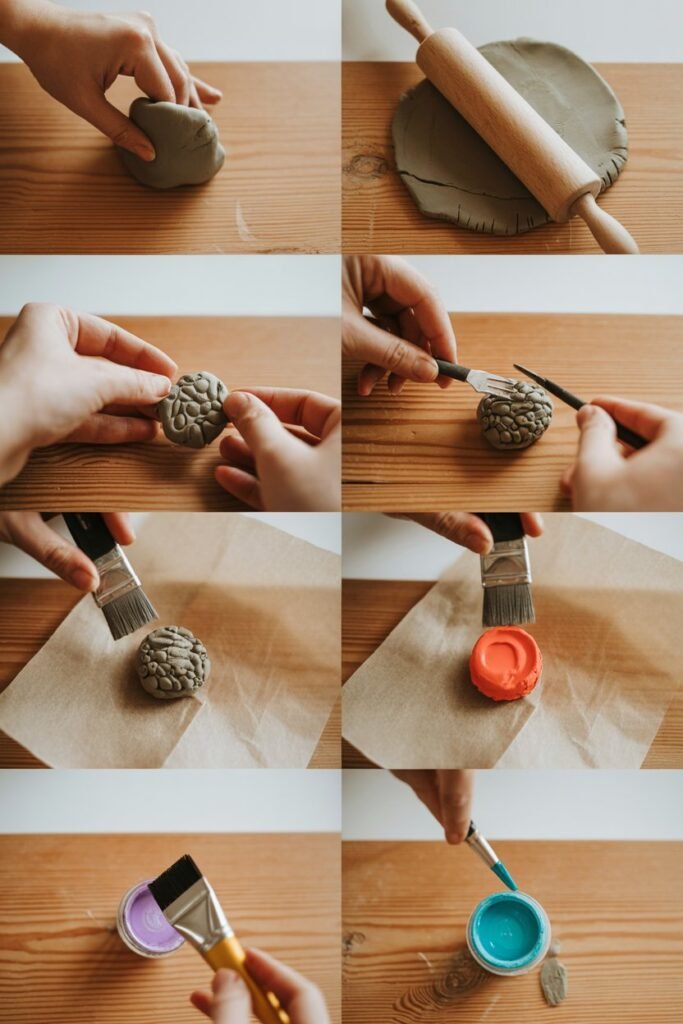
Making DIY clay stones can feel much easier when you break the process into simple steps.
Once you understand the basic flow, you can start experimenting with different shapes, textures, colors, and designs.
The great thing about clay projects is that there is room for creativity, so you do not need everything to look perfect.
Step 1: Prepare Your Work Area
Before opening your clay, set up a clean workspace. Place parchment paper, a silicone mat, or another non-stick surface on your table to prevent sticking and make cleanup easier.
Have your supplies nearby:
- Clay
- Rolling pin
- Cutting tools
- Water bowl
- Texture tools
- Paint brushes
- Paint
- Sealer
Preparing everything first helps the process feel smoother and avoids stopping in the middle of your project.
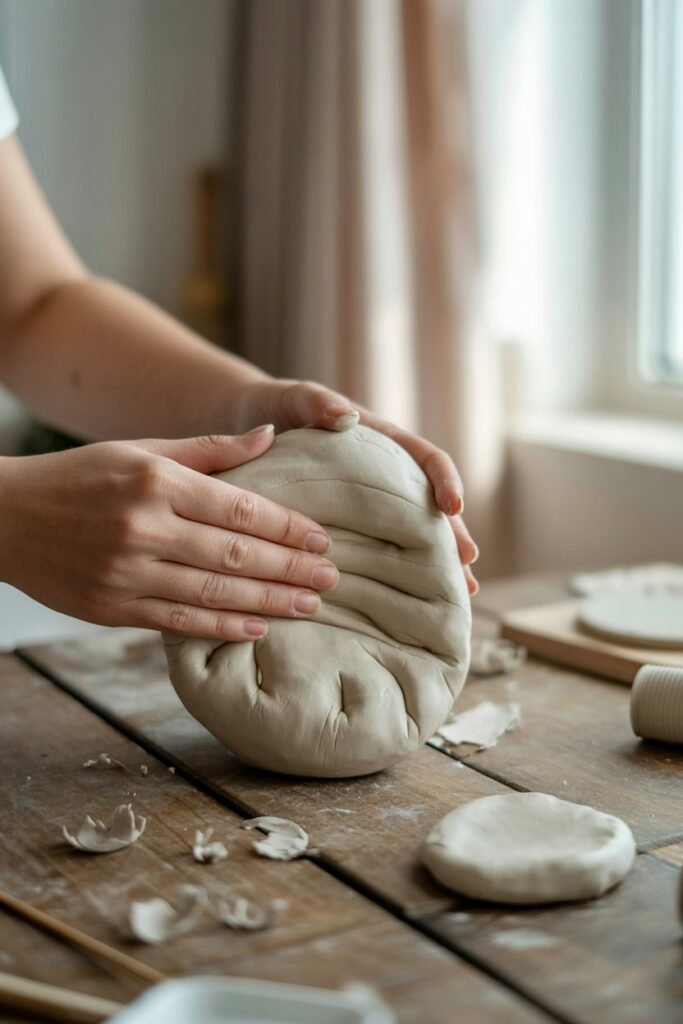
Step 2: Knead and Soften the Clay
Take your clay and gently knead it with your hands for a few minutes. This helps soften the material and improve flexibility.
Kneading can help:
- Remove stiffness
- Improve texture
- Reduce air pockets
- Make shaping easier
If the clay feels slightly firm, warming it with your hands often helps.
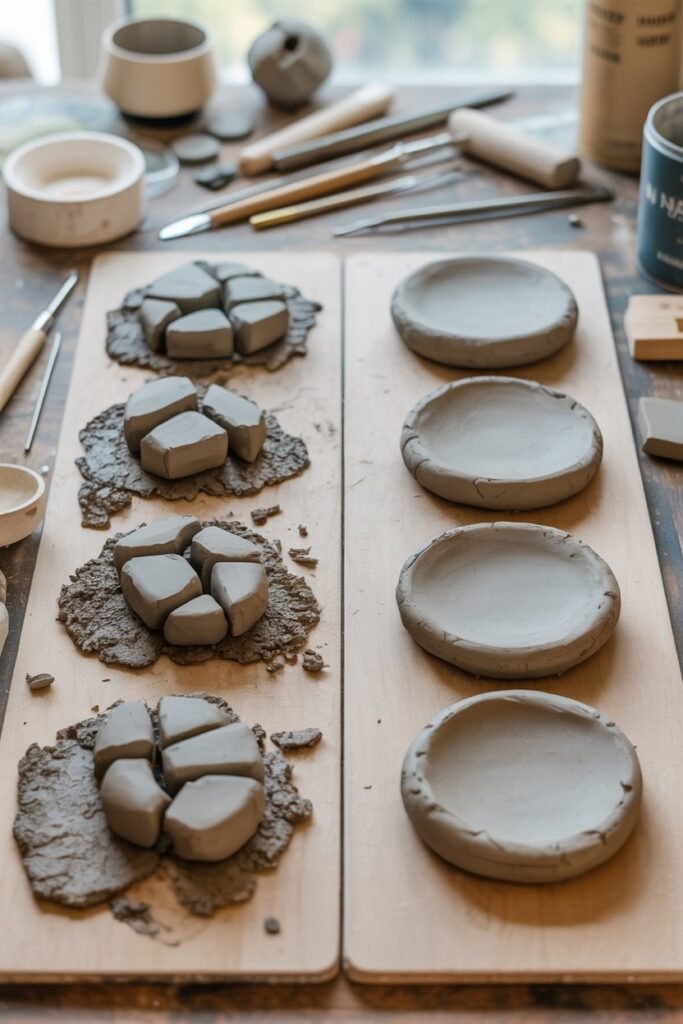
Step 3: Roll Out the Clay Evenly
Use a rolling pin to flatten the clay into an even layer. Try keeping the thickness consistent because uneven clay may dry differently and sometimes crack.
Aim for a smooth surface that is not too thin and not too thick.
Step 4: Shape Your Clay Stones
Now comes the creative part. Shape the clay using your hands, cookie cutters, molds, or cutting tools.
Popular shapes include:
- Circles
- Hearts
- Leaves
- Pebbles
- Flowers
- Geometric designs
You can keep the edges perfectly clean or create more natural stone-like shapes.
Step 5: Add Texture and Details

This step can completely change the appearance of your clay stones. Press different objects gently into the clay to create patterns and designs.
Ideas for texture:
- Leaves
- Lace fabric
- Buttons
- Forks
- Stamps
- Bubble wrap
You can also add names, initials, quotes, or small decorative patterns.
Step 6: Smooth the Edges
Use slightly damp fingers or a soft tool to smooth rough areas and shape the edges.
This helps:
- Remove fingerprints
- Fix small cracks
- Blend uneven areas
- Create a cleaner finish
Small adjustments here can make a noticeable difference later.
Step 7: Let the Clay Dry Completely
Allow the clay to dry according to the instructions for your specific clay type.
Avoid:
- Direct intense heat
- Rushing the process
- Moving pieces too often
Patience during this step can help reduce cracking.
Step 8: Sand Rough Areas
Once completely dry, inspect your clay stones and lightly sand any rough spots.
Sandpaper can help:
- Smooth edges
- Remove bumps
- Improve the surface
- Prepare for painting
Gentle sanding usually works best.
Step 9: Paint and Decorate
This is where your project starts showing personality. Use acrylic paint to add color, designs, quotes, or patterns.
Creative decorating ideas:
- Floral designs
- Neutral tones
- Inspirational words
- Metallic accents
- Simple patterns
Step 10: Seal and Finish Your Project
After the paint dries, apply a protective sealer to help preserve your work.
A sealer can help:
- Protect paint
- Reduce fading
- Improve durability
- Add a finished appearance
Once dry, your DIY clay stones are ready to display, gift, or use in other creative projects.
Common Mistakes to Avoid (List Version)
- Making the clay too thin
- Using too much water
- Skipping the kneading step
- Rushing the drying process
- Forgetting to smooth edges
- Painting before the clay is fully dry
- Skipping sanding after drying
- Forgetting to apply a protective sealer
Creative DIY Clay Stone Ideas
If you already understand the basics of making clay stones, the next fun step is exploring different creative ideas.
This is where your projects start to feel more personal, decorative, and unique.
You can keep things simple or experiment with detailed designs depending on your style.
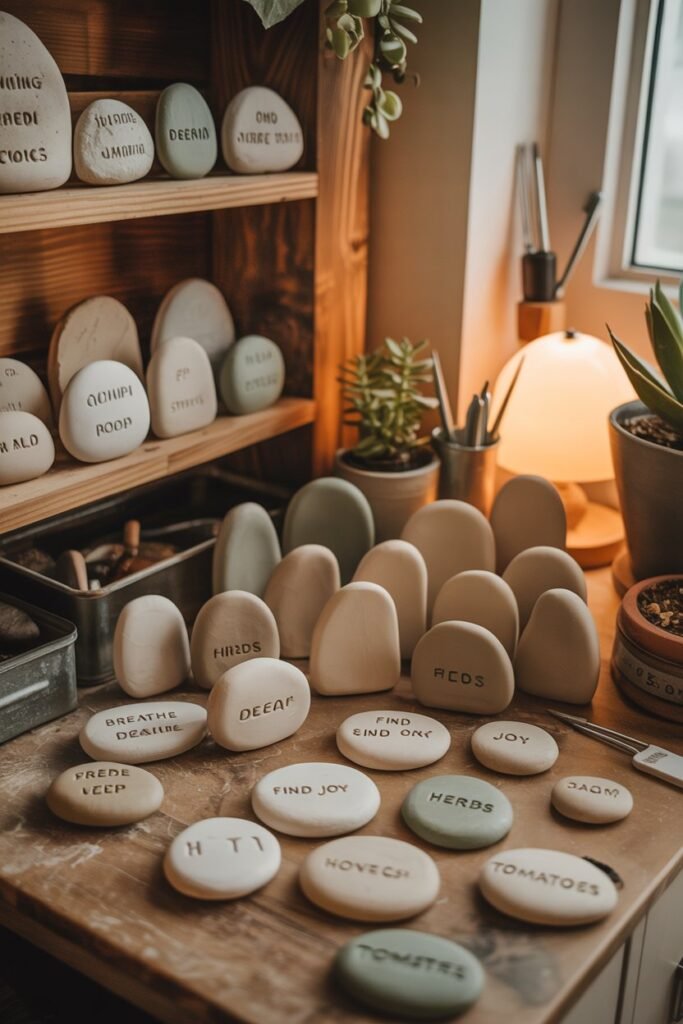
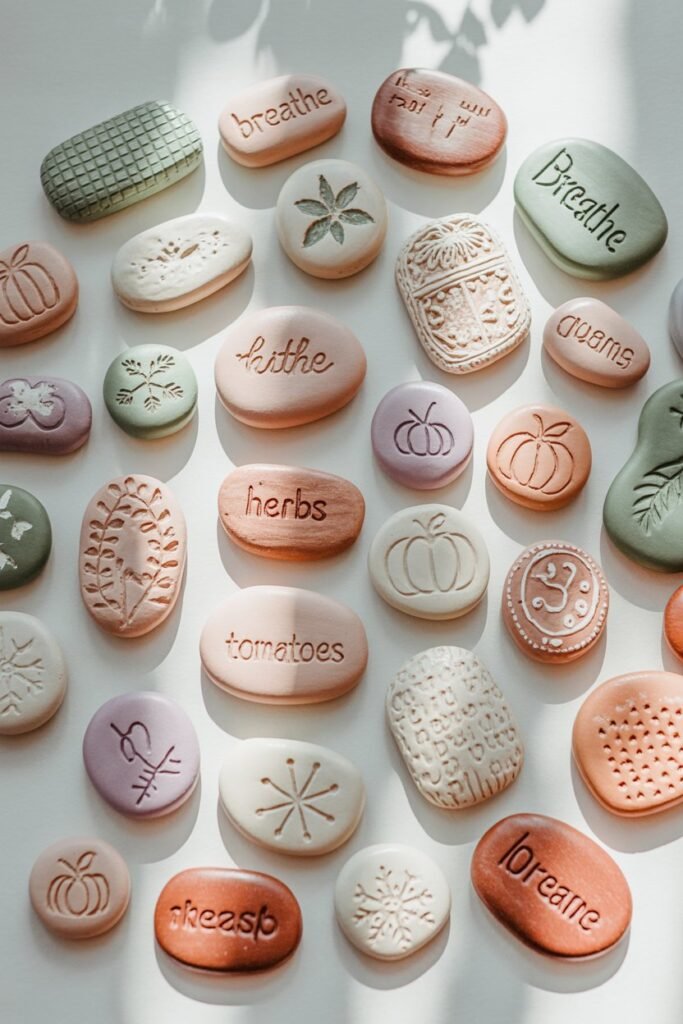
1. Inspirational Quote Stones
Create small clay stones with short motivational words or quotes.
Ideas include:
- “Be Kind”
- “Stay Strong”
- “Breathe”
- “You Got This”
These can be used as desk décor, shelf decorations, or small daily reminders.
2. Garden Marker Stones
Perfect for plant lovers or home gardeners.
You can label:
- Herbs (mint, basil, rosemary)
- Vegetables (tomatoes, peppers)
- Flowers
These make gardens look more organized and personal.
3. Minimalist Home Décor Stones
Simple painted clay stones can be used to decorate:
- Coffee tables
- Shelves
- Trays
- Bathroom counters
Neutral colors like white, beige, black, or soft earth tones work beautifully here.
4. Personalized Name Stones
These are great for gifts or room decoration.
You can create:
- Kids’ name stones
- Couple initials
- Family name plaques
Add small decorations like hearts or leaves for extra detail.
5. Holiday-Themed Clay Stones
Match your designs to different seasons or celebrations:
- Christmas: stars, trees, snowflakes
- Easter: eggs, bunnies
- Halloween: pumpkins, ghosts
- Valentine’s: hearts and roses
These can be reused every year.
6. Handmade Gift Tags
Instead of paper tags, use small clay stones as gift labels.
Write:
- Names
- Short messages
- Special dates
This makes gifts feel more thoughtful and unique.
7. Decorative Pebble Sets
Create a set of small clay pebbles in matching colors and patterns.
They can be used for:
- Table styling
- Bowl fillers
- Shelf décor
Mix matte and glossy finishes for a stylish look.
8. Affirmation Stones for Kids
Great for encouraging positivity in children.
Examples:
- “I am brave”
- “I am smart”
- “I am loved”
These can be placed in bedrooms or study areas.
9. Jewelry-Style Clay Stones
Make small, detailed clay pieces for:
- Necklaces
- Bracelets
- Keychains
Use polymer clay for stronger, longer-lasting results.
10. Memory or Keepsake Stones
Turn clay stones into meaningful keepsakes by adding:
- Dates
- Initials
- Tiny handprints
- Special symbols
These are perfect for remembering special moments or milestones.
Frequently Asked Questions
Can beginners make DIY clay stones?
Yes. DIY clay stones are beginner friendly and usually require only simple supplies.
Which clay is easiest for beginners?
Air-dry clay is often easiest because it does not require baking equipment.
How long does air-dry clay take to dry?
Drying time varies by thickness, but many projects need around 24–72 hours.
Why do clay stones crack?
Cracking often happens because of uneven thickness, too much water, or drying too quickly.
Do clay stones need sealing?
For decorative projects, sealing helps improve durability and preserve paint
Final Thoughts
DIY clay stones are one of those projects that feel simple but can lead to surprisingly beautiful results.
You can start with basic materials and gradually experiment with textures, painting styles, and creative designs.
Small details like smoothing edges, allowing enough drying time, and sealing finished pieces often make the biggest difference.
Some of the most interesting handmade projects do not begin with complicated supplies — they begin with a small piece of clay and an idea.