
Handmade doesn’t have to look homemade.
With the right techniques, small clay projects can look like expensive store-bought décor pieces, gifts, or accessories.
From aesthetic mini decor to useful everyday items, clay is one of the most versatile DIY materials you can work with.
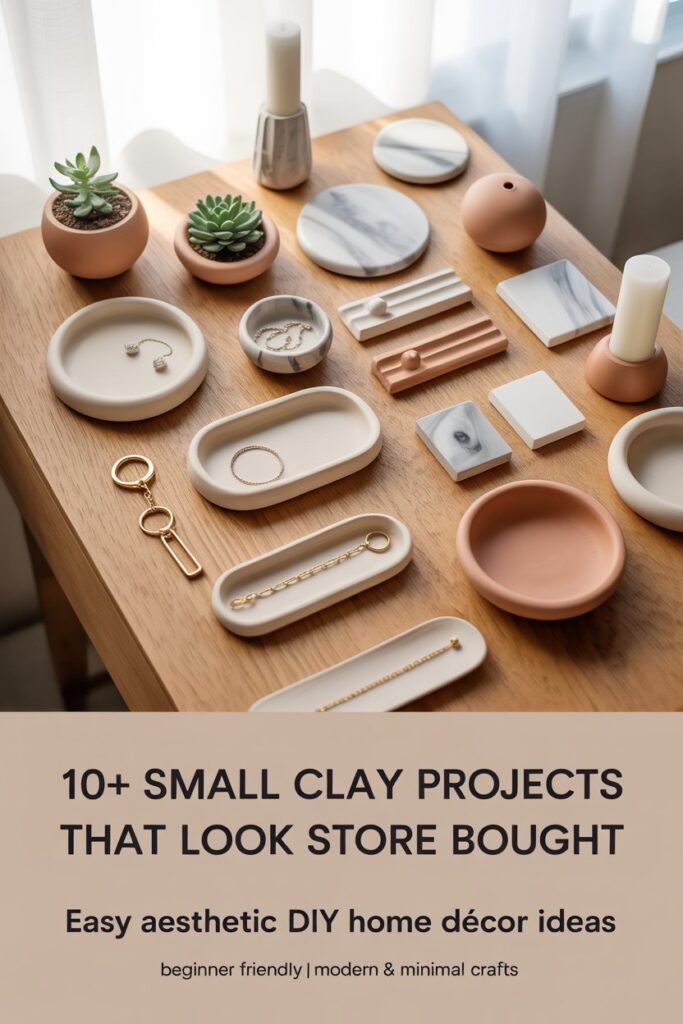
In this post, I will share simple yet creative small clay projects that look professionally made and perfect for home décor, gifting, or selling.
Disclaimer: This post may contain affiliate links, which means I may earn a small commission at no extra cost to you. Always use crafting materials according to instructions and work in a clean, well-ventilated area.
Amazon Shopping List: Creative Small Clay Projects
- Air Dry Clay Pack (Multi-Color or Natural Clay)
- Clay Sculpting Tools Kit
- Acrylic Paint Set for Craft Designs
- Paint Brushes Variety Set
- Fine Grit Sandpaper Set
- Clear Gloss Sealer Spray or Varnish
- Silicone Craft Mat for Workspace Protection
What Makes Clay Projects Look Professionally Made
Clay projects look professionally made when they focus more on clean execution than complex design.
Simple shapes that are well-proportioned and carefully finished always look more polished than overly detailed pieces.
A smooth surface is one of the biggest factors.
Taking time to blend cracks, refine edges, and sand lightly after drying can instantly elevate the final result and remove that “handmade roughness.”
Color choice also matters. Neutral tones like white, beige, grey, and terracotta tend to look more premium and store-bought compared to bright or mixed colors.
Finally, consistency is key. When all parts of a piece look balanced and intentionally designed, even a simple clay project can look like something from a boutique store.
10+ SMALL CLAY PROJECT IDEAS
Clay is one of the easiest materials to get creative with, even if you’re just starting out.
With a few simple tools and a bit of imagination, you can turn basic clay into beautiful, aesthetic pieces that look surprisingly professional.
In this section, you’ll discover 10+ small clay project ideas that are simple to make, stylish, and perfect for home décor, gifts, or even selling.
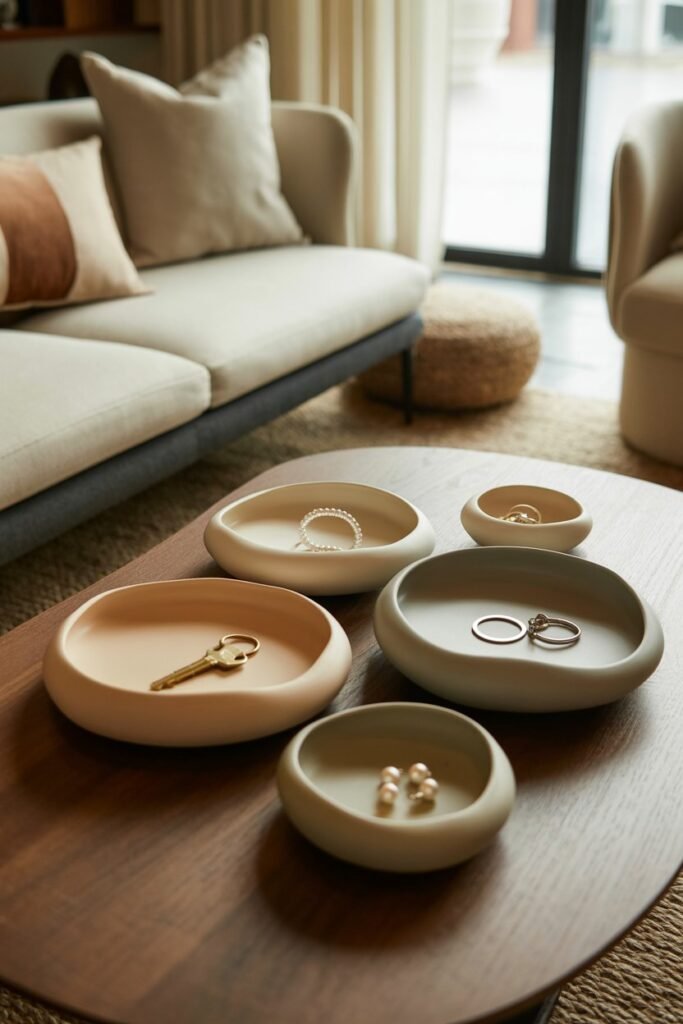
1. Minimal Clay Jewelry Dishes
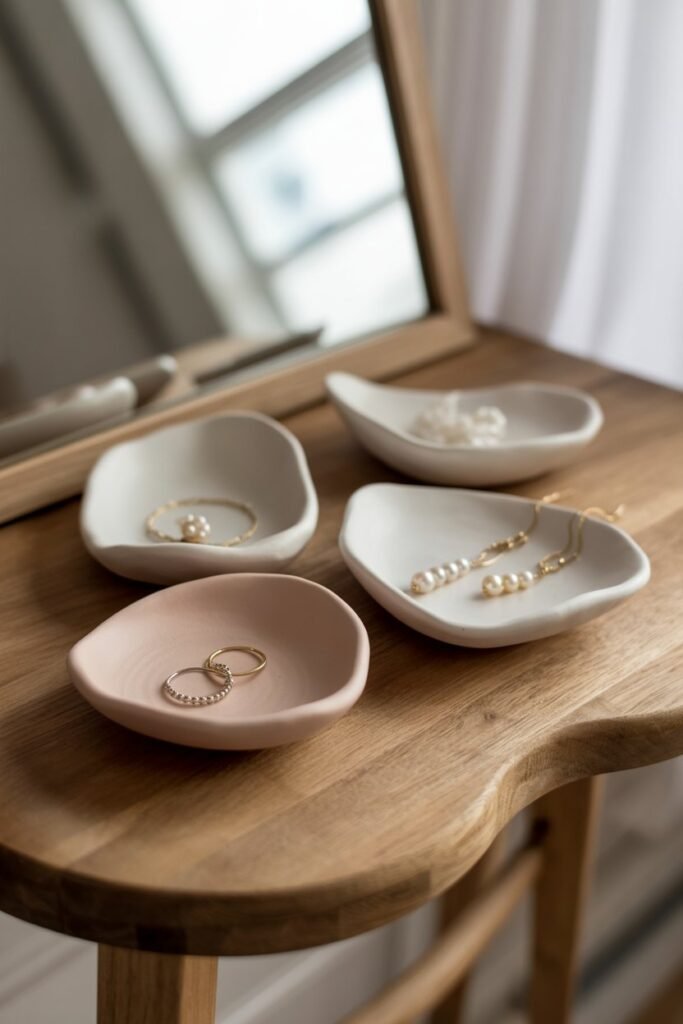
I like starting with jewelry dishes because they are simple, quick to make, and always end up looking more expensive than they actually are when finished properly.
Materials I use
- Air-dry clay or polymer clay
- Rolling pin or smooth bottle
- A cup or lid for shaping
- Small knife or clay tool
- Sandpaper (optional but helpful)
- Paint and sealant (optional for a premium finish)
Step-by-step process
1. Prepare the clay
I always start by kneading the clay well until it feels soft and smooth. This helps remove air bubbles and prevents cracks later.
2. Roll it evenly
Next, I flatten the clay using a rolling pin or bottle. I try to keep it even so the dish doesn’t dry unevenly or warp.
3. Shape the dish
Using a cup or lid, I cut out a clean circle or oval shape. Then I gently lift the edges and shape them upward to form a shallow dish.
4. Smooth everything out
This step makes a big difference. I use my fingers (sometimes a little water) to smooth out fingerprints, cracks, or rough edges so it looks neat and clean.
5. Let it dry properly
I leave it in a safe, dust-free place and let it dry completely without rushing it. This is where the structure sets.
6. Refine the finish
Once dry, I lightly sand the edges and surface if needed. This gives it that polished, store-bought look.
7. Optional finishing touch
For a more aesthetic result, I either leave it natural or paint it in neutral tones like white, beige, or soft grey.
A sealant on top makes it look even more professional and durable.
When done carefully, this simple project turns into a clean, aesthetic piece that looks like it came from a boutique home décor store rather than a DIY craft table.
2. Mini Clay Planters
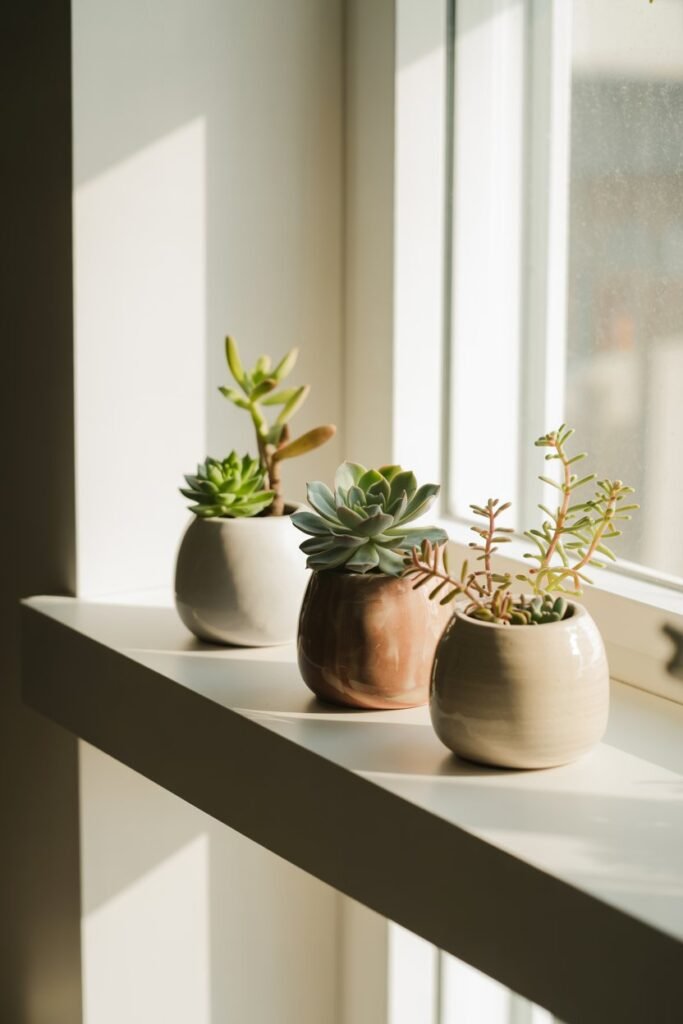
Mini clay planters are one of those projects that look simple at first, but end up looking like something you’d actually find in a home décor store when done properly.
I like them because they’re practical, aesthetic, and easy to customize for different styles.
Materials I use
- Air-dry clay or polymer clay
- Small bowl or cup for shaping
- Rolling pin or bottle
- Knife or clay tool
- Sandpaper (optional)
- Acrylic paint and sealant (optional)
Step-by-step process
1. Prepare the clay
I start by kneading the clay until it feels soft and workable. This helps avoid cracks and gives a smoother finish later.
2. Shape the base
I roll out the clay evenly and cut a circular base. This will be the bottom of the planter.
3. Build the walls
Next, I roll the clay into long strips and wrap them around the base to form the walls. I press gently to join everything together.
4. Smooth and refine
This is where it starts looking professional. I smooth out all joints, cracks, and uneven parts using my fingers and a bit of water.
5. Add texture or design (optional)
I sometimes add simple vertical lines, soft patterns, or keep it completely plain for a minimal look.
6. Let it dry completely
I leave it to dry fully so it becomes strong and holds its shape properly.
7. Sand and finish
Once dry, I lightly sand any rough edges to make it clean and polished.
8. Paint or seal (optional)
For a store-bought look, I use neutral colors like white, beige, or terracotta. A sealant gives it a smooth, finished shine and makes it more durable.
When finished well, mini clay planters look like expensive boutique pieces, especially when kept minimal and clean in design.
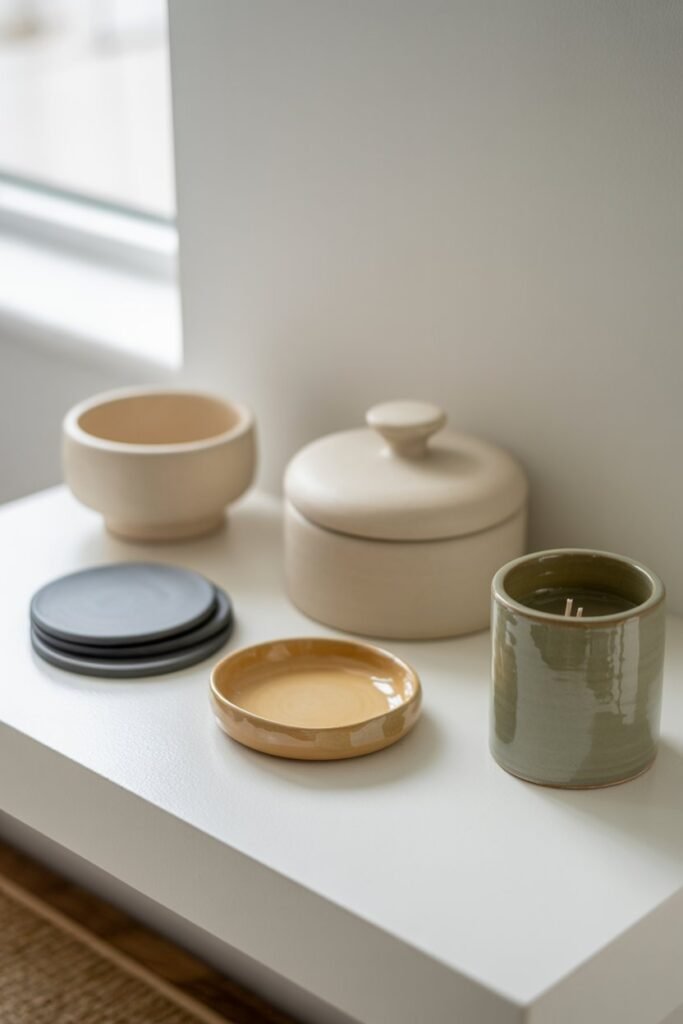
3. Clay Candle Holders
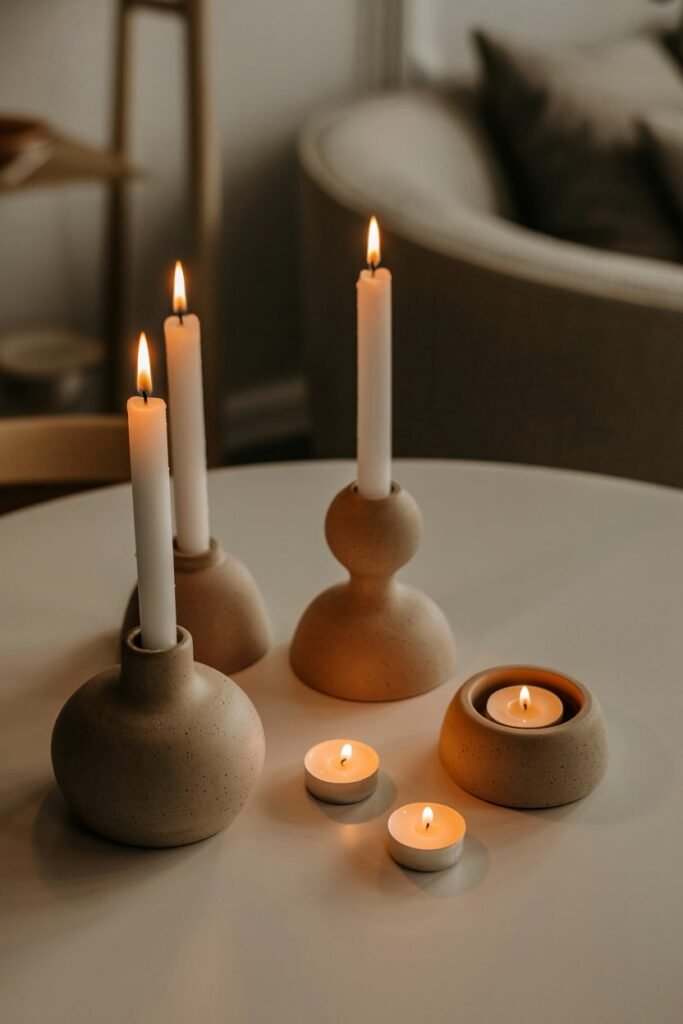
Clay candle holders are one of the easiest ways to create something that looks modern and store-bought with very little material.
I like this project because even a simple shape can turn into a luxury-looking décor piece when the finish is done right.
Materials I use
- Air-dry clay or polymer clay
- A candle (tea light or small taper) for sizing
- Rolling pin or bottle
- Knife or clay tools
- Sandpaper (optional)
- Paint and sealant (optional)
Step-by-step process
1. Prepare the clay
I start by kneading the clay until it is soft and smooth. This helps prevent cracks and gives a cleaner final look.
2. Shape the base
I roll out the clay and cut a solid base depending on the size of the candle I want to use.
3. Create the holder shape
I either press the candle gently into the center to form a mold or build a raised ring around it, depending on the design I want.
4. Refine the structure
This step is important. I smooth all edges and surfaces carefully so it looks neat and balanced.
5. Add simple design (optional)
Sometimes I keep it plain for a minimal look, or add light texture like lines or soft curves for a more aesthetic finish.
6. Let it dry completely
I leave it to dry fully so it becomes strong and holds shape without cracking.
7. Sand and finish
After drying, I lightly sand any rough areas to make the surface clean and polished.
8. Paint or seal (optional)
Neutral tones like white, beige, or stone grey work best for a store-bought look. A sealant gives it a smooth, professional finish.
When done carefully, clay candle holders look like high-end décor pieces you’d find in modern interior stores rather than handmade crafts.
4. Aesthetic Clay Keychains
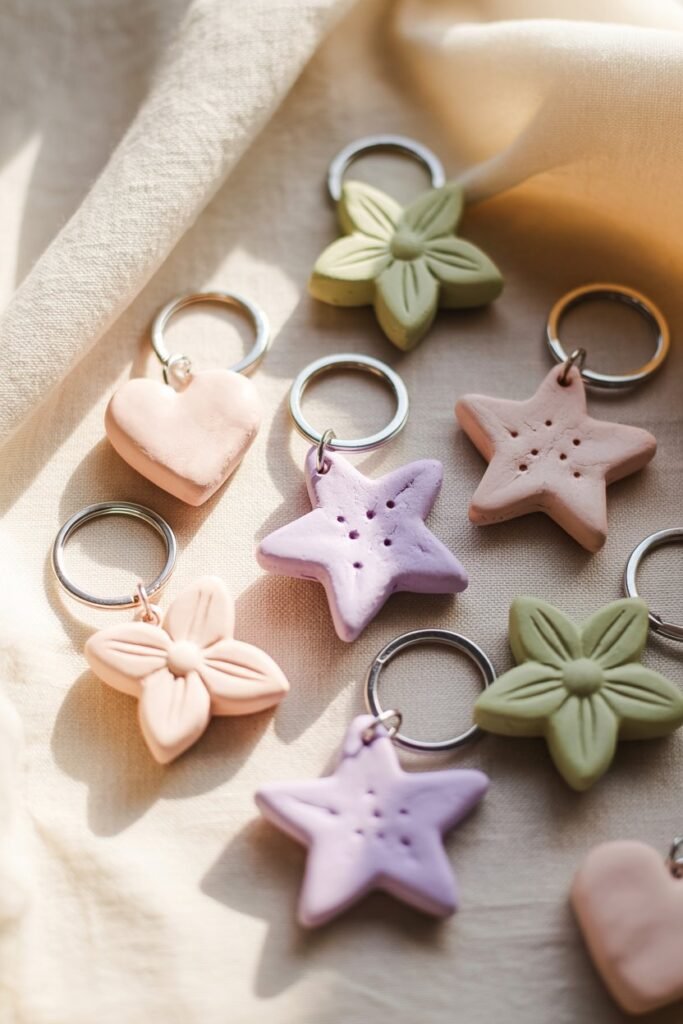
Aesthetic clay keychains are small but powerful pieces because they instantly look like boutique accessories when made with clean shapes and simple designs.
I like them because they are quick to make, easy to customize, and perfect for gifts or even small-scale selling.
Materials I use
- Air-dry clay or polymer clay
- Keychain hooks or rings
- Rolling pin or bottle
- Small cutter or knife
- Sandpaper (optional)
- Acrylic paint and sealant (optional)
Step-by-step process
1. Prepare the clay
I begin by kneading the clay until it becomes soft and smooth. This helps prevent cracks and makes shaping easier.
2. Shape your design
I roll out the clay evenly and cut simple shapes like hearts, stars, flowers, or abstract forms. Keeping it minimal is what makes it look aesthetic.
3. Create the hole for the keychain
Before drying, I make a small hole at the top using a straw or toothpick so the ring can be attached later.
4. Smooth the edges
I carefully smooth all edges and surfaces using my fingers and a little water so it looks clean and polished.
5. Let it dry completely
I leave it to dry fully so it becomes strong and ready for finishing.
6. Sand if needed
Once dry, I lightly sand the surface to remove rough edges and make it more refined.
7. Paint and seal (optional)
I usually go for neutral or soft colors like white, beige, pastel pink, or grey. A sealant gives it a smooth, store-bought finish and protects the design.
8. Attach the keychain ring
Finally, I insert the metal ring through the hole, and it’s ready to use or sell.
When made with simple shapes and clean finishing, clay keychains easily look like aesthetic store accessories rather than DIY crafts.
5. Clay Coasters (Marble Effect)
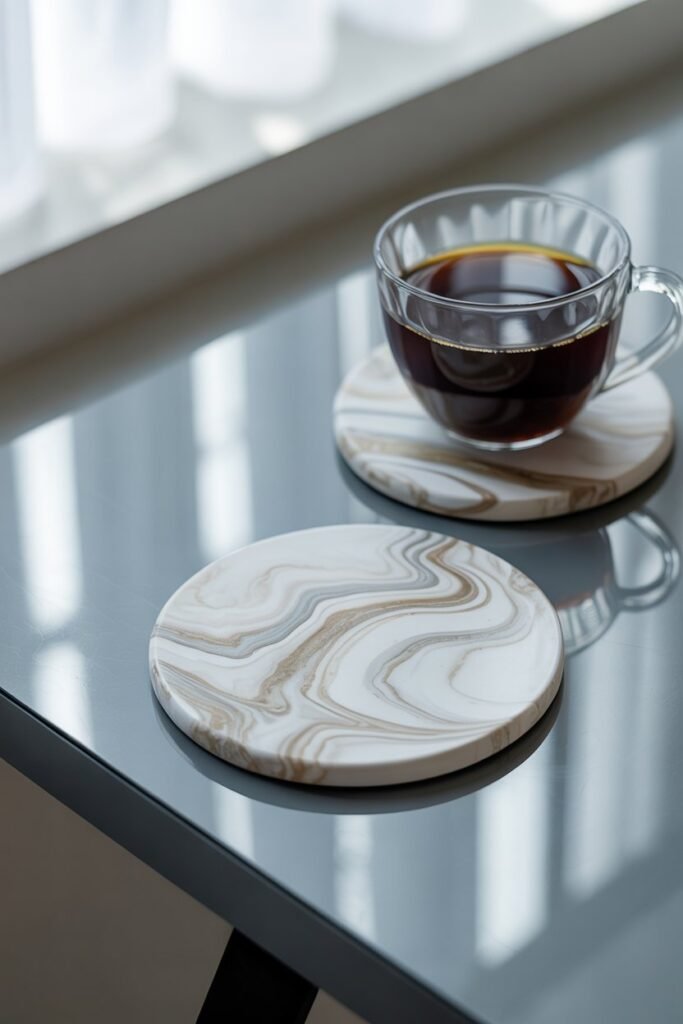
Clay coasters with a marble effect are one of the most “store-bought looking” DIY projects you can make.
I like this one because it looks expensive, even though the technique is actually very simple. The key is in how you mix and blend the colors.
Materials I use
- Air-dry clay or polymer clay
- White clay + grey/black clay (for marble effect)
- Rolling pin or bottle
- Knife or cutter
- Round object for shaping (cup or lid)
- Sandpaper (optional)
- Sealant or glossy finish (optional)
Step-by-step process
1. Prepare the clay colors
I start with white clay as the base and add small bits of grey or black clay. I don’t mix it fully because the streaks are what create the marble effect.
2. Create the marble pattern
I gently fold and twist the clay just a few times until I see soft marble-like lines. The goal is not to overmix.
3. Flatten evenly
I roll the clay out into a smooth, even sheet using a rolling pin or bottle. Keeping it flat and consistent is important for a clean coaster shape.
4. Cut into shape
I use a cup, lid, or cutter to create perfect circles or shapes like squares or hexagons.
5. Smooth the edges
I carefully smooth the edges with my fingers to remove roughness and give it a polished look.
6. Let it dry completely
I leave it to dry fully so it hardens and keeps its shape properly.
7. Sand and refine (optional)
Once dry, I lightly sand the surface and edges for a smoother, more professional finish.
8. Seal for a premium look
I usually finish with a clear matte or glossy sealant to make it look like a real store-bought marble coaster.
When done correctly, clay marble coasters look like high-end home décor pieces and are perfect for gifting or selling because of their aesthetic appeal.
6. Mini Clay Trinket Boxes
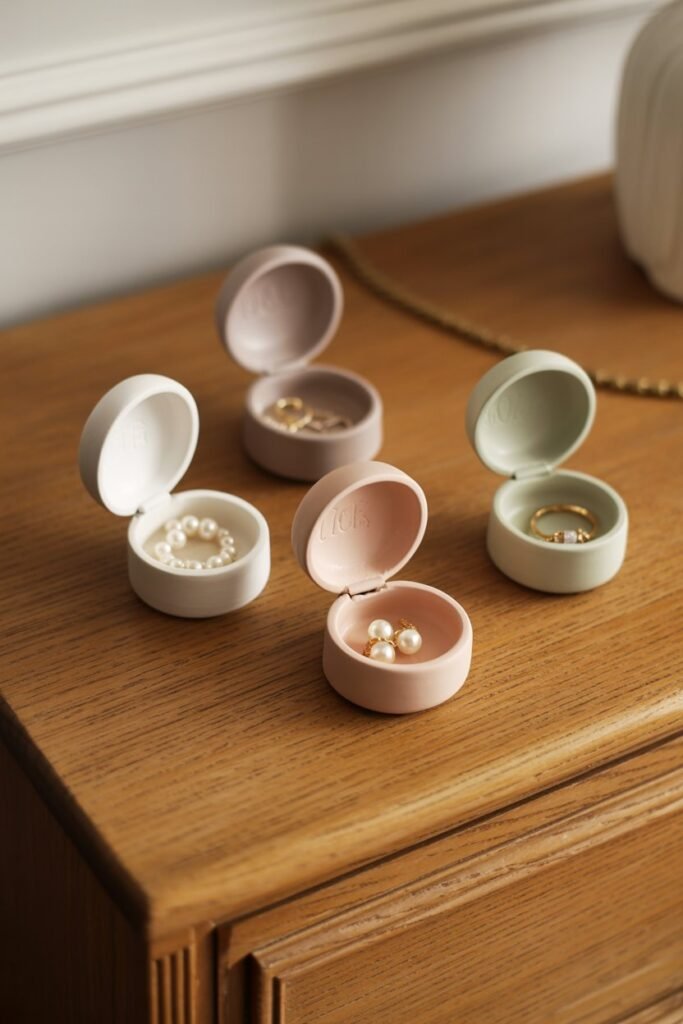
Mini clay trinket boxes are small storage pieces that look surprisingly high-end when finished well.
I like this project because it combines both beauty and function—you can use it for rings, earrings, or small keepsakes, and it still looks like something from a boutique store.
Materials I use
- Air-dry clay or polymer clay
- Small round object or mold (cup, bottle cap, or jar lid)
- Rolling pin or bottle
- Knife or clay tool
- Sandpaper (optional)
- Paint and sealant (optional)
Step-by-step process
1. Prepare the clay
I start by kneading the clay until it becomes soft and smooth. This helps prevent cracks and gives a cleaner finish later.
2. Shape the base and lid
I roll out the clay evenly and cut two circles—one for the base and one slightly larger for the lid.
3. Build the box walls
For the base, I roll small strips of clay and attach them around the edge of the circle to form the walls.
I repeat the same for the lid but keep it slightly wider so it fits properly.
4. Smooth everything carefully
This is the step that makes it look professional. I smooth all joints, seams, and edges so the box looks clean and seamless.
5. Let it dry completely
I leave both pieces to dry fully so they become strong and hold their shape.
6. Sand for a clean finish
Once dry, I lightly sand the edges and surface to remove roughness and make it look polished.
7. Paint or seal (optional)
I usually go for neutral tones like white, beige, or soft grey. Adding a sealant gives it a smooth, store-bought finish and improves durability.
When done properly, mini clay trinket boxes look like expensive decorative storage pieces you’d find in a home décor shop rather than a DIY craft project.
7. Clay Wall Hangings
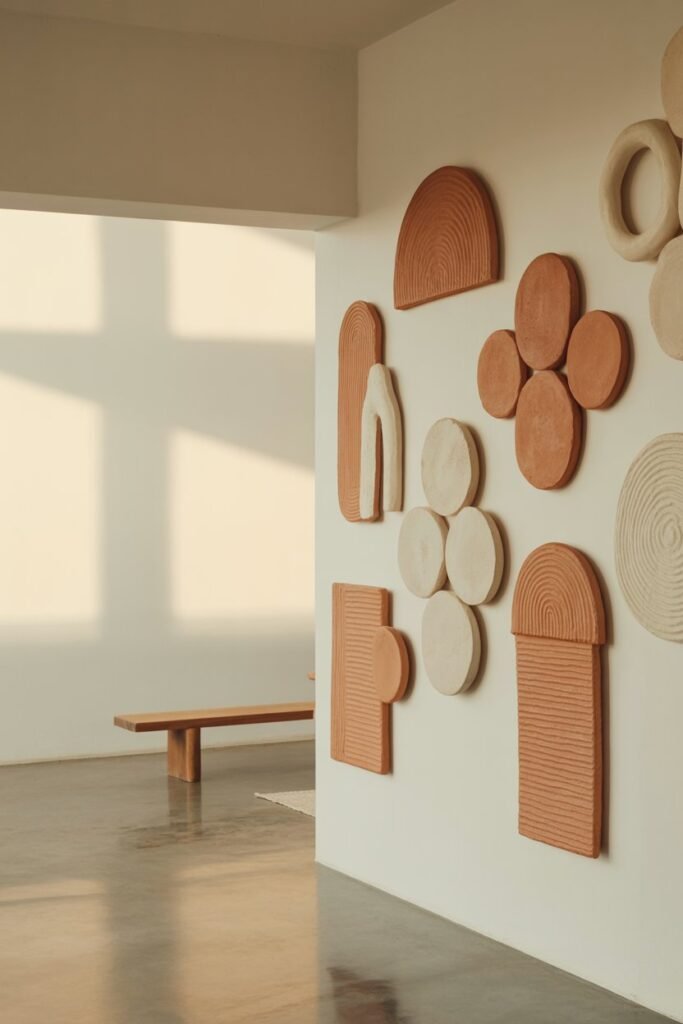
Clay wall hangings are simple decorative pieces that can instantly make a space feel more aesthetic and modern.
I like this project because it turns basic clay into art that looks like something from a curated home décor store when done with clean lines and minimal design.
Materials I use
- Air-dry clay or polymer clay
- Rolling pin or bottle
- Knife or clay tools
- String, twine, or metal hooks for hanging
- Sandpaper (optional)
- Paint and sealant (optional)
Step-by-step process
1. Prepare the clay
I start by kneading the clay until it feels soft and smooth. This helps avoid cracks and makes shaping easier.
2. Create your design shapes
I roll out the clay evenly and cut simple shapes like circles, arches, leaves, or abstract forms. I keep the design minimal for a more modern look.
3. Add texture or details (optional)
Sometimes I press light patterns into the clay using simple tools or leave it plain for a clean aesthetic finish.
4. Make holes for hanging
Before the clay dries, I create small holes at the top so string or hooks can be added later.
5. Let it dry completely
I leave the pieces to dry fully so they become strong and durable.
6. Smooth and refine
Once dry, I lightly sand rough edges to make the surface clean and polished.
7. Paint and finish (optional)
I usually stick to neutral tones like white, beige, or earthy colors. A sealant gives it a more professional, store-bought appearance.
8. Assemble the wall hanging
Finally, I thread string or attach hooks to connect the pieces into a hanging design.
When done with simple shapes and clean finishing, clay wall hangings look like modern boutique décor pieces rather than handmade crafts.
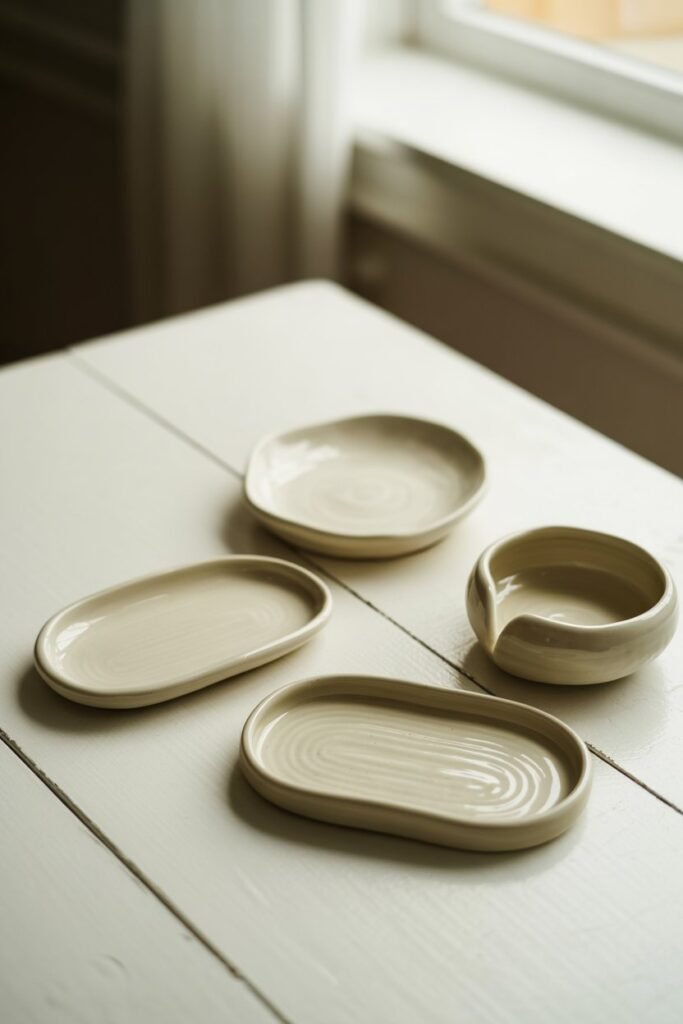
8. Decorative Clay Bowls
Decorative clay bowls are one of the most versatile small clay projects because they can be used for storage, décor, or gifting.
I like making them because even a very simple bowl shape can look high-end when the edges and finish are done properly.
Materials I use
- Air-dry clay or polymer clay
- A bowl (as a mold)
- Rolling pin or bottle
- Knife or clay tools
- Sandpaper (optional)
- Paint and sealant (optional)
Step-by-step process
1. Prepare the clay
I start by kneading the clay until it is soft and smooth. This helps prevent cracks and gives a better finish.
2. Roll out the clay
I flatten the clay evenly using a rolling pin or bottle, making sure the thickness is consistent.
3. Shape the bowl
I place the clay over an upside-down bowl and gently press it down to form the shape. I smooth it carefully so it sits evenly.
4. Refine the edges
This step makes a big difference. I trim and smooth the edges so they look clean and intentional instead of rough.
5. Let it dry completely
I leave it to dry fully while keeping it in the same shape so it doesn’t warp.
6. Sand the surface (optional)
Once dry, I lightly sand the surface and edges to make it more polished and store-bought looking.
7. Paint and seal (optional)
I usually go for minimal colors like white, beige, or soft grey. A sealant gives it a smooth, professional finish and makes it more durable.
When finished well, decorative clay bowls look like boutique home décor items that could easily be displayed in a modern interior store.
9. Clay Incense Holders
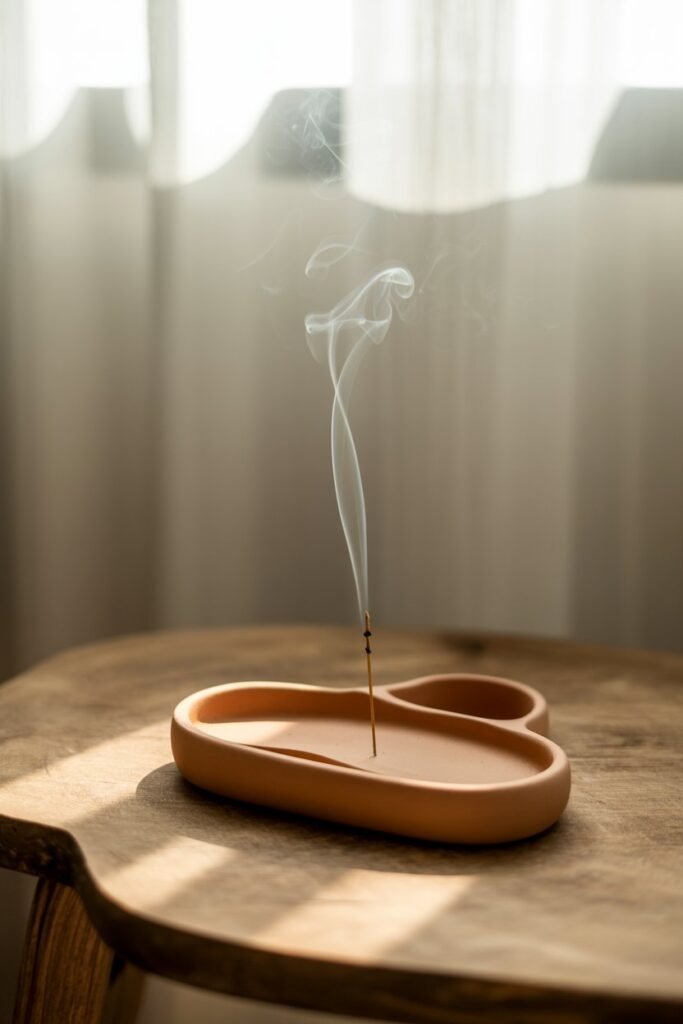
Clay incense holders are small, elegant pieces that instantly look like premium home décor when made with clean lines and minimal styling.
I like this project because it is simple to shape, but the final result always feels intentional and store-bought when finished properly.
Materials I use
- Air-dry clay or polymer clay
- Rolling pin or bottle
- Knife or clay tools
- Incense stick for sizing holes
- Sandpaper (optional)
- Paint and sealant (optional)
Step-by-step process
1. Prepare the clay
I start by kneading the clay until it is soft, smooth, and free from cracks.
2. Shape the base
I roll the clay into a flat sheet and cut a simple shape like a rectangle, oval, or circle depending on the style I want.
3. Create the incense hole
Before the clay dries, I gently insert an incense stick or a skewer into the center to form a clean hole at a slight angle.
4. Refine the design
I smooth all edges and surfaces carefully to make the piece look neat and minimal.
5. Let it dry completely
I leave it to dry fully in a flat position so it doesn’t bend or warp.
6. Sand for a clean finish
Once dry, I lightly sand the surface and edges to remove roughness and give it a polished look.
7. Paint and seal (optional)
I usually stick to neutral tones like white, beige, or stone grey. A sealant helps give it a smooth, professional finish and makes it more durable.
When done with simple shapes and clean finishing, clay incense holders look like modern boutique décor pieces that fit perfectly into aesthetic home spaces.
10. Clay Magnets for Fridge Decor
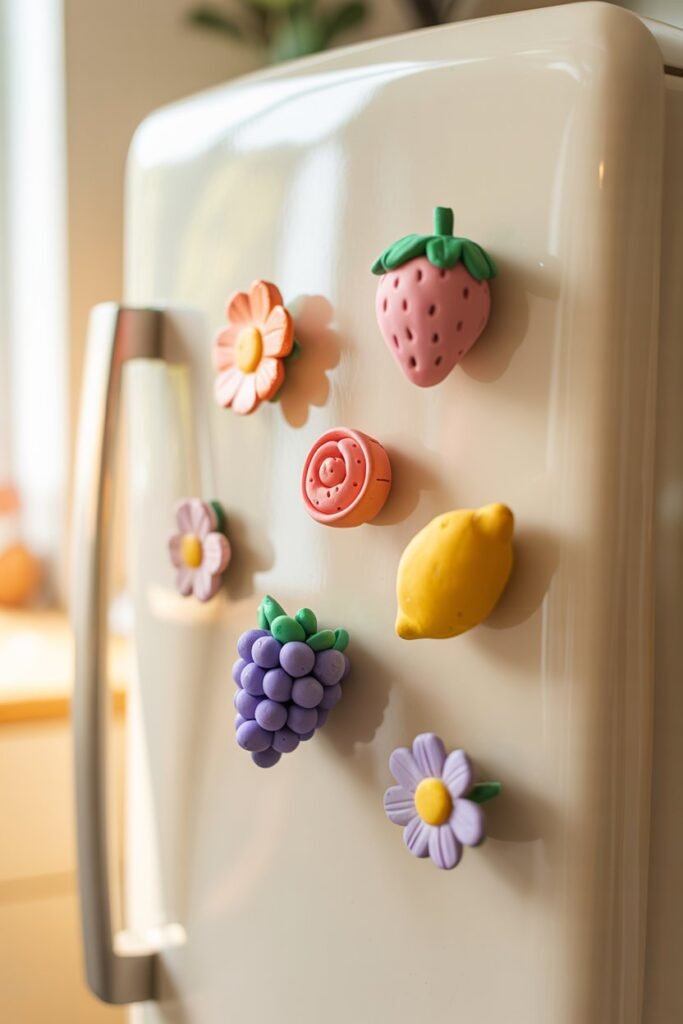
Clay magnets are small, fun, and very easy to make, but they can look surprisingly high-end when you focus on clean shapes and neat finishing.
I like this project because it turns simple clay into cute, aesthetic kitchen décor that feels like something you’d buy from a boutique store.
Materials I use
- Air-dry clay or polymer clay
- Small magnets (flat or round)
- Rolling pin or bottle
- Knife or clay tools
- Strong glue (for attaching magnets)
- Sandpaper (optional)
- Paint and sealant (optional)
Step-by-step process
1. Prepare the clay
I start by kneading the clay until it becomes soft and smooth. This helps prevent cracks and gives a cleaner final look.
2. Shape small designs
I roll out the clay and cut tiny shapes like fruits, hearts, stars, flowers, or simple abstract designs. I keep them small and minimal for a more aesthetic finish.
3. Smooth the edges
I carefully smooth all edges and surfaces using my fingers so the shapes look clean and polished.
4. Let them dry completely
I leave the pieces to dry fully so they harden properly and hold their shape.
5. Sand if needed
Once dry, I lightly sand the back and edges to remove any roughness.
6. Attach the magnet
I glue a small magnet to the back of each clay piece and let it dry completely so it sticks firmly.
7. Paint and seal (optional)
I usually go for soft, neutral, or pastel colors. A sealant gives a smooth, store-bought finish and protects the design.
When done carefully, clay magnets look like cute boutique kitchen accessories rather than simple DIY crafts, especially when the designs are minimal and well-finished.
11. Clay Ring Stacks (Decor Only)
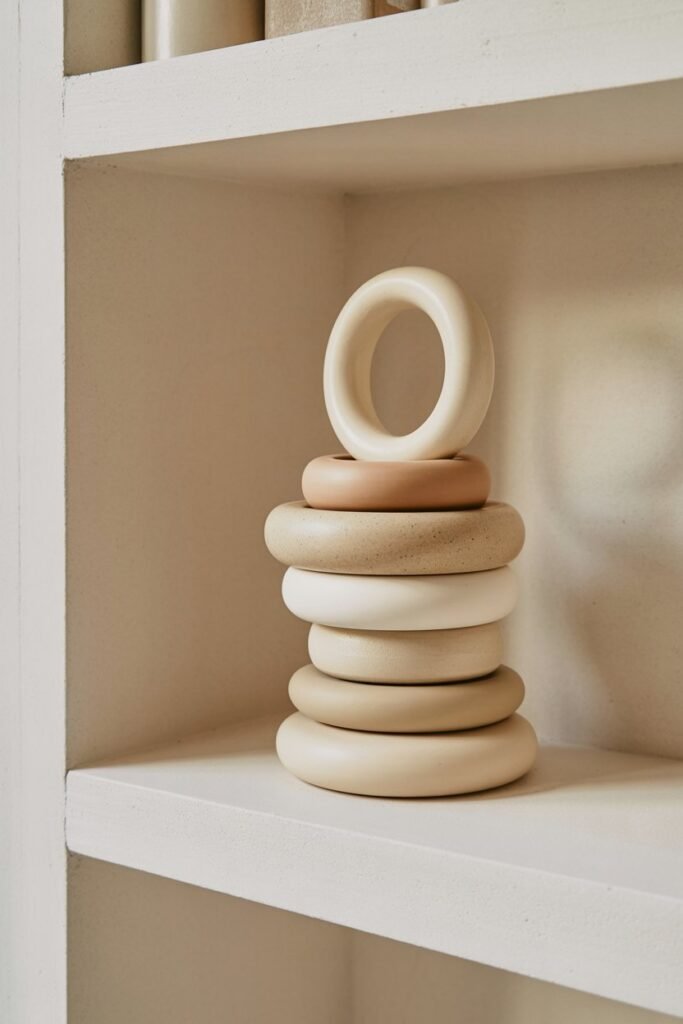
Clay ring stacks are simple sculptural pieces made to look like stacked rings or loops. They are not meant for wearing, but for decoration.
I like this project because it looks very modern and “store-bought” when kept minimal and neatly finished, especially as shelf or table décor.
Materials I use
- Air-dry clay or polymer clay
- Rolling pin or bottle
- Knife or clay tools
- Small circular objects (bottle caps or markers for shaping)
- Sandpaper (optional)
- Paint and sealant (optional)
Step-by-step process
1. Prepare the clay
I start by kneading the clay until it is soft and smooth. This helps prevent cracks and makes shaping easier.
2. Shape small rings
I roll the clay into long, even strips and join the ends to form simple rings. I make several sizes for a stacked look.
3. Smooth the joins
I carefully blend the connection points so the rings look seamless and clean.
4. Let them dry completely
I leave the rings to dry fully so they become firm and hold their shape.
5. Refine the surface
Once dry, I lightly sand any rough areas to make the finish smooth and polished.
6. Stack the design
I arrange the rings in a stacked or leaning composition to create a sculptural décor piece.
7. Paint and seal (optional)
I usually stick to neutral colors like white, beige, or stone tones. A sealant gives a clean, professional, store-bought finish.
When done properly, clay ring stacks look like modern abstract décor pieces you’d find in a minimalist home interior store.
12. Mini Clay Figurines
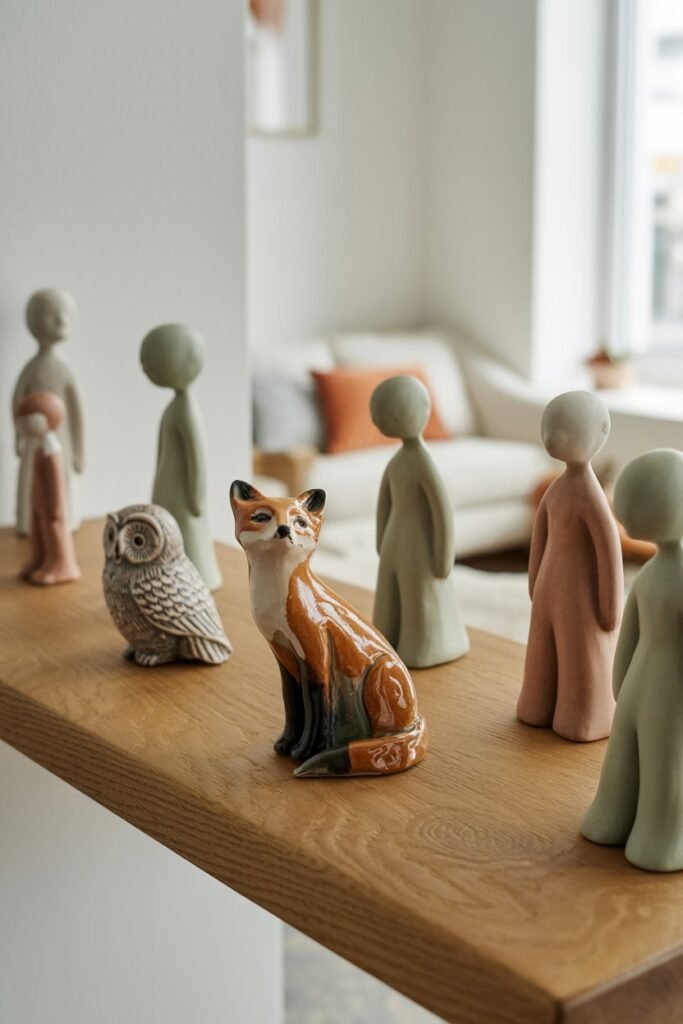
Mini clay figurines are small decorative characters or shapes that can instantly look like store-bought collectibles when made with clean details and a smooth finish.
I like this project because it allows a lot of creativity, but still looks premium when kept simple and minimal.
Materials I use
- Air-dry clay or polymer clay
- Small sculpting tools or a toothpick
- Rolling pin or bottle (optional)
- Sandpaper (optional)
- Acrylic paint and sealant (optional)
Step-by-step process
1. Prepare the clay
I start by kneading the clay until it is soft, smooth, and easy to shape.
2. Create the basic shape
I form simple base shapes like small animals, abstract figures, or tiny human-like forms. I avoid making it too detailed to keep it aesthetic.
3. Add simple details
Using a toothpick or small tool, I gently add facial features, lines, or textures. I keep details minimal so it still looks clean.
4. Smooth the surface
I carefully smooth out fingerprints and rough areas using my fingers and a little water.
5. Let it dry completely
I leave the figurines to dry fully so they become strong and stable.
6. Sand if needed
Once dry, I lightly sand any uneven parts to improve the finish.
7. Paint and seal (optional)
I usually go for soft, neutral, or pastel colors. A sealant helps give it a polished, store-bought look and protects the design.
When made with simple shapes and clean finishing, mini clay figurines look like aesthetic collectibles rather than handmade crafts.
WHY THESE LOOK STORE-BOUGHT
- Minimal color palettes (white, beige, terracotta)
- Clean edges and smooth finishing
- Matte or polished sealing
- Simple modern shapes instead of complex designs
MATERIALS YOU NEED
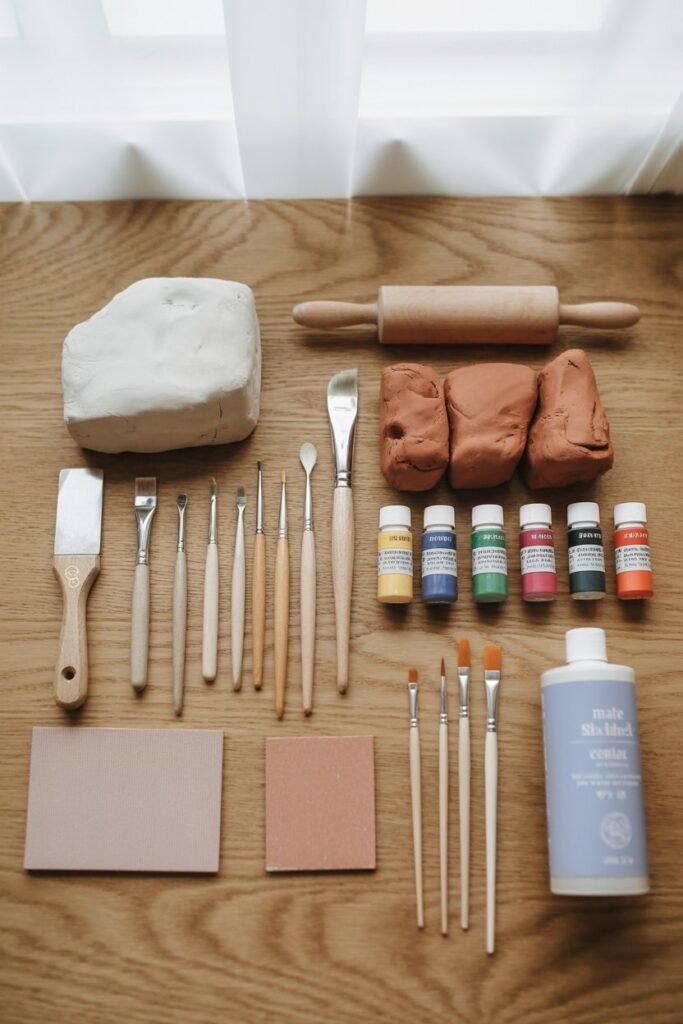
- Air-dry clay or polymer clay
- Acrylic paint (optional)
- Clay tools or household items
- Sandpaper for smoothing
- Clear sealant for finishing
BEGINNER TIPS
- Keep designs simple
- Focus on smooth finishing
- Use neutral colors for a premium look
- Let pieces dry fully before painting
- Always seal for durability
COMMON MISTAKES TO AVOID
- Over-decorating designs
- Using too many colors
- Not smoothing cracks before drying
- Skipping sealing step
FINAL THOUGHT IDEA
Small clay projects don’t need to look handmade or imperfect. With simple shapes and clean finishes, you can create pieces that look like they came straight from a boutique store.