
I didn’t start this camper remodel because it was trendy.
I started because I knew something was missing: a space that felt truly mine—not generic, not pretentious, just warm, lived-in, and soulful.
My camper worked, technically, but it didn’t feel like home. And when you’re spending real time in a small space, that difference matters more than you expect.
If you’re like me and you’ve stared at your tired camper walls thinking, “This should feel magical,” then you’re in the right place.
Not magazine-perfect magical—but the kind that feels calm in the morning, cozy at night, and grounding after a long day on the road.
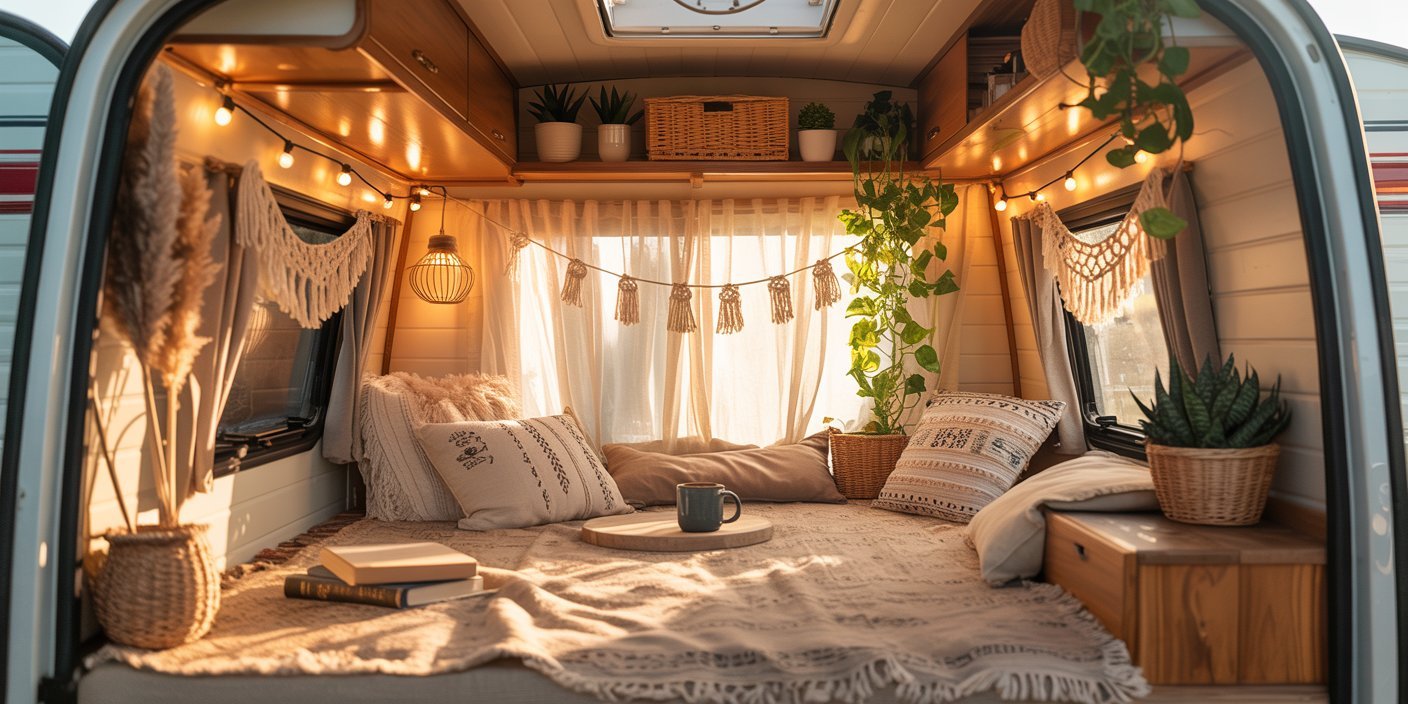
In this post, I’m sharing boho camper remodel ideas that focus on creating that feeling without ignoring reality.
Camper life has limits: tight layouts, limited storage, and budgets that don’t always allow for big renovations.
That’s why everything here is built around solutions that actually work in real, small spaces.
These ideas are:
- Practical, because function always comes first in a camper
- Stylish, without feeling forced or overdone
- Budget-friendly, using smart swaps and intentional choices
- Rooted in real experience, not just inspiration boards
These aren’t Pinterest dreams without instruction.
They’re ideas that helped transform an ordinary camper into a space that feels personal, relaxed, and thoughtfully designed—proof that you don’t need a massive budget or a full gut remodel to create a camper that finally feels like yours.
Disclaimer: This post contains affiliate links. If you make a purchase through these links, we may earn a small commission at no extra cost to you.
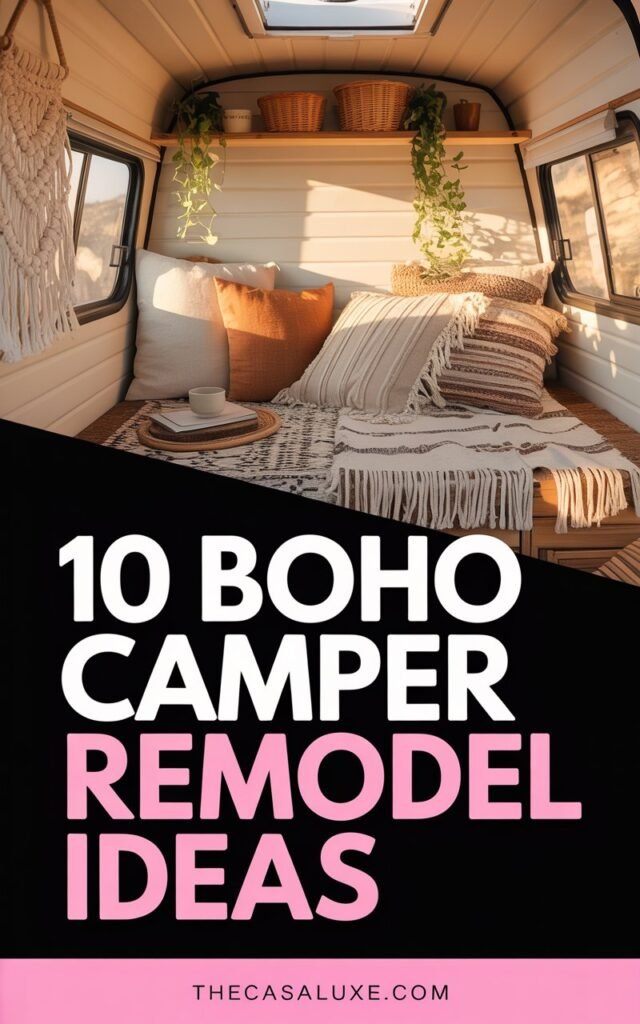
Amazon Shopping List: 10 Boho Camper Remodel Ideas
- Macrame Wall Hanging Decor
Adds texture and a cozy boho vibe to plain camper walls.
BUY NOW ON AMAZON - Woven Storage Baskets
Perfect for organizing small spaces while adding natural boho style.
BUY NOW ON AMAZON - Kilim or Patterned Rug
Brings warmth, color, and personality to camper floors.
BUY NOW ON AMAZON - String Fairy Lights
Creates a soft, cozy ambiance for a relaxed boho feel at night.
BUY NOW ON AMAZON - Macrame Plant Hangers
Adds greenery and life to your camper without taking up space.
BUY NOW ON AMAZON
What “Boho” Really Means in a Tiny Camper
Before we list ideas, let’s get clear about one thing: boho isn’t just patterns and macramé.
In fact, when boho is reduced to décor alone, it often feels cluttered—especially in a small camper.
At its core, boho decorating is a mindset. It’s about creating a space that feels relaxed, layered, and lived-in rather than styled for perfection.
In a camper, that philosophy becomes even more important, because you’re not just decorating—you’re designing a place you actually live in.
True boho style focuses on:
- Texture and layering, using fabrics and finishes that add depth without adding bulk
- Natural, tactile materials like wood, cotton, linen, jute, and wicker that soften hard camper surfaces
- A relaxed, eclectic vibe where nothing feels overly coordinated or forced
- Collecting items that feel meaningful, whether they’re thrifted, handmade, or tied to a memory
The goal isn’t to make everything match perfectly. In fact, over-matching often kills the boho feel.
What makes a space work is intentional imperfection—pieces that feel chosen, not staged, and a layout that allows the space to breathe.
How Small Spaces Change the Rules
Working in a camper is very different from decorating a house, and ignoring that reality is where most remodels go wrong.
In a tiny space, design choices have consequences—you feel them immediately.
In a camper:
- Every square inch matters, because unused or awkward space quickly becomes visual and physical clutter
- Function must come before beauty, or the space becomes frustrating to live in
- Storage has to be beautiful too, because there’s no hiding it behind doors or spare rooms
This means you can’t decorate just for looks. Every pillow, shelf, basket, and hook needs to earn its place.
If something doesn’t serve a purpose—whether functional or emotional—it usually ends up feeling heavy in a small space.
That’s why the best boho camper remodels don’t choose between practicality and style. They blend the two.
They use soft textures to balance hard surfaces, thoughtful storage to reduce chaos, and personal details to add warmth—creating a space that feels both efficient and soulful.
When boho is done right in a camper, it doesn’t overwhelm the space. It grounds it.
1. Start With a Neutral “Canvas”
The first mistakes I almost made was trying to add personality before creating calm.
In a camper, visual noise builds up fast, and once it does, no amount of pretty décor can fix it.
That’s why I started with a neutral base—not because neutrals are boring, but because they create breathing room.
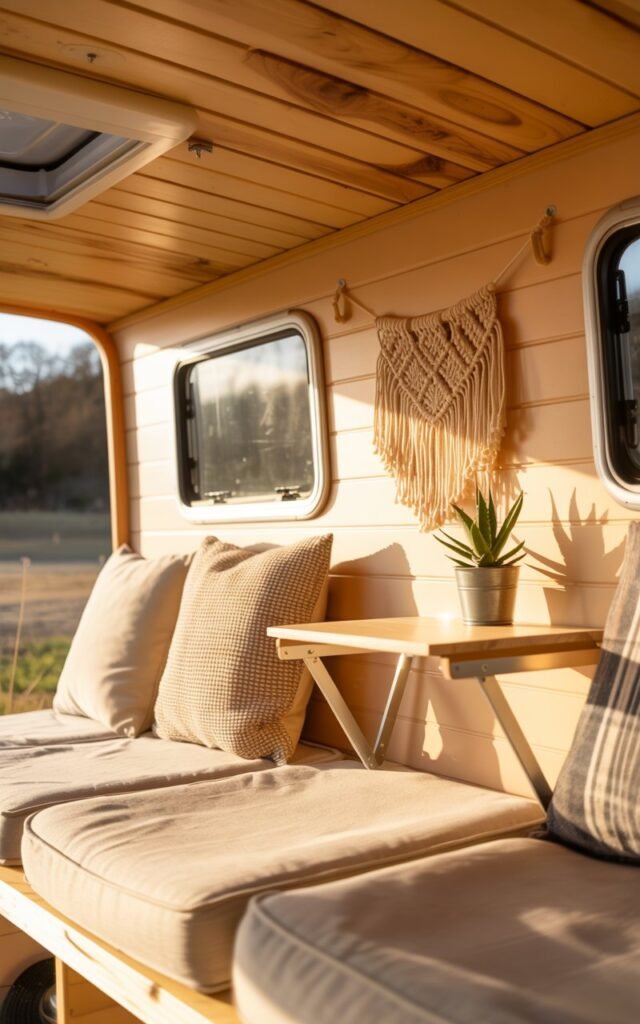
For me, this meant soft, warm whites and light beige tones on the walls and ceiling. I avoided anything stark or cool.
In a small camper, cool whites can feel flat and clinical, while warmer neutrals reflect light in a way that makes the space feel open and inviting.
The reason this step matters so much is simple: a neutral canvas allows everything else to shine.
Textures look richer. Wood tones feel warmer. Patterns feel intentional instead of chaotic.
What I learned the hard way:
If your base is too busy or too dark, you’ll constantly feel the urge to “fix” the space with more décor—and that’s how clutter starts.
How to apply this realistically:
- Use matte or satin finishes to avoid glare
- Keep the ceiling lighter than the walls to visually lift the space
- If paint isn’t an option, choose subtle peel-and-stick wallpaper with organic or linen-like patterns
This step alone changed how my camper felt. It didn’t look decorated yet—but it felt calm. And that calm became the foundation for everything that followed.
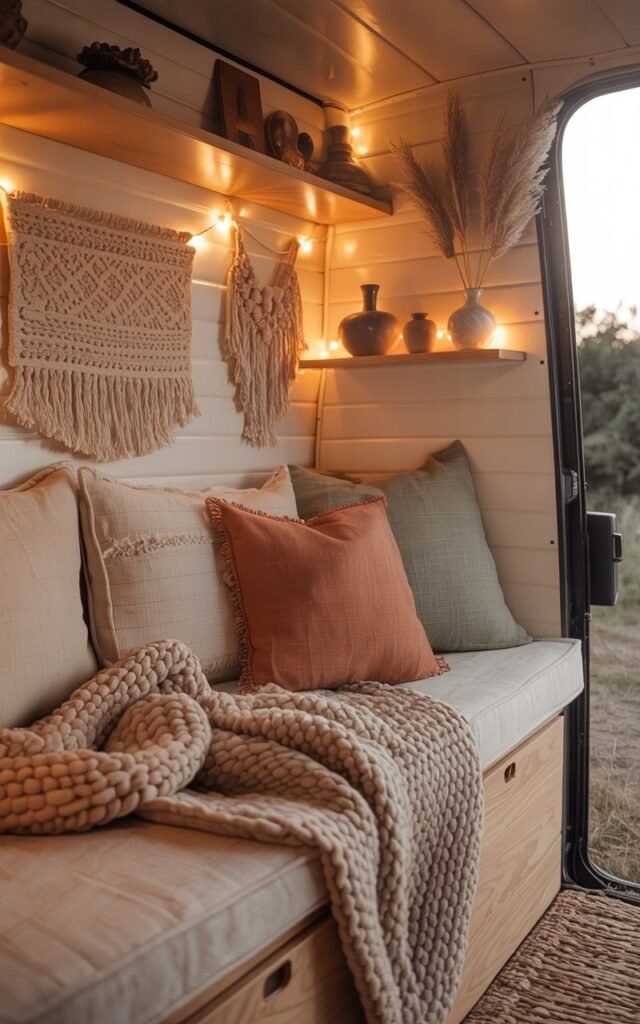
2. Use Texture Instead of Color Overload
Once the neutral base was in place, I resisted the urge to add color everywhere.
Early on, I realized that color isn’t what makes a boho space feel cozy—texture does.
In a camper, too much color can shrink the space visually. Texture, on the other hand, adds depth without heaviness.
It gives the space personality while keeping it grounded.
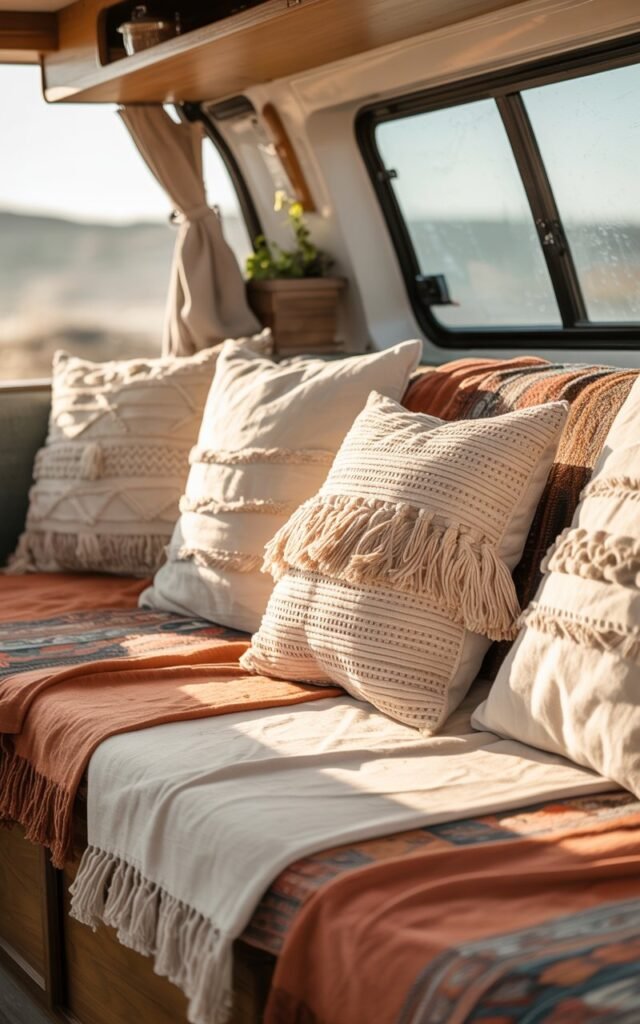
I focused on layering textures that felt soft, natural, and tactile:
- Woven rugs with subtle patterns
- Linen or cotton throw pillows
- Lightweight blankets with fringe or tassels
- Macramé accents used sparingly, not everywhere
What surprised me most was how much warmth texture added even when everything stayed in a neutral color family.
Beige on beige doesn’t feel boring when one is woven, one is smooth, and one is slightly distressed.
Why this works in a small camper:
Texture creates visual interest without competing for attention. Your eye moves through the space instead of stopping abruptly at bold colors or busy prints.
How I kept it from feeling cluttered:
- I limited patterned textiles to one or two areas
- I repeated similar textures in different spots for cohesion
- I avoided heavy fabrics that felt bulky or stiff
This approach made the camper feel layered and intentional—not crowded. It also made the space more comfortable to actually live in, not just look at.
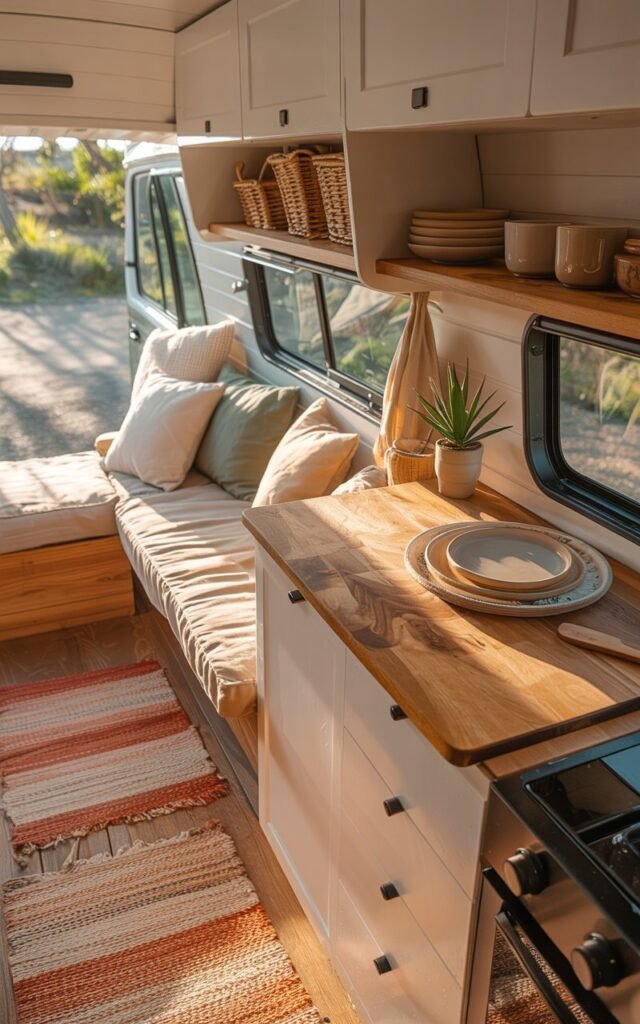
3. Bring in Natural Materials to Warm Up the Space

After setting the neutral base and layering texture, the camper still felt a little flat. Calm, yes—but not alive yet.
That’s when I realized what it needed was warmth, and nothing adds warmth to a small space like natural materials.
Campers are full of hard, manufactured surfaces—plastic trims, laminate panels, metal fixtures. Boho style works so well in campers because it softens all of that.
When I started swapping out synthetic-looking pieces for natural ones, the space instantly felt more grounded and connected to the outdoors.
I focused on materials that felt organic and slightly imperfect:
- Light wood for shelves and small accents
- Wicker and rattan for baskets and storage
- Jute or seagrass for rugs and bins
- Ceramic or clay pieces for small décor
What I loved most was how these materials didn’t demand attention.
They quietly added character without making the space feel busy.
Why natural materials matter in a camper:
They visually warm the space while also aging beautifully.
Scratches, wear, and patina don’t ruin them—they add to the story, which fits perfectly with the boho mindset.
How I used them practically:
- Wicker baskets replaced plastic bins for open storage
- Wooden trays doubled as décor and catch-alls
- Rattan containers hid everyday clutter while still looking intentional
This step made the camper feel less like a vehicle and more like a tiny home on wheels.
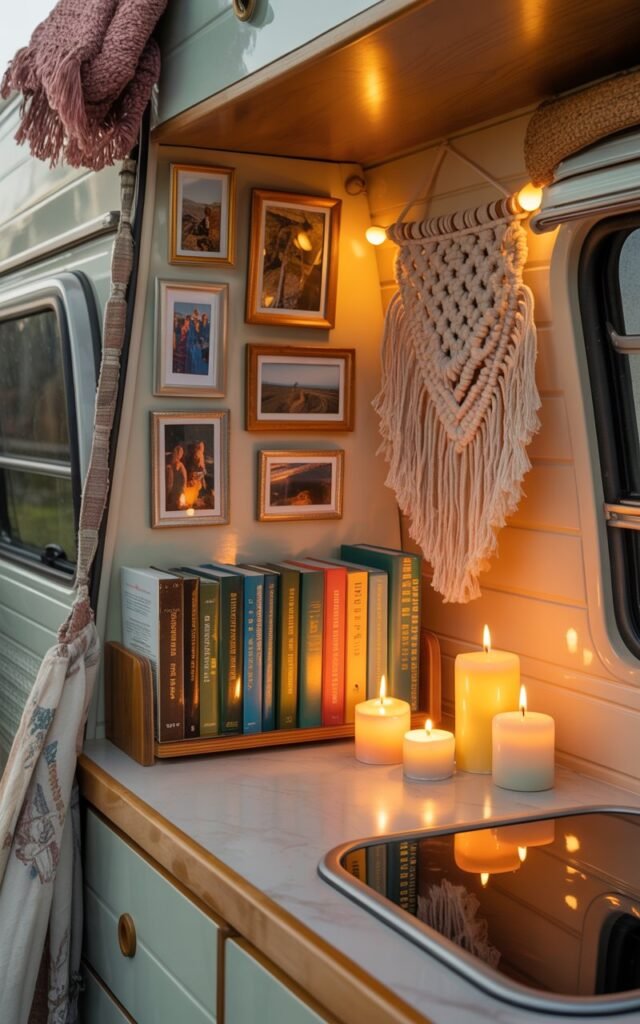
4. Layer Lighting Instead of Relying on One Harsh Source
Lighting was something I completely underestimated at first.
I assumed décor would do most of the work—but once the sun went down, the space felt cold and unfinished.
That’s when I learned that boho spaces are built with light just as much as décor.
Overhead camper lights are practical, but they’re rarely cozy.
Relying on a single light source makes the space feel flat and uninviting.
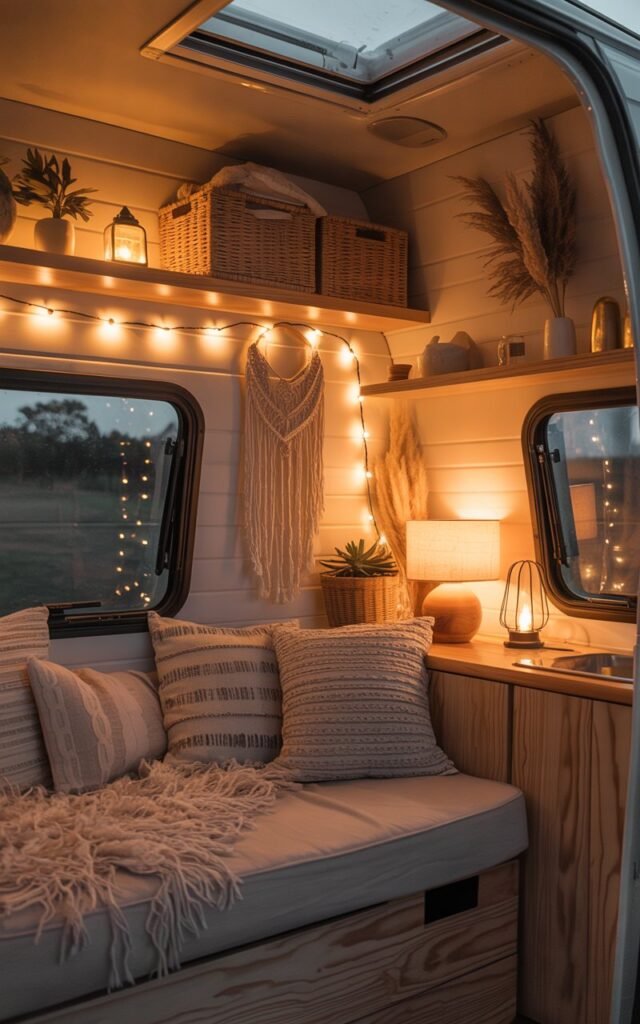
Boho style thrives on layers of warm, soft lighting that create depth and mood.
I started adding smaller, gentler light sources:
- Warm LED string lights tucked along shelves and windows
- Small table lamps with soft bulbs
- Battery-powered lanterns for flexibility
- Candles in safe, stable holders for evenings
The difference was immediate. Even the same space felt completely different depending on which lights were on.
Why layered lighting works in small spaces:
It creates zones. Instead of one bright room, you get pockets of warmth that make the camper feel larger and more intentional.
What I paid attention to:
- Choosing warm-toned bulbs instead of cool white
- Avoiding overly bright lights that caused glare
- Placing lights at different heights to add dimension
This wasn’t about making the camper dramatic—it was about making it comfortable. Once the lighting felt right, everything else finally made sense.
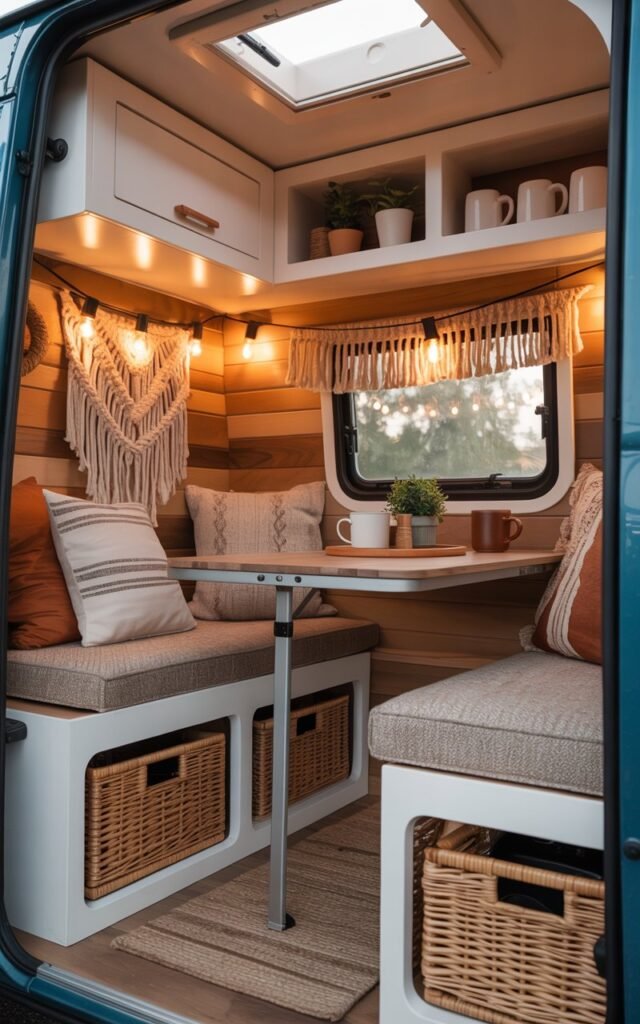
5. Choose Furniture and Storage That Earn Their Place
At some point in the remodel, I had to get honest with myself: in a camper, every item has to work a little harder.
Pretty furniture that doesn’t serve a purpose becomes frustrating fast, no matter how beautiful it looks.
Instead of adding more pieces, I focused on smart furniture and storage that blended into the space while still supporting the boho aesthetic.
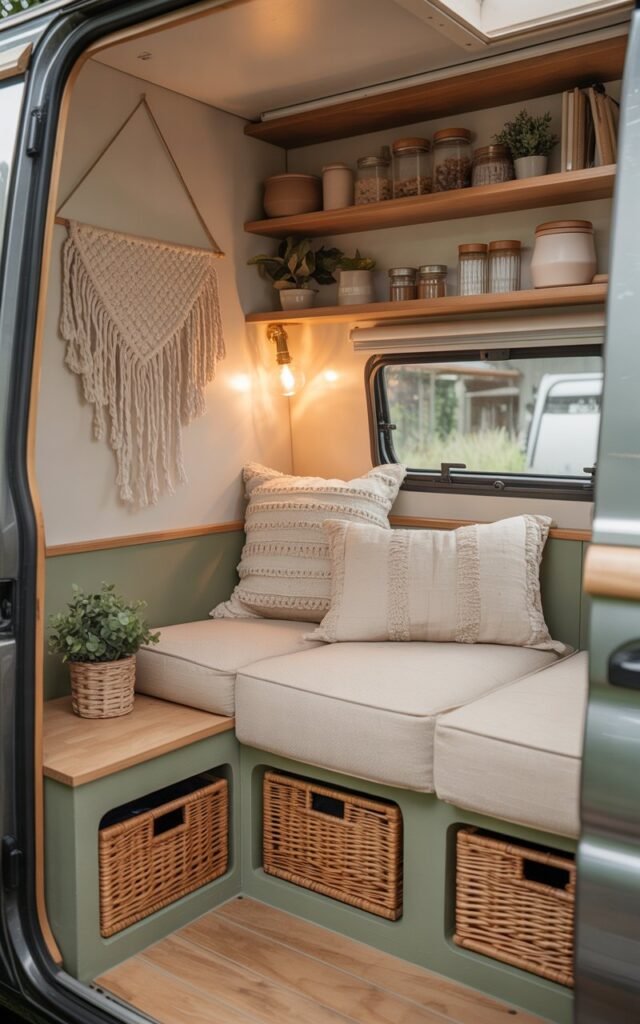
What worked best for me were pieces that felt soft and intentional rather than bulky:
- Storage ottomans that doubled as seating
- Benches with hidden compartments
- Open shelving styled with baskets instead of closed cabinets
- Under-seat storage that was easy to access daily
Why this matters in a boho camper:
Boho spaces rely on visual openness. Heavy furniture or too many closed cabinets can make a small camper feel boxed in.
Using open storage with natural textures keeps things accessible while still looking relaxed.
A lesson I learned:
If storage is hard to reach or inconvenient, clutter builds up on surfaces. The easier it is to put things away, the calmer the space stays.
I treated storage as part of the décor, not something to hide. Wicker baskets, fabric bins, and wooden crates added texture while keeping everyday items under control.
6. Add Plants to Bring Life Into the Camper
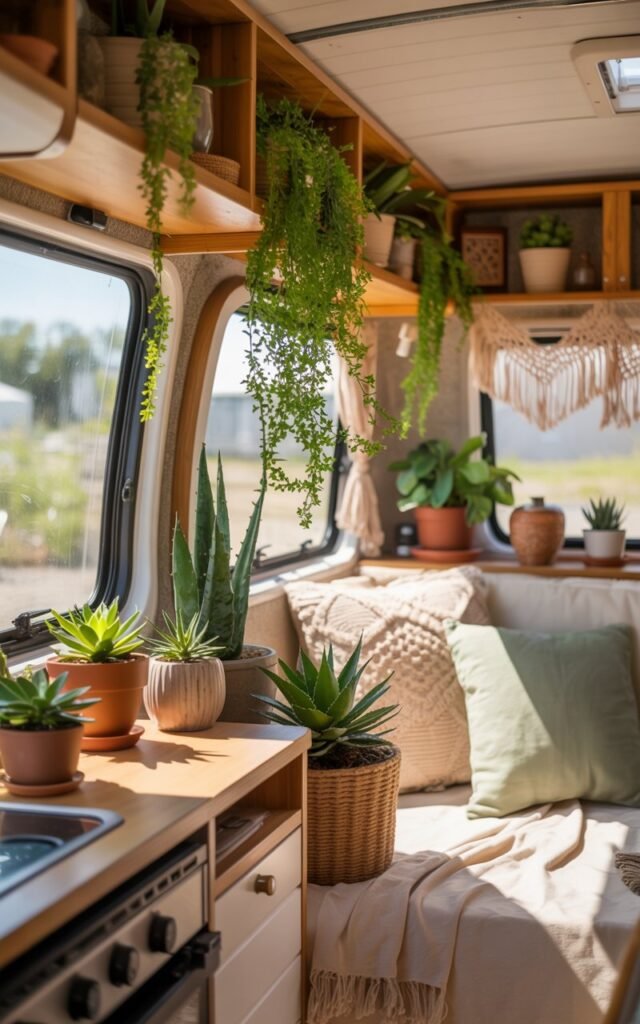
Nothing made my camper feel alive faster than adding greenery.
Even with neutral colors, texture, and wood, the space still needed something organic to break up all the beige and brown.
Plants did that instantly.
In a camper, plants aren’t just decorative—they’re grounding.
They soften corners, draw the eye upward, and make the space feel connected to nature, which fits perfectly with the boho lifestyle.
I kept things simple and realistic:
- Low-maintenance plants for spots near windows
- Hanging plants to save counter space
- Faux plants in areas that didn’t get enough light
What surprised me:
Even a single plant in the right spot made the camper feel calmer and more balanced.
How I placed them intentionally:
- Hanging one near a window to create height
- Using small plants on shelves to break up straight lines
- Avoiding too many plants in one area to prevent visual clutter
This step wasn’t about creating a jungle—it was about adding subtle life.
Plants made the camper feel less like a designed space and more like a lived-in one.
7. Create Personal Corners That Tell Your Story
At one point during the remodel, everything looked “nice”… but it still didn’t feel like me.
That’s when I realized something important: boho style isn’t built from store runs alone — it’s built from memory.
In a tiny camper, you don’t need many decorative items. You just need the right ones.
I started adding small, meaningful pieces instead of trendy fillers:
- A framed photo from a road trip that changed me
- A handmade textile I picked up at a local market
- A book stack that reflects what I actually read
- A small art print that feels calming, not loud
These aren’t expensive pieces. But they carry emotional weight.
Why this matters in a small space:
When your camper is tiny, every item becomes visible.
There’s no spare room to hide things that don’t resonate.
So instead of decorating for aesthetic alone, I chose pieces that had a story behind them.
And something shifted. The space stopped looking styled — and started feeling rooted.
A practical rule I followed:
If I couldn’t explain why I loved it, it didn’t stay.
Boho design thrives on collected energy — not clutter.
When your décor reflects your experiences, the camper feels less temporary and more like a portable extension of your life.
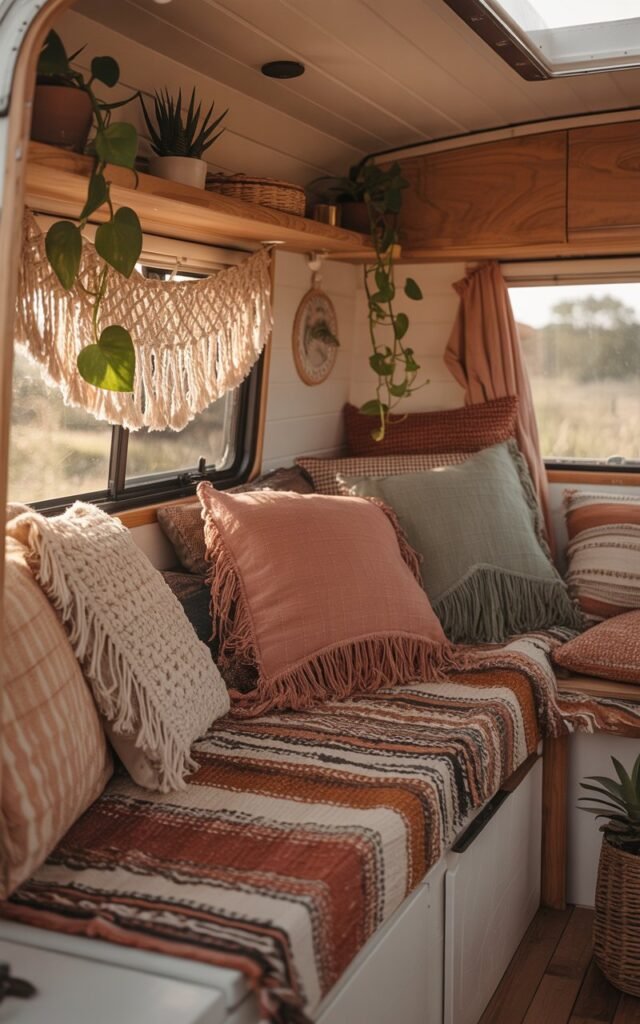
8. Choose Accent Colors With Discipline, Not Impulse
This is where I had to slow myself down.
It’s easy to get excited and start adding bold pillows, colorful throws, patterned rugs — all at once.
But in a camper, too much color can overwhelm the eye quickly.
Instead of scattering random colors everywhere, I chose two accent tones and repeated them subtly throughout the space.
For me, that looked like:
- Earthy terracotta in throw pillows and small ceramics
- Muted sage green in plants, artwork, and textiles
The repetition created rhythm. The space felt cohesive without feeling matched.
Why limiting color works in a camper:
Small spaces need visual continuity.
When colors repeat, the eye flows naturally. When colors clash, the space feels tighter and busier.
How I kept it balanced:
- I kept larger furniture neutral
- I used color mostly in soft furnishings
- I avoided loud patterns competing in the same area
Boho doesn’t mean chaotic. It means expressive — but grounded.
Once I treated color as an accent rather than a statement, everything felt intentional instead of experimental.
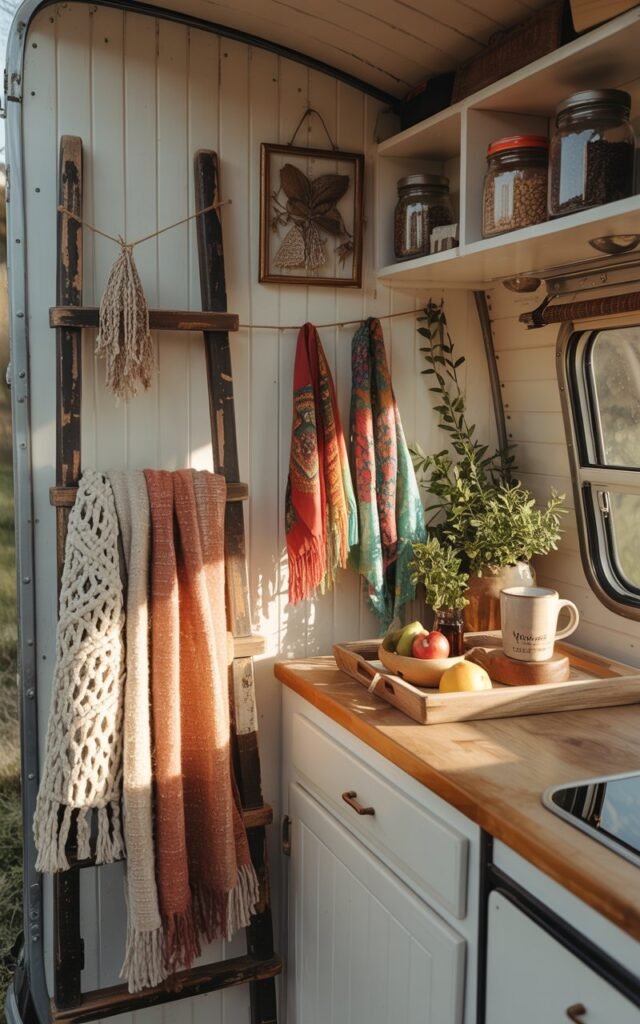
9. Upcycle and Repurpose Instead of Buying Everything New
One of the most rewarding parts of my boho camper remodel wasn’t shopping for new décor — it was learning to look at what I already had in a new way.
Tiny spaces like a camper can quickly feel cluttered if you buy too many new items, so upcycling became both a budget-friendly and design-savvy strategy.
I started by walking through the camper with fresh eyes.
I asked myself: “What can serve a new purpose?” That mindset alone changed everything.
Here’s what I ended up doing:
- Old ladder → Blanket and towel rack: A slightly worn ladder leaned against the wall added height and storage without taking up extra floor space.
- Vintage scarves → Wall art: Scarves with beautiful patterns became framed pieces, adding color and texture while keeping surfaces free.
- Cutting boards → Decorative trays: Wooden boards became practical décor for serving snacks or holding candles, combining function with warmth.
- Glass jars → Storage for small essentials: Instead of buying containers, I cleaned and repurposed jars for pens, utensils, or even little plants.
Why it works so well in a boho camper:
Boho style celebrates imperfection, history, and individuality. Items with a story — even small scratches or signs of wear — feel authentic. They make the space feel curated without trying too hard.
Pro tips I learned:
- Keep functionality first: Make sure every repurposed item serves a practical purpose
- Don’t overcrowd: Limit upcycled décor to avoid visual chaos
- Mix old with new: A single new accent piece can balance the vintage items
Upcycling doesn’t just save money — it makes your camper feel personally yours, with layers that tell a story.
10. Don’t Ignore Practical Finishes That Support Daily Life
Boho style can look relaxed and effortless, but living in a small camper exposes you to wear, humidity, and movement every day.
I quickly realized that without practical finishes, even the prettiest design would be frustrating to live in.
Here’s what I focused on:
- Washable fabrics: My pillows, throw blankets, and seat cushions are all machine-washable. Spills happen, and being able to clean them without stress keeps the space feeling fresh.
- Non-slip rugs: Small rugs are easy to layer in a camper, but movement is inevitable while driving. I added rubber or cork backing to ensure rugs stay in place.
- Sealed wood surfaces: For shelves, tables, and counters, I used a natural sealant. This protects from water, humidity, and scratches while keeping the wood’s warmth.
- Lightweight décor: Anything on counters or shelves is light enough not to shift or break while traveling, but still feels intentional.
Why this matters:
A camper is a moving space. Materials that can’t handle moisture, dirt, or movement make daily life stressful. Practical finishes let your design survive long-term without constant maintenance.
A lesson I learned:
Boho doesn’t mean sacrificing function for aesthetics.
When finishes are thoughtfully chosen, the space feels beautiful and livable.
You can have softness, warmth, and personality without trading comfort or usability.
The combination of upcycling and practical finishes transformed my camper from “cute but temporary” into a small home that’s both functional and soulful.
What Changed After My Remodel
Looking back, the biggest shift wasn’t a trendy pillow, a string of lights, or even the carefully chosen color accents.
The real transformation happened when I understood the principles behind the choices—not just the choices themselves.
I realized that every item, texture, and light source needed a purpose.
Spaces shouldn’t feel filled just to look busy—they should feel intentional, comfortable, and reflective of how you live.
That perspective completely changed how I approached decorating and organizing.
My camper didn’t suddenly gain square footage, but it gained presence and soul.
Each corner now serves a function, every item adds warmth or utility, and the overall feel is calm yet layered.
It finally feels like a space I belong in, not just a space I occupy.
The small tweaks I made—layered lighting, functional storage, carefully curated décor, and natural textures—created a sense of home that I never expected could fit in such a tiny space.
It was a powerful reminder that thoughtful design doesn’t require a lot of space; it requires intention.
Quick Starter Checklist (Print-Ready)
If you’re ready to take the first steps, here’s a starter checklist you can print, keep on your desk, and follow as you plan your remodel.
Each item reflects lessons I learned the hard way:
- Neutral wall base: Light, warm colors create breathing room and allow textures to shine.
- Layered light sources: Combine overhead lighting, string lights, table lamps, or lanterns for warmth and depth.
- Textured textiles: Mix rugs, throws, pillows, and macramé to add dimension without overwhelming the space.
- Natural materials: Wood, rattan, wicker, and jute add warmth and an organic feel that softens the camper’s hard surfaces.
- Functional storage: Every furniture piece should serve a dual purpose—organization and décor. Think ottomans, baskets, shelves, and hidden compartments.
- Two accent colors: Limit your palette for cohesion; repeat colors subtly in textiles, décor, and small accents.
- Personal décor: Choose items with meaning—photos, souvenirs, handmade items—to make the space feel truly yours.
- Durable finishes: Washable fabrics, non-slip rugs, and sealed wood protect your investment and make the camper livable long-term.
Tip: Print this checklist and tick off each step as you go. It’s a simple way to stay intentional, avoid clutter, and keep the space feeling like home at every stage of your remodel.